
Accessing and Modifying Data
Finding Data
Find
•The Find (or Search) function allows you to search the database for a list of records that match your search criteria. This function is only available for the Screen Element 1 & Screen Element 2 on each screen. (The Filter function is provided for use on remaining screen elements).
•Perform any of the following to use the find function:
•Click on the ‘Find’ button
•Select Edit > Find
•Press Ctrl +F
If the Find function is activated, the screen will appear as shown below:
All screens that have a find function open in “find mode” (ie. ready for you to type your search criteria) this is indicated by the “Ready to Search” message in the bottom left hand corner of the screen.
Entering Search Criteria
Once the find function is activated, the screen is in “Ready to Search” status and you may enter your search criteria in Screen Element 2. To perform a search with a partial field value, type in part of the field and a “%” sign. The percentage sign (%) is referred to as a “wild card”).
Examples of Wild Card use:
•“sm%” will find “smith” and “smythe” but not “sam”, “asm” or “asme”
•“%sm” will find “asm” but not “smith” or “sam”
•“%sm%” will find “asm”, “smith” and “asm” but not “sam”
Some fields in Screen Element 2 are only ever enabled when entering search criteria (ie. you can search on some fields even though you cannot normally edit the values for those fields)
Search Results
To perform a search, select the find function (press Ctrl+F or click on the Find button). The search will be initiated, the cursor will change to an hourglass and the status bar will be updated to “Searching…”.
Records matching the search criteria will be displayed in Screen Element 1.
Filter
Unlike the Find (or Search) function which searches the database for matching values, the Filter function is used to reduce a list of values already displayed on the screen to a smaller (subset) list.
Filter is therefore not usually availably in Screen Element 1. It is available where ever a list of records is displayed in other screen elements (ie. Screen Element 2, 3, etc.).
Follow these steps to use a filter:
•Right click on the list you wish to filter and select Filter
•Enter your filter criteria for each column (rows will only be displayed if they match your entry in every column).
o The percentage sign (%) acts as a wildcard character
(e.g. ABC% will return all value that begin with ABC)
o The tilde character (~) allows a range of values to be specified
(e.g. ‘ABC~CDE’ will return all values from ABC to CDE inclusive)
o If filter criteria is entered in more than one column, only rows will be displayed that match all of the criteria entered.
•Right click on the list and select Apply Filter
Note: the background color of a list changes to indicate that a filter is active.
To remove a filter:
Right click on the list and select Clear Filter
Refreshing Data
The Refresh Data function refreshes all data in the current window from the database. If someone else has saved changes to the records displayed, the Refresh Data function makes those changes available only on your screen.
Note: Unsaved changes are lost when data is refreshed. K212 HRP therefore prompts you for confirmation before performing the refresh, when unsaved changes (that you have entered on a record) exist.
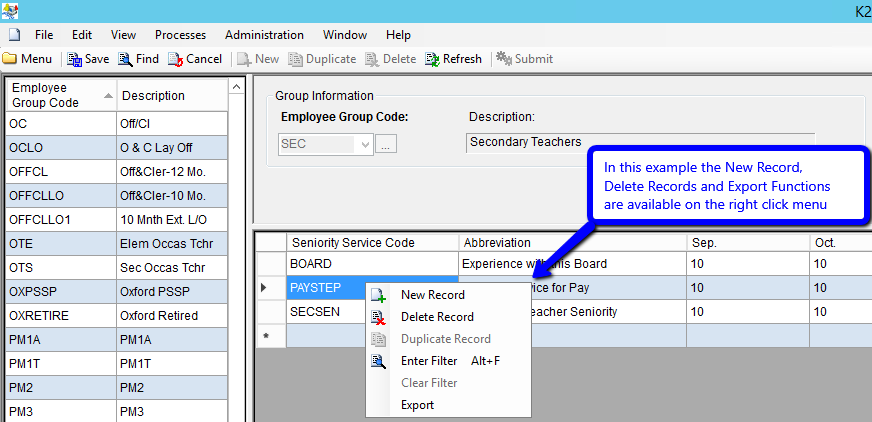
Toolbar buttons vs. Right Click Menu
The Find, New, Duplicate and Delete toolbar buttons and menu options always refer to the Screen Element 1 and Screen Element 2, no matter where the cursor is placed. For other screen elements use the right click menu when the mouse is held over the appropriate list of data.
Example:
Creating a New Record
The New Record function displays a new blank record and puts the message “Ready to create New Record” in the Status area. The cursor appears in the first editable field of the new blank record.
A new record is not actually added to the database, until you Save.
When inserting a new record in to an updatable data grid, a blank row is inserted (see example below).
.png)
Example of adding a new record in a list
Duplicating an Existing Record
The Duplicate Record function is only available on certain screens. When this function is used, details of the currently selected record are automatically copied and pasted into a new record. The status bar displays the message “Ready to create New Record” as you are now in a new record that has not been saved.
Note: The duplicated record will be the same as the original record, except where a field (such as a code) is uniquely identified. For fields which must be unique, a question mark will be appended to the end of the code. Also, for some screens, if the record contains a start and end date then the start date will be updated to contain the end date plus one day and the end date will be cleared.
As with the New Record function, the new (duplicate) record is not saved until you use the Save function.
Deleting an Existing Record
For screen element 1 & 2 select Delete (ctrl+d). You will be prompted for confirmation as shown below:
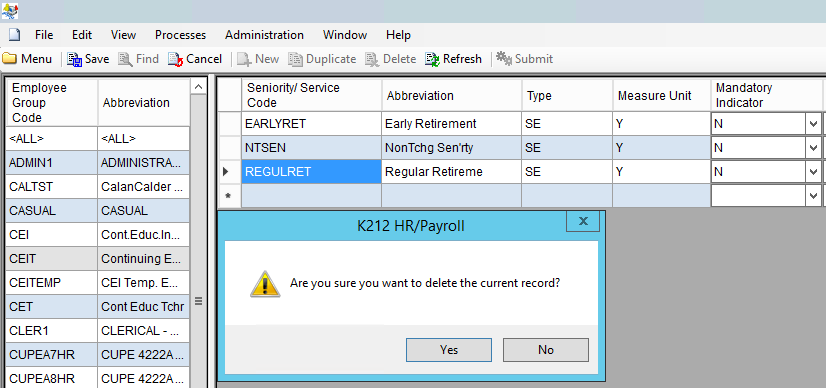
Note: The record is not actually deleted from the database, until you select the save function.
Cancelling Your Changes
Cancel removes any of your unsaved changes from the current window and reverts the data back to the values in the screen, prior to you making changes.
Cancel is only available when there are unsaved changes made to a record.
Saving Your Data
When you choose the Save function, a data validation check is performed on the current record and if there are no errors, all modified records in the current child window (whether currently visible or not) are saved to the database. All modified data in the child window is saved at the one time regardless of which field currently has focus.
If data validation errors are identified by K212 HRP, you will be informed of the error via a pop up message box and the save function will not be performed.
Note: The Save function is disabled if you have read only access.