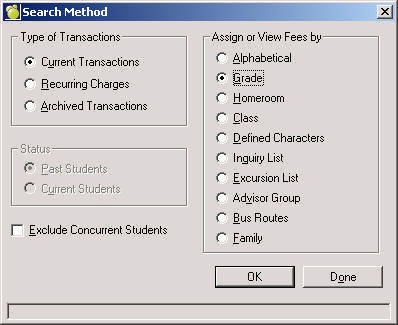
Choose Accounts, Assign Charges and Payments, and select a Type of Transaction and a method by which to Assign or View Fees.
Accounts, Assign Charges and Payments
Assign Charges and Payments - Current Transactions
Choose Accounts, Assign Charges and Payments, and select a Type of Transaction and a method by which to Assign or View Fees.
Select the method of assignment. If the selected method requires a Group, you will be prompted to define the group prior to assigning the fee. When assigning fees en masse, sometimes it is necessary to set up a Group. The rational for this is tied to behind-the-scene functionality. For the assignment methods that require a Group, there exists the additional functionality of bulk chargers, adjustments (edits) and payments. The following assignment orders require groups: Grade, Homeroom, Class, Defined Character, Advisor Group and Bus Routes. With respect to the assignment order of Family, single student families are included on both the eldest and youngest list.
Use the checkbox to exclude/include concurrent students in account transactions. When checkbox is checked, transactions done by group of students will exclude students who are concurrent.
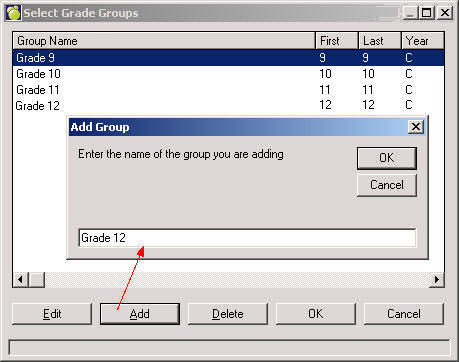
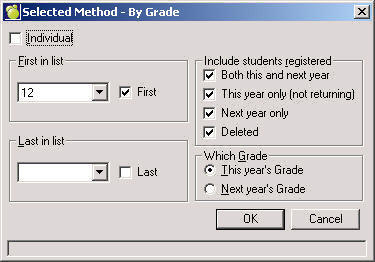
After entering the group name, a selection box will be presented to select students for the group. When you've finished selecting, click OK.
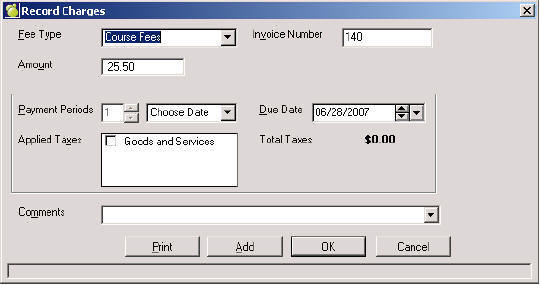
4. The program will then generate a Record Charges interface where you can create a charge or payment. You can click on Print (instead of Add/OK) in order to print the students' invoices/receipts. The Print button functions also as a record button and the transaction will be saved in the students' account records.