From Central Office choose File, Maintenance, Synchronize Enrolment Tables.
General Overview
The purpose of this function is to standardize the main enrolment tables throughout the division. Tables are first defined at the Central Office, then the values in the school tables are matched to appropriate values at the Central Office.
This is particularly important prior to migrating to Maplewood’s Enterprise database. This ensures that there will not be duplicate or unneeded records in the tables when the conversion to Enterprise is completed.
The synchronization process will perform the following tasks:
New Central Office table values (values that exist at the Central Office but not at the schools) are added to each of the individual schools’ tables.
Unused school-defined tables values may be deleted from the school’s table (this is optional).
School-defined table values are be converted to the value defined by the Central Office, based on a user-selected matching field (Ministry Code, Board Code or Description). All fields in the school table will be converted (if not used as match field): Ministry Code, Board Code, Description, OnSIS Code (Ontario clients only).
School tables will become identical to those in the Central Office. The exception to this is if the user opts to leave a certain school value unmatched with a Central Office value. In this case the school table will contain everything that exists in Central Office, plus its own unique records.
Student values will contain only table entries defined by the Central Office, unless a certain school value was left unmatched by the user.
School users will not be able to edit the existing values in the school tables. School users will only be able to add new values to those tables.
Before you begin:
There are two ways to use this program: Centralized and Packaged.
The Centralized method demands that your Central Office be set up in a Centralized environment. This means that the Central Office data is live, connected directly to the schools. This approach is recommended, if possible, because changes are made directly to the school data, and all the schools are changed at once.
The Packaged method means that the Central Office tables are packaged, and extracted at the school. Then, at each school, the tables are synchronized with the extracted Central Office tables. The packaged method is more time-consuming as there is duplicate work being done at each school. Because of the amount of manual work being done there is also more chance for human error. This method, however, is necessary for divisions and boards that are not able to use the centralized setup.
From Central Office, select File - Maintenance - Synchronize Enrolment Tables
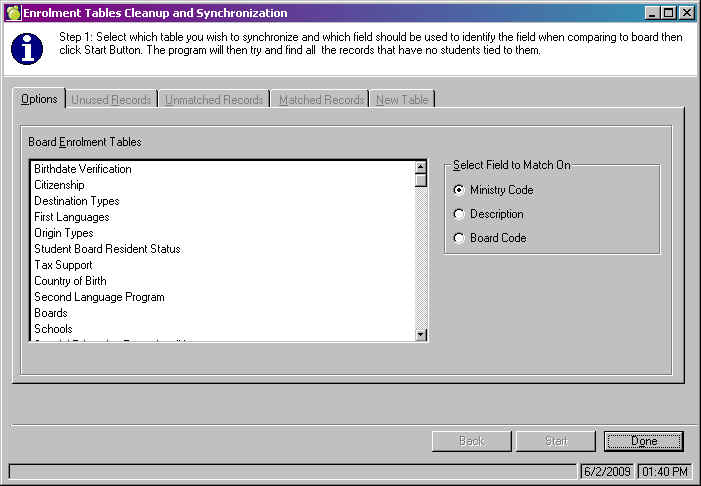
Step 1: Options tab
Select the table to synchronize. To be available for synchronization, a table must have at least one record in Central Office. For some tables, this simply means the Central Office user must open the menu item, to have the default table created (e.g., Incident Tracking). Please see the list of available tables in the Special Notes section.
Select the field on which to match:
Note: Values will match without leading zeros. For example, if a value at the Central Office has a Ministry Code of 04, school values with a Ministry Code of 4 will match to it.
Click Start. This will load all values in the selected table from all schools. This process may take quite a bit of time.
Step 2: Unused Records tab
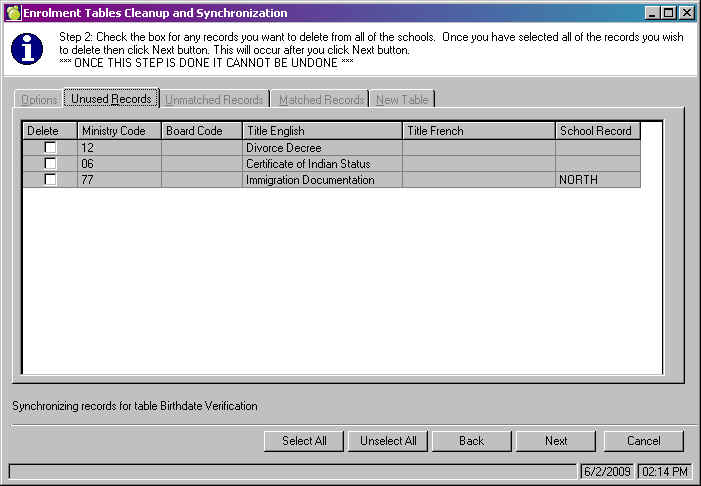
Items will show up in this tab for these reasons:
In the above example, "Immigration Documentation" would be the only one available for deletion because it only exists at the school 'North' and is not in use by any students there.
Select the checkbox in the Delete column for the records to delete from the schools.
Press Next. Selected values are deleted immediately.
NOTES:
Step 3: Unmatched Records tab
School-defined values that do not automatically match a Central Office value, based on the match field (Ministry Code, Board Code or Description) in Step 1, will appear on the Unmatched Records tab. To match these items, select one Central Office value from the left, and as many school values as you wish to match to that Central Office value, from the right. Use the <CTRL> and <Shift> keys to select multiple items from the right.
Once one item is selected from the left, and one or more items are selected from the right, press the Match button. The items from the right will move to the Matched Records tab. The items from the left remain, so that other items from the right may be matched to them if necessary.
Repeat as necessary to match as many values as possible.
The value in the Key column on the right-hand side represents the match field for that unmatched value.
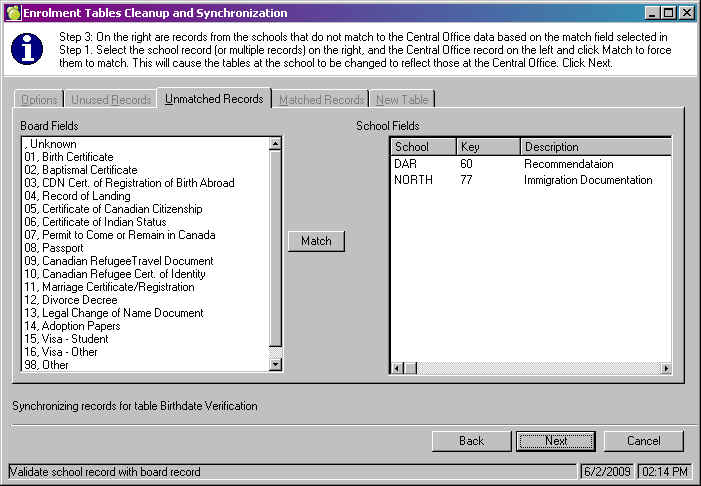
Click Next. The Matched Records tab will be brought up for verification. It is possible to press Back from the Matched Records table, to match more items from the Unmatched Records tab.
NOTES:
Step 4: Matched Records tab
From this tab, confirm the validity of the matches. If necessary, uncheck the Match checkbox to unmatch the values. Press the Back button to go back to the Unmatched Records tab, and match values up correctly.
In the School Fields area, Description column, the short name of the school combined with the Description.
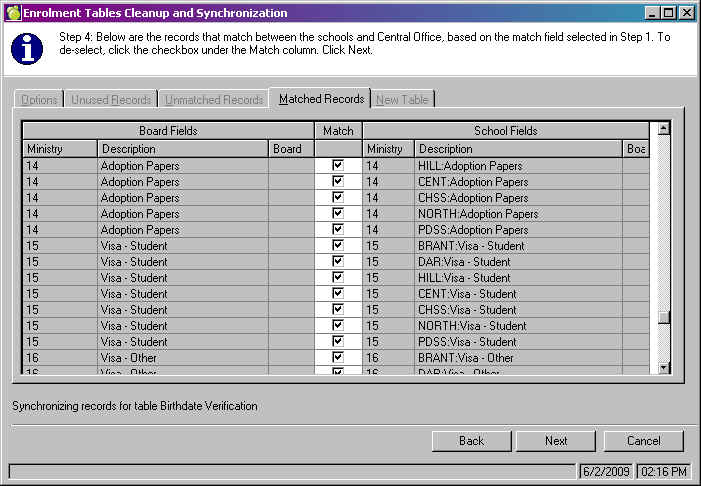
Click Next. The New Table tab will open, to display what the new table will look like after synchronization.
Step 5: New Table tab
This tab displays the table for review. Items that have Board in the Board/School column will exist in all instances of this table - all schools plus the Central Office. Items that have a school name in the Board/School column will exist only at that school. The "Num Assoc" column is the number of instances of that value, not the number of students using that value. It includes internal transfers and previous enrolment records if appropriate. As well, there are some tables that are in use in multiple areas of the student record. Please see the Special Notes section, Part D, for a complete list of these fields.
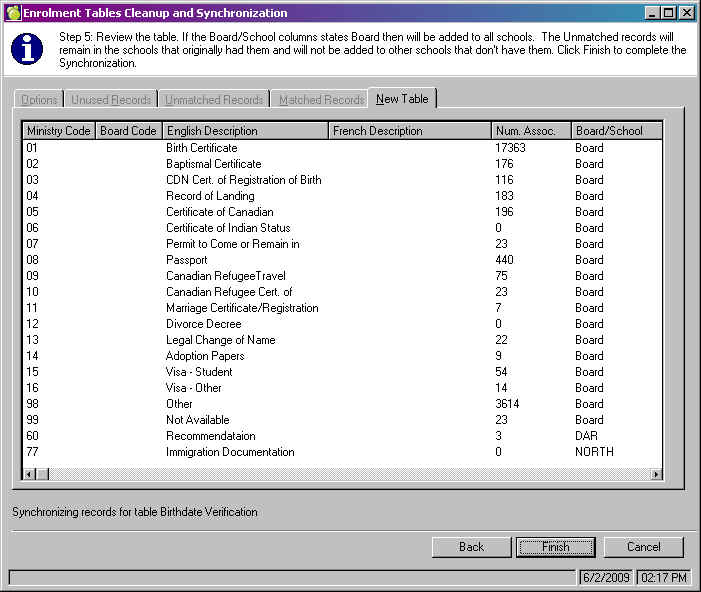
Click Finish to complete the synchronization process. This process may take quite a bit of time.
Please see the Special Notes section of this manual for information on the logs that are created during the synchronization.
Step 6: After the synchronization
Once the synchronization has been finished, the values in table that has been synchronized will only be editable by the Central Office. Users at the schools will no longer be able to edit the existing values, but will still be able to add new values.
The table can be synchronized again to incorporate the newly added values (to send new records from Central Office out to the schools).
Some tables, for example, the Country of Origin (Place of Birth/Origin), can be so large and unique in each school, that it is a very daunting task to synchronize the entire table at once. It is possible to divide the task of synchronizing a table into more manageable pieces. In the case of the Country of Origin table, divide the countries up alphabetically into two or three (or more) groups. Synchronize countries A-F in one sitting, leaving the rest unmatched. Once the synchronization for that group has been completed, the next group can be synchronized.
This also makes the tracking and logging of changes much easier to manage.
It is not possible to perform the synchronization process on a subset of schools. All schools in the division are synchronized every time.
Frequently, it is necessary for a new value to be added to a specific table. This program can also be used to push this new value from the Central Office, out to all schools. For example, if a new Infraction has been defined by your Ministry or the Division Office, add the value to the table at Central Office. Then use this program to synchronize Infractions. Do not match anything from the schools to this new value. The new value will be added to all schools' tables.