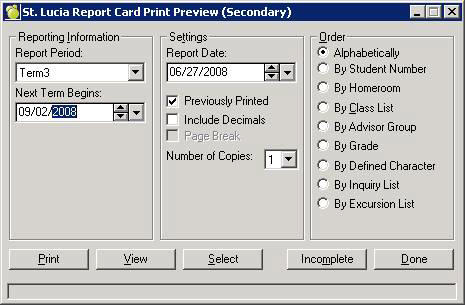
Student report cards may be printed using Marks, Print Report Cards, St. Lucia Report Cards (Secondary). The report cards are flexible where they can be printed up to 3 times per year, corresponding to the end of each term. Currently, schools print official report cards at the end of the year, which corresponds to the selection of Term 3 on this settings screen.
Term 3 has an additional field to specify the Next Term Begins date, while this date can be automatically determined for the other Report Periods.
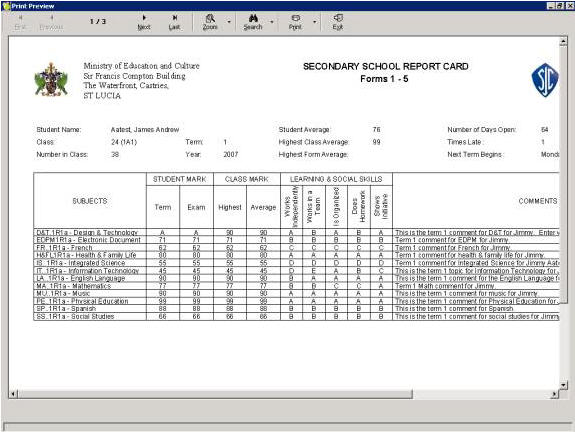
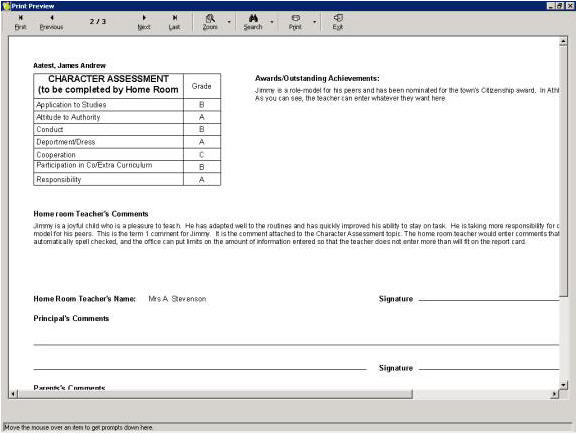
Use the Incomplete button to determine which students don’t have all their report card data entered. The Print or View buttons will print or preview the report cards. The report card preview pages will look like these:
Report Card Preparation Steps
1. Students must have classes (subjects) in their timetables, and a teacher is assigned to each class. The class should be properly set up in the classes file so that it is taught in the appropriate semesters and terms (Note: Schools may be set up with 3 terms and 1 semester, or 3 semesters and 1 term, or whatever combination is appropriate for the school. The terms in the timetable are different than the terms in the report card).
2. The school calendar should be set up with the start/end dates for each semester (or term).
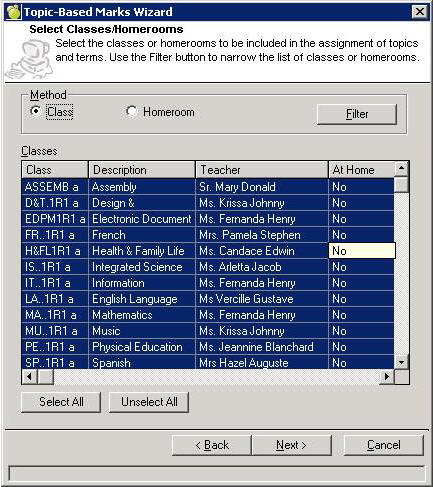
3. The report card wizard must be run using Marks, Topic-Based Marks, Wizard. At this point, the Wizard will need to have some user intervention to select which terms and topics are assigned to the classes and homerooms.
The Wizard will correlate (determine which teachers teach each class and build the database of the students in the class). You'll see a Welcome screen; click Next. The following screen will show all classes selected; click Next.
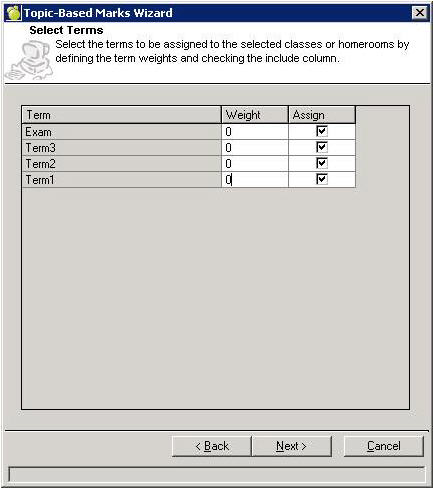
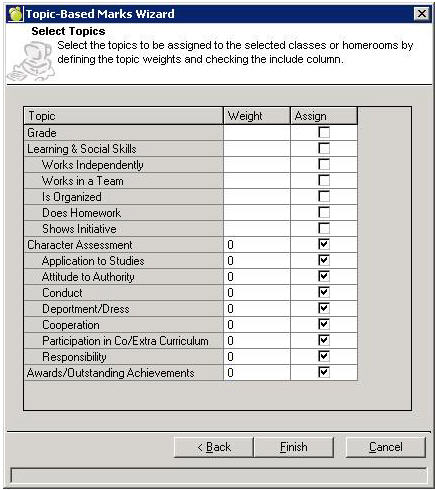
Enter a weight (zero since the software will not be calculating the final mark based on a calculation of the marks in each term). This will check the Assign box. Click Next. Note: If report cards are not going to be printed in Maplewood for terms 1 and 2, only Term 3 and Exam can be selected.
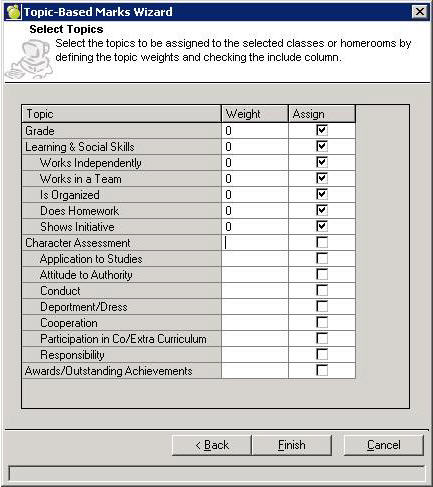
At the subsequent screen, enter zeros for the Grade and Learning and Social Skills topics and then click Finish as shown on the screen below:
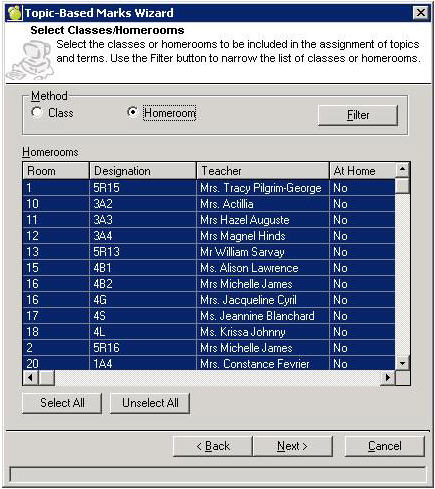
Once the wizard has completed its work, a message will appear asking if the wizard is needed again. It must be run again, this time selecting the Homeroom method as shown here:
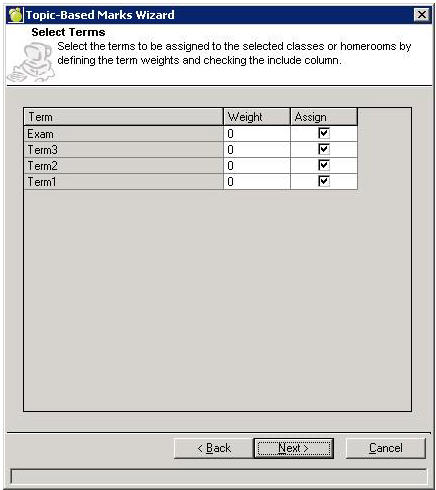
Enter the same term information again:
Select the character assessment and awards/outstanding achievement topics, and then click Finish.
4. The school’s logo and the Ministry of Education’s logo must be stored in the school’s Maplewood data folder in the pictures\logo. The files must be called school.jpg and district.jpg.
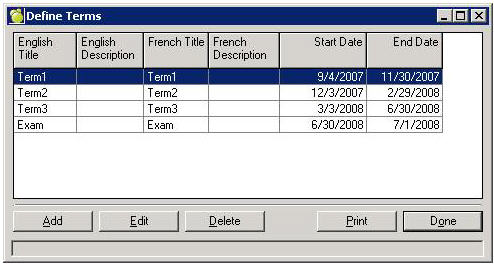
5. Use Marks, Topic-Based Marks, Define Terms to set up the term start and end dates which are used to determine the date ranges for the attendance totals and days open on the report card.
6. Teachers must enter the marks and comments for each student in their classes. Maplewood and Ministry officials will determine the best way based on the technology available to teachers. Hint: Right click a cell to enter the comment.
Special Note: The office can do many things to control the entry of the information in the report card. Each topic, in each term, can store both a mark and a comment. It is possible to prevent the comment from being entered in the wrong area or control the size of comment that can be entered. The mark can be limited to letters or numbers. Terms can be locked to prevent teachers from changing marks after the report cards have been issued (or accidently entering the next terms’ marks in the previous term).