Report Card Information (Things to know before running the Wizard)
Date of Report Cards
What are the dates of your report card terms?
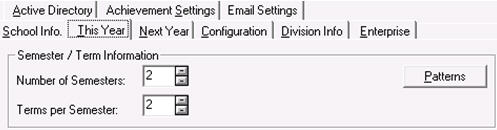
Report Cards Setup (Mixed/Sem)
If you are planning to print the Mixed or Semester report cards they will require 2 semesters with 2 terms per semester. (File, School Setup, School Information)
Logo
Either a school or division logo may be used. Please consult with your division as to which you are to use. Schools must then provide a logo that will be used on the first page of the report card.
A file called School.jpg must exist in the school’s Pictures/Logo folder in order for the school logo to be printed on the report card. The report card will fit the image into a 1.2 x 1.2 inch box on the report card, and will maintain the image’s proportions.
Principal Signature
If a file called PrincSig.jpg exists in the school’s Pictures/Logo folder, this image will print in the Principal Signature area on the report cards. The signature is 6.5cm wide by 1.5cm high. The image box extends below the signature line to account for letters such as j, p etc. The report card will fit the image into this 6.5cm by 1.5 cm box on the report card, and will maintain the image’s proportions
Maplewood connectEd Teacher Accounts
If your school has not yet used Maplewood connectEd, then this must be set up. Please contact your division and/or Maplewood to assist with this step.
Staff Records
Ensure your staff records are clean and use proper first names. Be sure not to have any entries that include job titles (i.e. Principal Smith). If a period is desired after salutation, be sure to have this information entered (i.e. Mrs. Smith).
Learning Behaviours Local Options
Will your school be using local option learning behaviours? A maximum of two may be used for each report card grouping: 1-6, 7-8 and 9-12.
Principal’s Comments
Will your school/principal be using the Principal’s Comment Box? Will it be a standard comment or a specific comment for each student or a combination? The box will grow/shrink/disappear as appropriate.
Local Option Course Codes
Will your school be offering Local Option Courses? If yes, how many and what locally developed Subject Categories are to be contained?
Multi-subject Grading Box
Will your school be using a multi-subject grade box to report on option courses? What subjects are to appear?
Reporting on Arts Education and Technology Education
Which option will your school be using for reporting on the Arts and Technology?
Multi-subject grading box (“Arts Education” at the top with subjects like Music, Drama, etc underneath)
Full implementation (Music or other subject area at the top with subject categories “Language and Performance Skills”, etc, underneath)
Graduation Requirements
Ensure that your Graduation Requirements are set up properly. This is required for the last page.
___________________________________________________________
The Manitoba Provincial Report Cards are set up to pull from a standard set of course codes for the grades 1-6 and 7-8 report cards. The list can be viewed under Chapter 9, Jurisdictional, Manitoba, Manitoba Provincial Report Cards, Standard Course Codes. This list is based on the Ministry’s list in the Subject Table Handbook.
Although this list of courses can be created manually, a menu option within the Courses file exits to create this list for schools thus reducing data-entry. From within the Courses file (File, School Set up, Courses), under the File menu option, select Create Standard Elementary Courses. The following warning will appear:
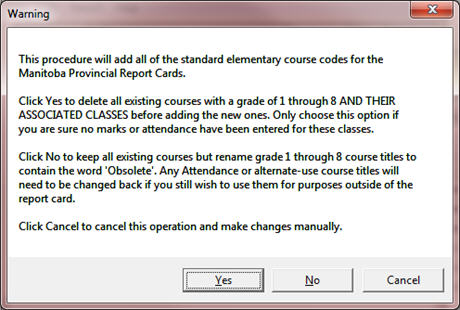
If a school has NOT started to set up the classes for the elementary panel, we recommend to answer YES to this option in order to have a completely standardized list. If timetabling has already been started on the grade 1-8 classes, be warned that this option will delete the classes along with the existing courses. It does this based on the grade of the course and excludes course codes beginning with L1, L2, etc (for the local option courses).
Please note, if Elementary classes have already been set up, we recommend that you answer No. By answering No to this option, any existing grade 1-8 courses will be renamed with “Obsolete” preceding their existing title and the standard list will be created. These can be renamed manually afterwards, but must match the Standard Course Codes in both Code and Title.
Once the standard list of courses has been created, please create classes as necessary, and add students to those classes. Only create classes for the subjects offered and wish to have print p on the report card.
Changes are logged in the school’s folder, under SchoolName\logs\modifycourses\MoCrs_YYYYMMDD_HHMM.log.
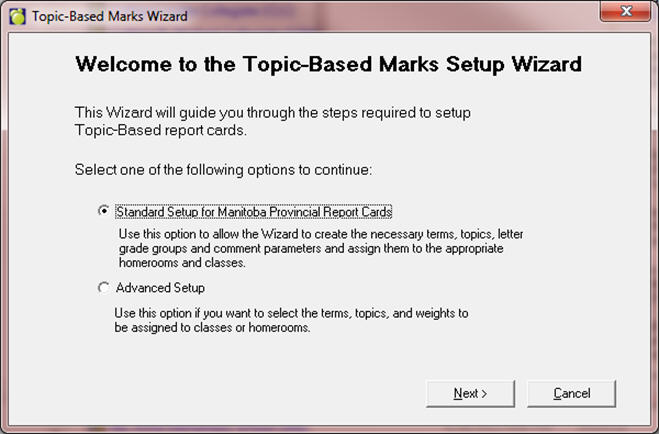
Choose Marks, Topic Based Marks, Wizard
Select the option “Standard Setup for Manitoba Provincial Report Cards” and click Next. NOTE: A correlate database will run at this point.
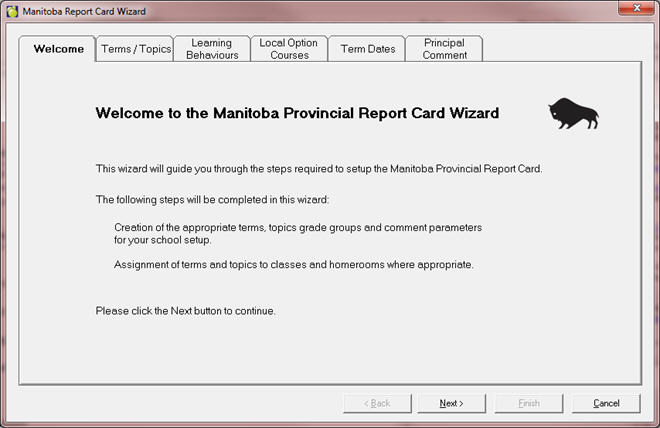
Read the message and click Next.
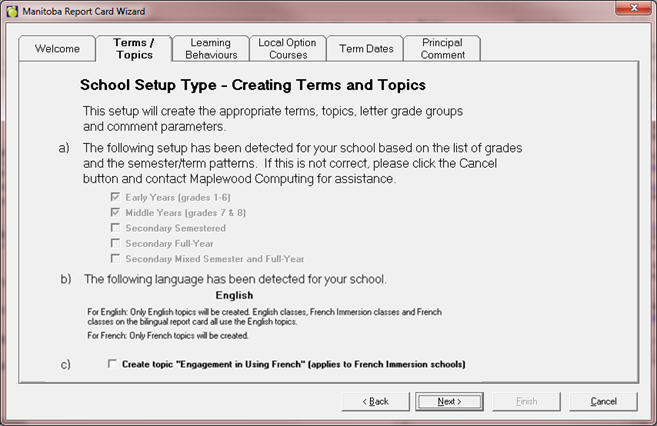
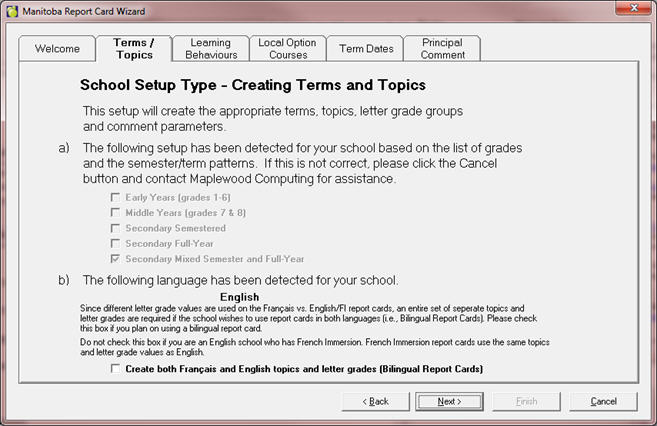
The wizard will automatically detect the level and schedule type of your school. It looks at the table of grades to determine Early/Middle/Secondary, and the schedule of the secondary classes to determine Semestered/Full Year/Mixed.
NOTE: If the check marks are incorrect, please close the Wizard and contact Maplewood’s support department.
The language is taken from the Language setting on the Configuration tab of the School Information screen.
If your school is French Immersion, please check the box to Create topic “Engagement in Using French”. If you leave it unchecked, and the wizard does not create this learning behaviour topic, you can always re-run the wizard to have them created, or create the topic manually. See list of terms and topics for details on what to add, or contact our support department.
Click Next when you are satisfied with the selections.
If your school is using local Learning Behaviours, you can define them separately for each grade level (grade levels will appear based on the setup of your school). If you are not sure about the local Learning Behaviours, you can leave this screen blank, or enter temporary titles and edit the titles later (either by re-running the wizard, or through Marks, Topic Based Marks, Define Topics).
Be sure to change the selection of Language from the drop down box to enter Learning Behaviours/Comportements liés à l’apprentissage in both languages, if desired.

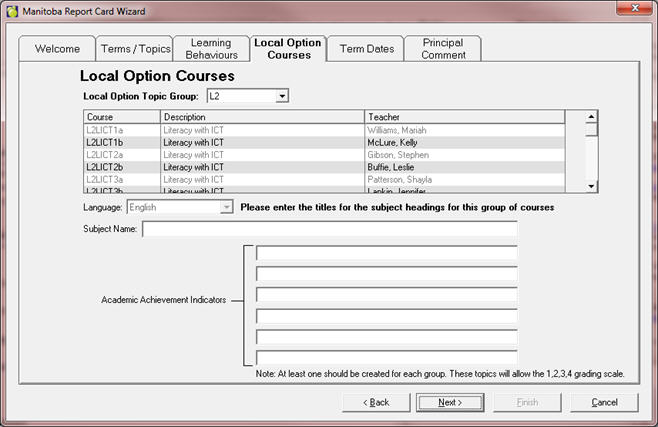
Any courses that are defined in your school with the first two characters being “L” plus a digit (L1, L2, L3, etc), will be treated as Local Option Courses by the Wizard.
You can define the topics for these courses in this screen.
Make sure to change the selection of Local Option Topic Group to make sure that you are creating topics for all of your local option courses.
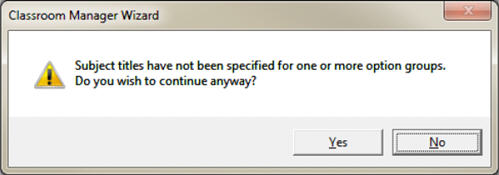
If you choose to skip this step for now, no topics will be created and you can run the Wizard again at a later time, to have them created. In this case you will receive this message. Click Yes:
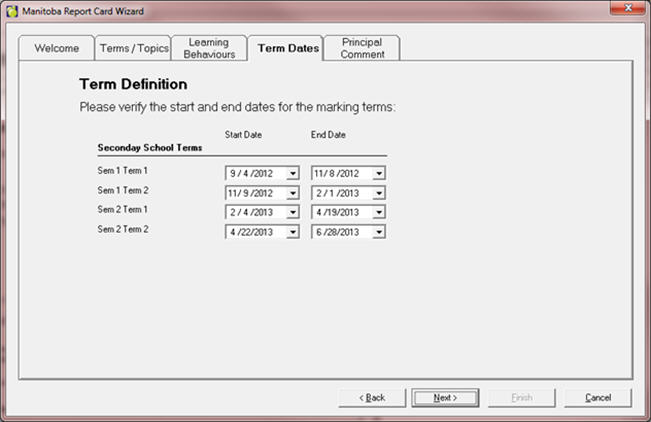
The appropriate evaluation terms will be created based on the school level in step 1. In this screen, please enter the start and end dates of your terms. As always, you can leave the defaults and click Next if you are unsure of the dates, you can either re-run the Wizard or edit the terms through Marks – Topic Based Marks – Define Terms to enter the dates at a later time.

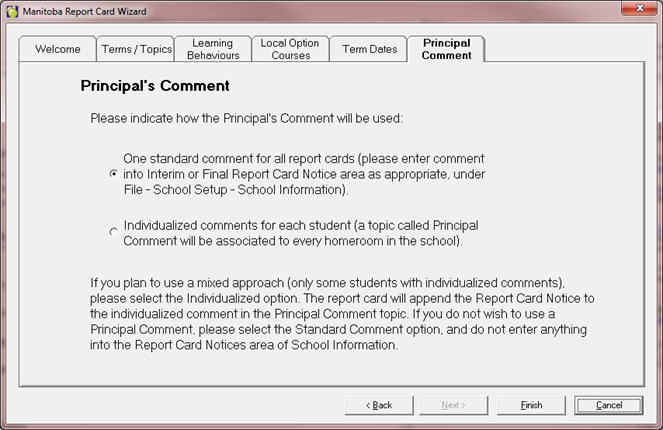
In this step, define whether the principal will be entering a unique comment for each student or one standard comment for all students in the school, a combination of the two methods, or no comment at all.
If some students will be getting a unique comment, select the Individualized option, and the principal can then enter comments only for the students that require one. Both the individual and the standard comment will appear on the report card for the students who have both.
If no Principal Comment is to show up on the report card at all, select the Standard option and then make sure nothing is entered into either the Interim or Final Report Card Notice in School Information. The entire Principal Comment section will not print at all if no Principal Comment is used.
Click Finish when you are satisfied with the selections.
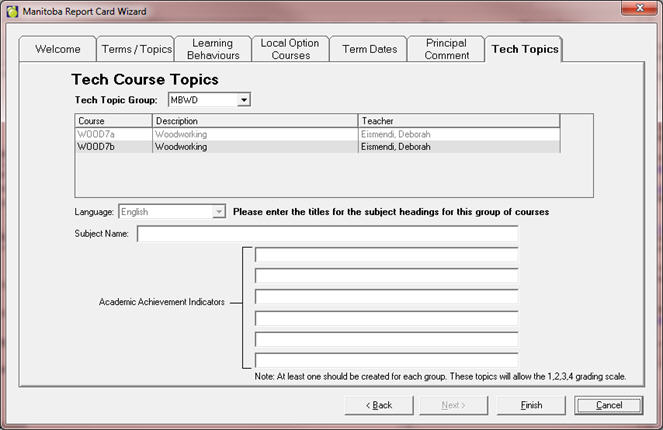
If technological education classes have been created (CONS, TEC, MANU, etc from the standard list of course codes), the last step will ask for the user to create topic groups for these courses. These are completely locally-defined, so enter the titles now, or click Finish to skip this step and enter them later (by rerunning the wizard).
If more than one tech class exists, please use the “Tech Topic Group” drop down box to toggle between the different subject areas.
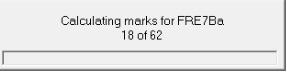
If this is the first time the wizard has been run, and the school is using cumulative markbooks, you will see this window. Depending the number of classes in the school it might take a while, but it is a necessary step for the cumulative markbooks to be initialized.
You will receive this message when the Wizard has finished:
Marks, Topic Based Marks, Wizard
Select the option “Standard Setup for Manitoba Provincial Report Cards” and click Next.
NOTE: A correlate database will run at this point.
Read the message and click Next.
The wizard will automatically detect the level and schedule type of your school. It looks at the table of grades to determine Early/Middle/Secondary, and the schedule of the secondary classes to determine Semestered/Full Year/Mixed.
NOTE: If the check marks are incorrect, please close the Wizard and contact Maplewood’s support department.
The language is taken from the Language setting on the Configuration tab of the School Information screen. If your school has classes taught in both languages, please check the “Create both French and English letter grades” box. If you uncheck it, and the wizard does not create the letter grade groups in both languages, you can always re-run the wizard to have them created.
Click Next when you are satisfied with the selections.
If your school is using local Learning Behaviours, you can define them. If you are not sure about the local Learning Behaviours, you can leave this screen blank, or enter temporary titles and edit the titles later (either by re-running the wizard, or through Marks – Topic Based Marks – Define Topics).
Be sure to change the selection of Language from the drop down box to enter Learning Behaviours/Comportements liés à l’apprentissage in both languages, if desired.

The appropriate evaluation terms will be created based on the school level in step 1. In this screen, please enter the start and end dates of your terms. As always, you can leave the defaults and click Next if you are unsure of the dates, you can either re-run the Wizard or edit the terms through Marks – Topic Based Marks – Define Terms to enter the dates at a later time.
In this step, define whether the principal will be entering a unique comment for each student or one standard comment for all students in the school, a combination of the two methods, or no comment at all.
If some students will be getting a unique comment, select the Individualized option, and the principal can then enter comments only for the students that require one. Both the individual and the standard comment will appear on the report card for the students who have both.
If no Principal Comment is to show up on the report card at all, select the Standard option and then make sure nothing is entered into either the Interim or Final Report Card Notice in School Information. The entire Principal Comment section will not print at all if no Principal Comment is used.
Click Finish when you are satisfied with the selections.
If this is the first time the wizard has been run, and the school is using cumulative markbooks, you will see this window. Depending the number of classes in the school it might take a while, but it is a necessary step for the cumulative markbooks to be initialized.
You will receive this message when the Wizard has finished.
Overview
The Manitoba Provincial Report Cards can be viewed and printed from both Maplewood for Windows (Marks, Print Report Cards, Report Builder for Report Cards) and Maplewood connectEd (Print Report Cards menu link).
The reports have been configured in such a way that users can print part of a report (individual pages) or the entire report. The parts of the report are the “Individual” reports and they include:
First Page
Courses pages (flexible in size due to comment boxes growing comment boxes and number of classes assigned)
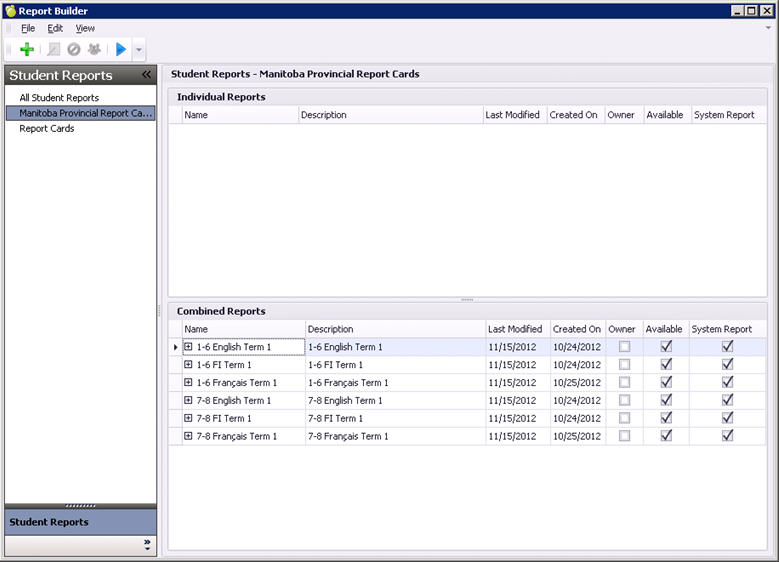
The whole reports are the “Combined” reports. They consist of multiple individual reports. For example, the 1 - 6 English Term 1 report card is made up of three individual reports: 1-6 First Page English, 1-6 Courses English Term 1 and 1- 6 Learning Behaviours English/FI Term 1.
When the user selects a specific Combined report, they have the ability to print an entire report. Additionally, the option exists to de-select individual reports before running. This is to allow users to print a certain page from a report card (for example in the case of needing to reprint just the first page for a group of students) without having to search through the list of individual reports to find the right one.
Marks, Print Report Cards, Report Builder for Report Cards
The division will have shared the appropriate report templates to the school. If they are not present, please contact your division. When printing from Report Builder for Report Cards, under Student Reports, select the Manitoba Provincial Report Card, then under the Combined Reports, select the desired combined report and click the blue arrow Run button (towards the top).
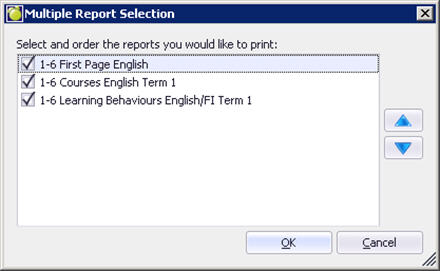
Select or deselect the individual reports as desired then click OK. If you wish to print all pages required of a report card, simply press OK. If you wish to just print a particular page, remove the undesired check boxes from the corresponding reports. The arrows to the right allow users to re-order the printing of the reports (when printing more than one page). It is not recommended that users press these buttons.
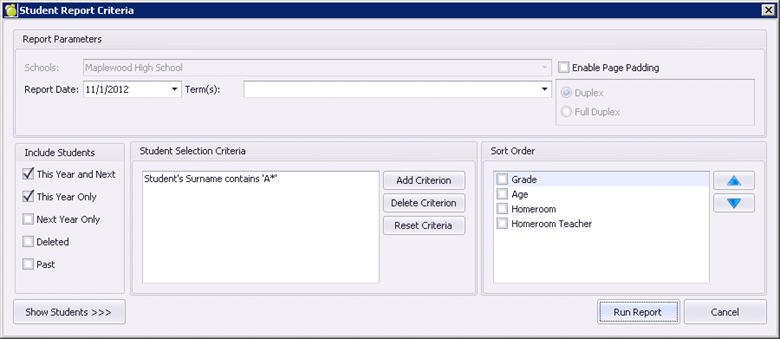
The Student Report Criteria screen will appear.
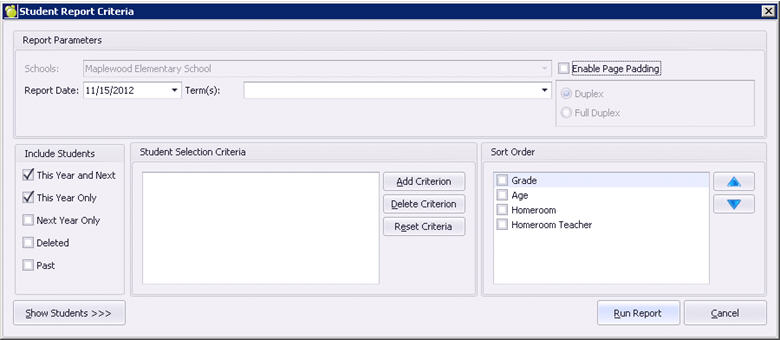
Enter the Report Date. This is the desired date that will appear as the Date Issued on the report cards. Page Padding can be used if printing double sided. Leave the radio button beside Duplex. Full Duplex could be used if printing to a booklet format, however that is not the design of the Manitoba Provincial Report Cards and should not be used. Check the students to include in the report based on their status under Include Students. To include all active/enrolled students, be sure to check This Year and Next and This Year Only.
It is recommended that schools narrow the Student Selection Criteria. If you click Run Report at this point, it will print the report cards for the entire student body. It is suggested that some criteria be entered in order to narrow the list down. Simply click the Add Criteria button to narrow your selected students. To print by grade, enter a grade (under Personal Details) or to print certain sections of the alphabet, enter a partial name (under Alphabetic, any part of the name can be used. Surname, Given, etc). Click OK. Click the Show Students button to see the list of students that is going to be printed. Always use the Show Students button to verify the students for whom the report is going to run.
Once you have narrowed down the list of students to print, you can sort the print order by selecting a field from the Sort Order list to the right. Once you are happy with your selection, click the Run Report button. When the reports are running a status bar will appear, this may take a moment.
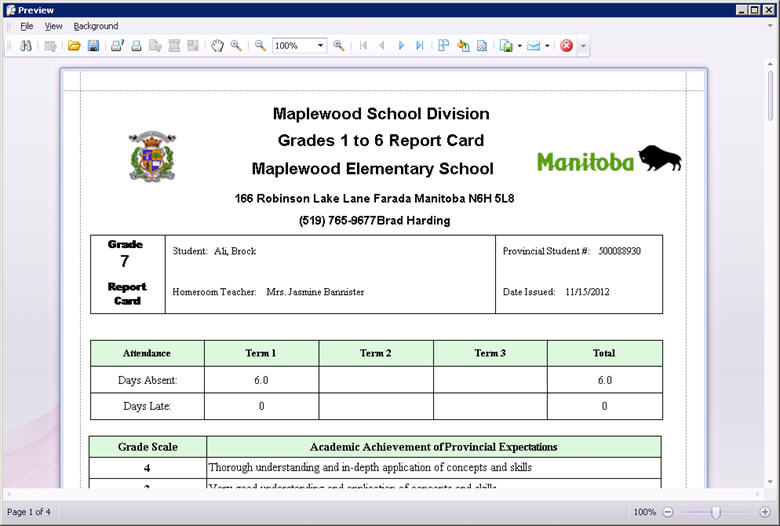
Once in the Preview screen report cards for the students whom you have selected may be printed (click the Print Icon or the Quick Print Icon) or Exported/Printed to PDF (click the Export Document icon and select desired format).
Achievement, Print Report Cards link
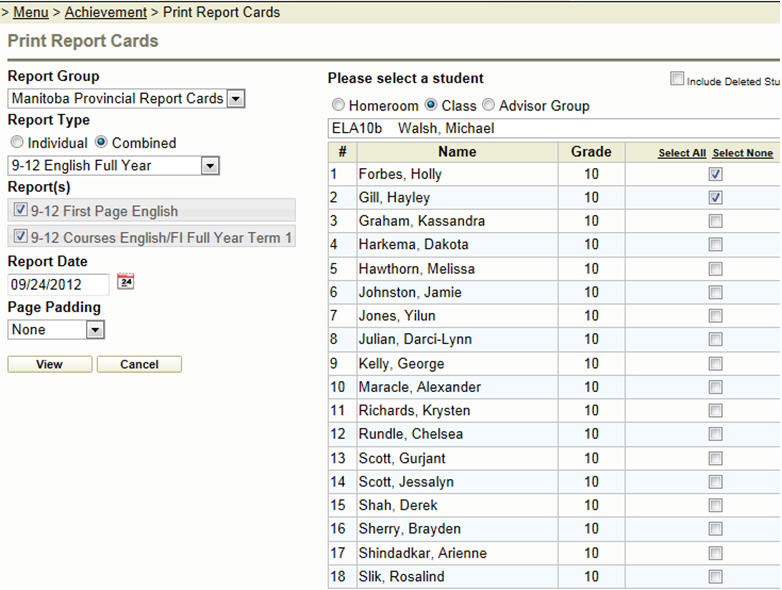
If Teachers do not have this link, please ensure that they have permission to Print Report Cards under the Achievement branch from within your Maplewood connectEd security settings. From Maplewood connectEd, the Print Report Cards screen appears similar:
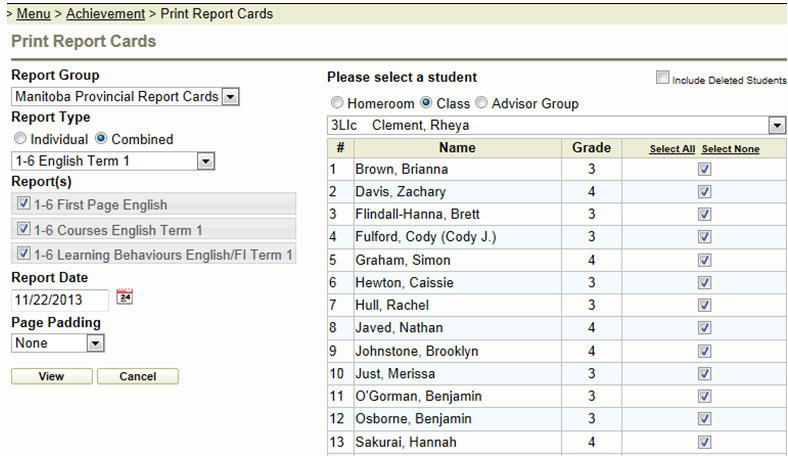
First, select the Manitoba Provincial Report Cards report group, then select the Combined report type. Select or deselect the individual reports as desired then click OK. If you wish to print all pages required of a report card, leave the check boxes. If you wish to just print a particular page, remove the undesired check boxes from the corresponding reports. Enter the Report Date. This is the desired date that will appear as the Date Issued on the report cards. Page Padding can be used if printing double sided, Select Duplex. Full Duplex could be used if printing to a booklet format, however that is not the design of the Manitoba Provincial Report Cards and should not be used.
To the right, select the student(s) to print by one of the three orders (generally Class). By default all students are selected, if this is not desired, check the students to include in the print. Press the View button.
Overview
The Manitoba Provincial Report Cards can be viewed and printed from both Maplewood for Windows (Marks, Print Report Cards, Report Builder for Report Cards) and Maplewood connectEd (Print Report Cards menu link).
The reports have been configured in such a way that users can print part of a report (individual pages) or the entire report. The parts of the report are the “Individual” reports and they include:
First Page
Courses pages (flexible in size due to comment boxes growing comment boxes and number of classes assigned)
Credit Summary page
The whole reports are the “Combined” reports. They consist of multiple individual reports. For example, the 9 - 12 English Semestered report card is made up of three individual reports: 9-12 First Page English, 9-12 Courses English/FI Semestered Term 1 and Credit Summary.
When the user selects a specific Combined report, they have the ability to print an entire report. Additionally, the option exists to de-select individual reports before running. This is to allow users to print a certain page from a report card (for example in the case of needing to reprint just the first page for a group of students) without having to search through the list of individual reports to find the right one.
Marks, Print Report Cards, Report Builder for Report Cards
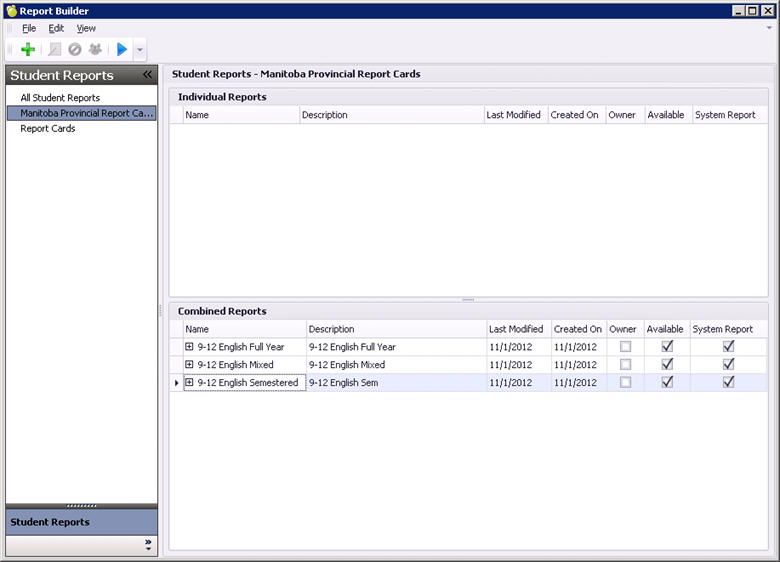
The division will have shared the appropriate report templates to the school. If they are not present, please contact your division. When printing from Report Builder for Report Cards, under Student Reports, select the Manitoba Provincial Report Card, then under the Combined Reports, select the desired combined report and click the blue arrow Run button (towards the top).
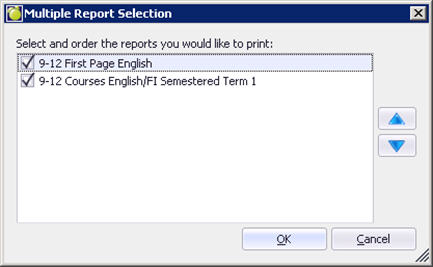
Select or deselect the individual reports as desired then click OK. If you wish to print all pages required of a report card, simply press OK. If you wish to just print a particular page, remove the undesired check boxes from the corresponding reports. The arrows to the right allow users to re-order the printing of the reports (when printing more than one page). It is not recommended that users press these buttons.
The Student Report Criteria screen will appear.
Enter the Report Date. This is the desired date that will appear as the Date Issued on the report cards. Page Padding can be used if printing double sided. Leave the radio button beside Duplex. Full Duplex could be used if printing to a booklet format, however that is not the design of the Manitoba Provincial Report Cards and should not be used. Check the students to include in the report based on their status under Include Students. To include all active/enrolled students, be sure to check This Year and Next and This Year Only.
It is recommended that schools narrow the Student Selection Criteria. If you click Run Report at this point, it will print the report cards for the entire student body. It is suggested that some criteria be entered in order to narrow the list down. Simply click the Add Criteria button to narrow your selected students. To print by grade, enter a grade (under Personal Details) or to print certain sections of the alphabet, enter a partial name (under Alphabetic, any part of the name can be used. Surname, Given, etc). Click OK. Click the Show Students button to see the list of students that is going to be printed. Always use the Show Students button to verify the students for whom the report is going to run.
Once you have narrowed down the list of students to print, you can sort the print order by selecting a field from the Sort Order list to the right. Once you are happy with your selection, click the Run Report button. When the reports are running a status bar will appear, this may take a moment.

Once in the Preview screen report cards for the students whom you have selected may be printed (click the Print Icon or the Quick Print Icon) or Exported/Printed to PDF (click the Export Document icon and select desired format).
If Teachers do not have this link, please ensure that they have permission to Print Report Cards under the Achievement branch from within your Maplewood connectEd security settings. From Maplewood connectEd, the Print Report Cards screen appears similar:
First, select the Manitoba Provincial Report Cards report group, then select the Combined report type. Select or deselect the individual reports as desired then click OK. If you wish to print all pages required of a report card, leave the check boxes. If you wish to just print a particular page, remove the undesired check boxes from the corresponding reports. Enter the Report Date. This is the desired date that will appear as the Date Issued on the report cards. Page Padding can be used if printing double sided, Select Duplex. Full Duplex could be used if printing to a booklet format, however that is not the design of the Manitoba Provincial Report Cards and should not be used.
To the right, select the student(s) to print by one of the three orders (generally Class). By default all students are selected, if this is not desired, check the students to include in the print. Press the View button.