Notes: Always change the name of the calculated field before binding it to anything on your report. Binding will be lost if the name is changed afterwards. The field may be bound to the report before or after giving the calculated field a value.
Giving the Calculated Field a Value – Expression or Script
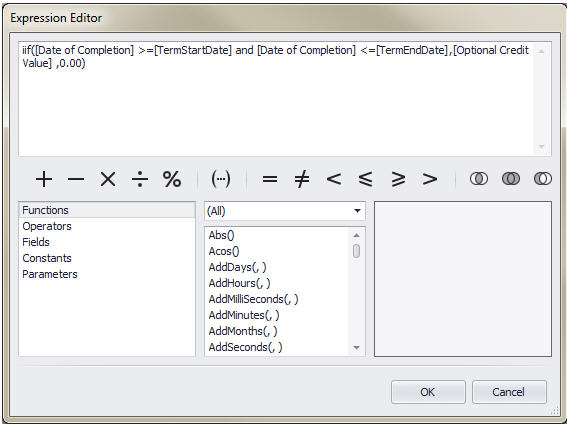
Two methods are available for giving your calculated field a value. Using the Expression is more straight-forward, but Scripts are sometimes necessary for things that are not available in the Expression Editor. Anything that is school-defined (see examples below) cannot be accessed through a simple expression and must be defined using a script.
The main advantage to having a calculated field use a script as opposed to attaching a script directly to an element (cell or label) is that the calculated field can be easily re-used throughout the report. It can even be used in other calculated fields.
Expression:
| Expression | Result | Usage |
| [Personal Details.Gender] == 'F' | Will print a checkmark in the box when student’s gender is female. You will need two checkboxes, one for male and one for female. | Create a blank checkbox on the report first, and change its text the format you want (“F”, “Female”, etc). Then, bind this field to the checkbox. |
| iif ([Personal Details.Gender] = 'F', 'her', 'his') | Field can be used within a sentence to print a gender-specific word. | Use this field in the middle of a sentence: “We are concerned about [GenderWord] attendance in this class.” |
Scripts:
Example: Term start and end dates based on the term code would be different for each school that is running the report, and therefore the calculated field would need a script. (Two calculated fields, and two scripts: one for StartDate and one for EndDate).
Private Sub TermEndDate_GetValue(ByVal sender As Object, ByVal e As DevExpress.XtraReports.UI.GetValueEventArgs)
Dim curStu As Student = DirectCast(GetCurrentRow(), Student)
If curStu IsNot Nothing Then
' Pass the desired term code into FindByTermCode
Dim t As Term = curStu.School.Terms.FindTermByTermCode("MBS21")
If t IsNot Nothing Then
' Term has StartDate or EndDate
e.Value = t.EndDate
End If
End If
End Sub
To use this calculated field with this script attached to display the end date on the report, bind the calculated field directly to a cell or label on the report.
To use this calculated field within another calculated field, refer to this new field within square brackets in the expression of the other calculated field, e.g.,