5. Printing Reports
![]() To print a report, click the print icon or choose Print Report from the File menu. Then choose the Print Order from the screen. The report can be printed for all students or selected students only. And the reports can be printed for males or females, or males and females.
To print a report, click the print icon or choose Print Report from the File menu. Then choose the Print Order from the screen. The report can be printed for all students or selected students only. And the reports can be printed for males or females, or males and females.
Setting Up the Printer
The Report Builder feature uses the default printer setup in Windows. If this printer’s settings need to be altered or if another printer is required, choose Printer Setup from the File menu. The printer selected will be used for all standard reports in the Report Builder feature, and is set as the default printer for Report Builder reports.
Always select the printer before formatting the report. The choice of fonts depends on the selected printer. The printer settings, which you can alter, include the paper size and source, and orientation (portrait or landscape).
Defining The Print Order
Choose File, Print Report. The Print Orders box will appear with these options: Alphabetically, Grade, Homeroom, Class, Defined Characters, Inquiry List, Sorted List, Excursion List, Individually Bus List.
Each print order a box has specific printing instructions. All Print Parameters boxes operate in basically the same manner.
Alphabetical
Click the First Student in School check box to start printing with the first alphabetically listed student. Otherwise, enter as many letters as you know for the student and the list will be displayed. Select a student from the list as a starting point for printing.
Click the Last Student in School check box to end printing for the last alphabetically listed student. Otherwise, enter as many letters as you know for the student and the list will be displayed. Select a student from the list as an ending point for printing.
Click the check boxes to indicate the status of students to be included.
Click the check boxes to print sibling information for the selected students. Choose from All Students, Youngest Sibling or Oldest Sibling.
Note: Only Children are included with any/all sibling lists.
Click the View button to access the Print Preview screen. Here you can see the way a report will look when it is printed. Print Preview is useful to check the report for errors. If this is the case, return to the main Report Builder screen and edit the appropriate boxes.
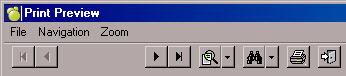
![]() To move through the pages for printing, use the First Page, Previous Page, Next Page and Last Page buttons.
To move through the pages for printing, use the First Page, Previous Page, Next Page and Last Page buttons.
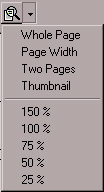 Click the Zoom button or click the drop-down menu to use the pre-sets.
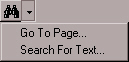 Click the Search icon and enter the text that you would like to locate, or click the drop-down menu to use the pre-sets.
![]() Click the Print icon to print the report.
Click the Print icon to print the report.
![]() Click the Close icon to close the print preview screen.
Click the Close icon to close the print preview screen.