Create a PDF file for each school rather than previewing warnings
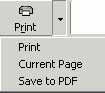
When creating the batch files for multiple schools in Central Office, any potential data issues that may require attention are automatically presented in a print preview screen. Each school will be identified at the top of each page, and each school will start a new page. These pages may be printed and then distributed to the schools for attention, or you may save the entire report in a single PDF file using the Save to PDF option (as shown below, click the arrow beside the Print button to see it).
If individual reports, in PDF format, are required for each school, check the option "Create a PDF file for each school rather than previewing warnings".
When this option is selected, the warnings will not appear in the print preview screen. Individual PDF files will be created for each school in the Central Office data folder under the Export\OnSIS\Elem or Sec folder. The file names will have the PDF extension, and will have the school’s number in the file name (e.g. E1_123456_ClsLst_20060118_1135.PDF where 123456 is the school number and 20060118 represents the date as yyyymmdd and 1135 represents the time as hhmm).
To create a batch file, first determine whether an extract is required. Extracts are not required for the October 2005 submission period, so the “Extract not required” option should be checked off. This will then enable the different files to be selected, one at a time. If an extract is required (e.g. March 2006), then uncheck “Extract not required” and then use the Browse button to find the Extract, as explained in March Submission.
Assuming an extract is not required, follow these steps to create the batch file:
OnSIS files created by individual schools will be saved in the Maplewood folder under EXPORT\ONSIS. OnSIS files created by Central Office will be saved in the central office's Maplewood folder under EXPORT\ONSIS\ELEM or SEC. The defaulted filename will follow this naming convention:
E#_mident#_filedescription_Date_Time.xml (elementary files)
S#_mident#_filedescription_Date_Time.xml (secondary files)
E# or S# represents the number of the file in the list of possible files for elementary (E) or secondary (S). E.g. E1, E2, E3..., S1, S2, S3...
The mident# is the Ministry Identification number of the school (if created by the school), or the number of the board (if created by Central Office).
The file description is a short description describing the type of file (e.g. ClsLst for Class List).
Date is in yyyymmdd format and Time is in hhmm format.
For example, if Central Office created the class list file for all the elementary schools, the file would be:
EXPORT\ONSIS\ELEM\E1_B12345_ClsLst_20060123_0945
If viewing the batch file (step 8 above), the file will appear something like this:
