The process to enter a new student queries the entire board to determine if the record already exists. The search engine uses the student name, gender and birthdate to find matching records. Records that match the criteria are displayed and the user has the option to select one of the records or enter the student as a new student. If the record exists at another school the student is linked to the existing record and shares the same information including contacts, emergency details, transcripts, special education, and common enrolment fields such as OEN.
The student number automatically generated for a new student will be saved as both their School Student Number and as their GNID. Once assigned, the GNID/Student Number can only be modified through Central Office on the Enrolment tab. Schools do not have the ability to change this value.
The Nunavut Jurisdiction is slightly different, please see below for complete instructions.
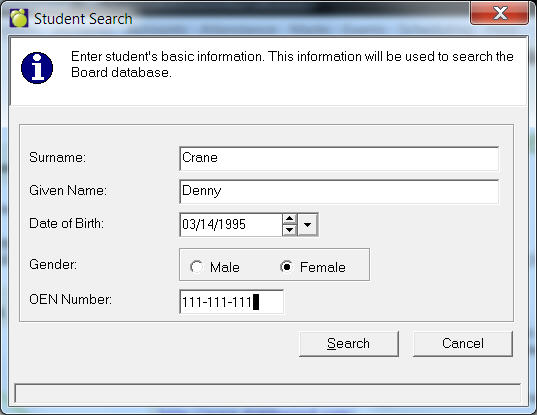
Choose Students, Add New Students from the home screen. This Add New Student box will appear:
Enter the Student Surname, Given Name and Date of Birth. Click Search.
Upon searching the database, possible matches at other schools for this
student will be found, or a message will appear informing the user that
no match was found.
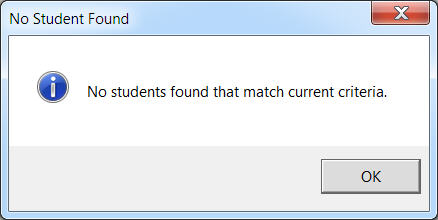
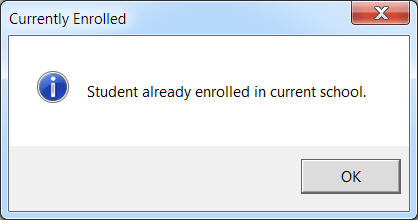
No Match Found
If no match was found on the information entered, the following message will be displayed. Click OK to continue to the next screen.
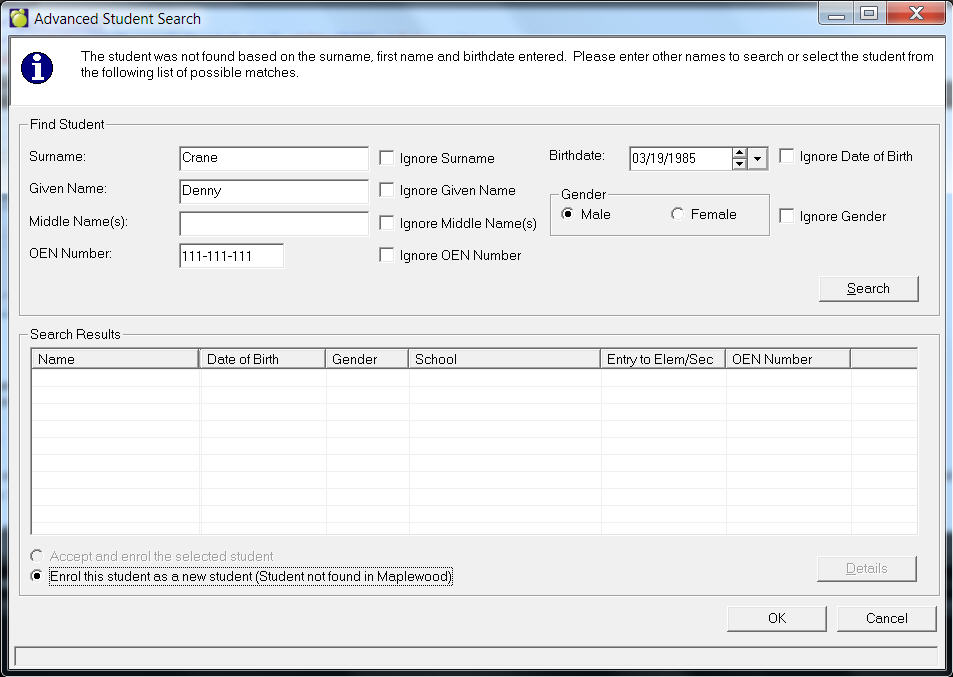
The Advanced Student Search form will be displayed. May expand the search
by opting to ignore Name, Birthdate or Gender to find additional potentially
matching students. or you can choose the option to “Enrol the student
as a new student (Student not found in Maplewood) and click OK.
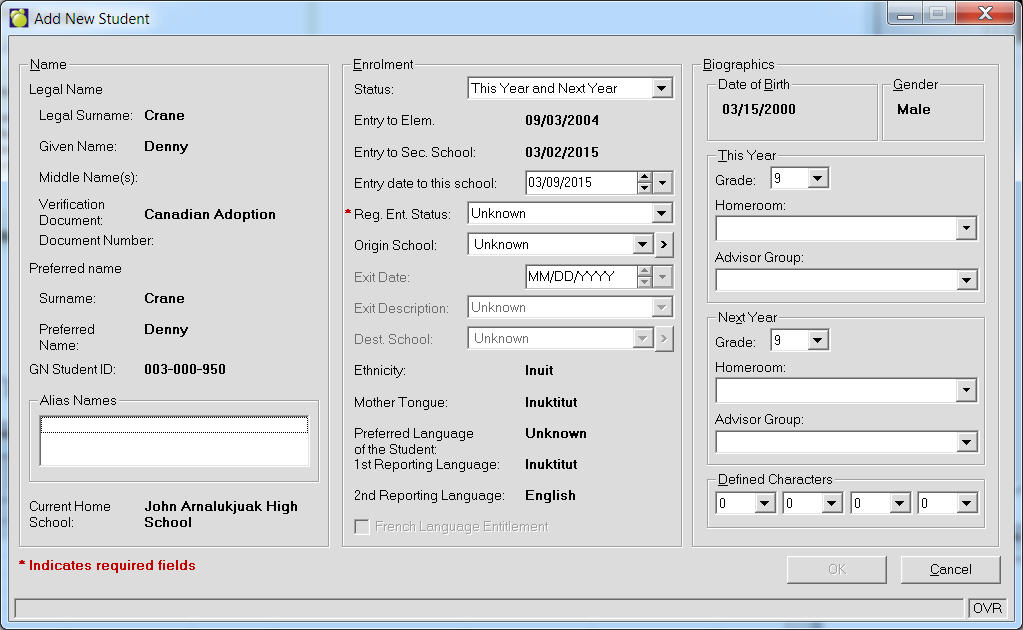
The Add New Student details form will be displayed. Complete the form and click OK (Note: all fields marked with a red asterisk (*) must be completed.)
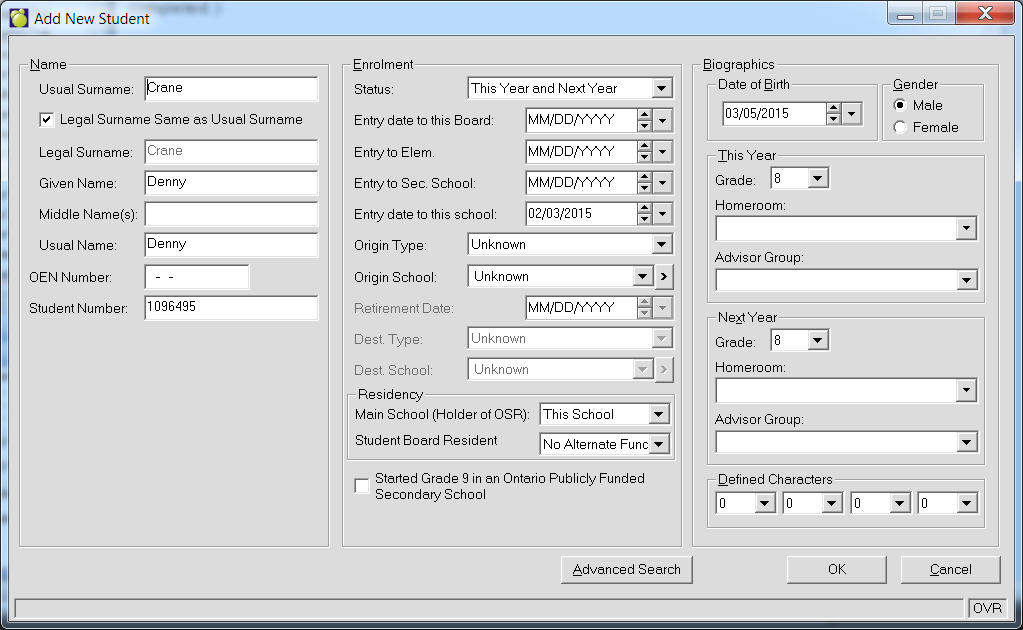
Name: Enter the Surname, Given Name, Middle Name(s) and Usual Name. Then enter the student number; if the number does not fall within the table of allowable numbers an error message will appear.
Enrolment: Enter the date of entry for the new student. You can also use the spin buttons or click the down arrow to access a calendar. Click the drop down arrows and select an Origin Type and an Origin School. These indicate where the student came from before he/she was enrolled in your school. You can also enter the Entry Date to Elementary and Secondary school.
Biographics: Enter the date of birth. You can also use the spin buttons or click the down arrow to access a calendar. Click either the Male or Female option button.
This Year/Next Year: Click the down arrow and select a homeroom and grade for this year and next year (if known).
Advisor Group: Click the down arrow and select an Advisor Group for this year and next year (if known.
Defined Characters: If applicable, click the down arrows and select previously defined characters for the student. Four characters are reserved to be defined by the school for each student. Defined Characters are not recorded anywhere in the system - administrators and teachers must remember what each letter or number represents. Defined Characters can be any letter of the alphabet or any number from 0 to 100. They may be used for selecting groups of students for whom reports will be printed e.g., 1 could represent Native American Indian. You can then print a report for students with defined character 1 using Report Builder.
Defined Characters will appear on the Biographics tab, and can be accessed by clicking Edit on the Biographics tab.
When you have entered all student information, click OK. You will be asked if this student has any siblings attending this school. If you click "Yes", then a list will appear (if set up). Make your selection and click OK. For more information about how to set up a list of siblings, see Setting Up A Sibling List.
When all the information has been entered, click OK.
You will be prompted if this student has any siblings attending this school.
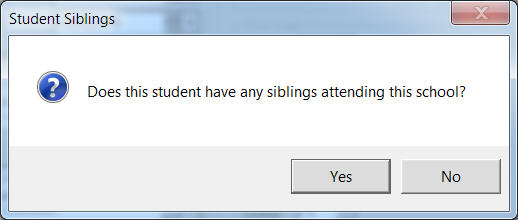
Click "Yes" if the new student does have siblings at this school,
and a list will appear to select from. Make your selection and click OK.
Otherwise, click No. By selecting a sibling, Maplewood automatically copies
all the applicable biographical information of the sibling to the new
student’s record.
Exact Match is found
If an exact match was found for the student being entered, the The Add New Student window will appear with the information preloaded in the form. Update the student’s Entry date to this school to represent the date they are starting at this school, as well as the applicable Reg. Ent. Status, Grade, Homeroom and Advisor Group. Click OK to continue to add this student to the school.
Continue to fill in the required information and click Ok when done.
The student record will then be displayed. Click the X at the top right corner to close and save the record. A prompt will appear asking if you wish to add another. This student is now added to the school and can be selected from the Student Records search.
Possible Matches Found
When the student is not found with exact information as entered in the search, but possible matches exist, the Advanced Student Search window will be displayed.

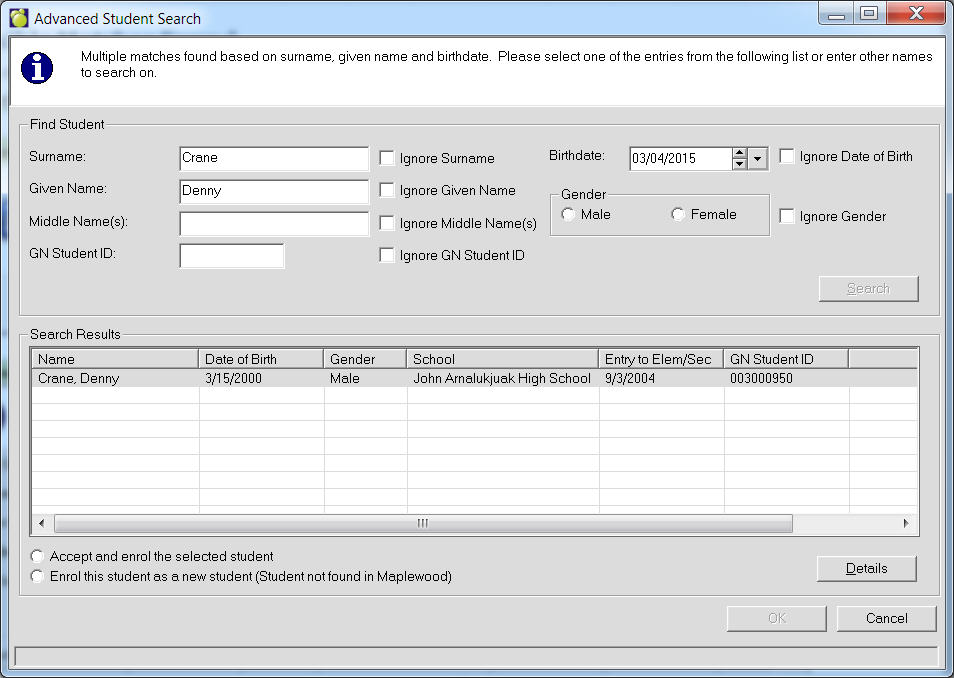
Examine the Search Results to see if one of the close matches could be the desired student. May also expand the search by opting to ignore Name, Birthdate or Gender to find additional potentially matching students.
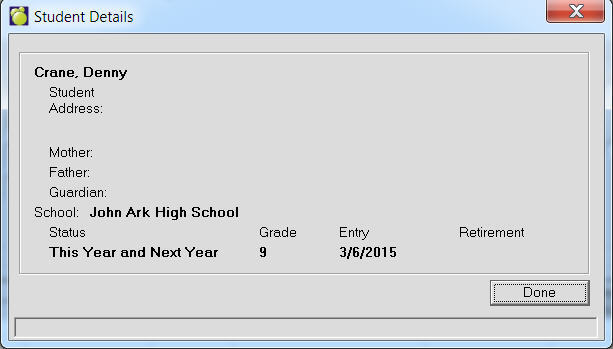
To view further details of any possible match, highlight the student in the list and click the Details button.
If one of the close matches is the desired student being enrolled, select the student and choose ‘Accept and enroll the selected student’. This avoids entering duplicates occurrences of the same student. Otherwise, if you are certain that the student being added does not match any of these possible entries, choose ‘Enrol this student as a new student’ to create a new student record. Continue filling in the applicable information for the student (as mentioned above) and close the record to add the student to the school.
Once students have been added to the system, use the Student Records search to call up their details record. If any changes need to be made to their information, or If more information needs to be entered, it may be done using Student Records.