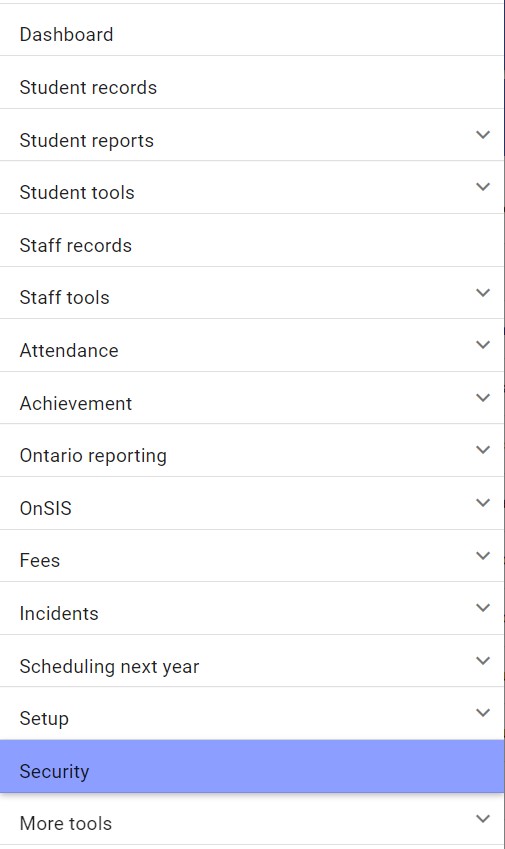
Using the Main Menu in the top left corner locate the Security option to set access rights for the Edsembli 1.0 WebAdmin site.
Security groups utilize the establish permissions, naming schemas and policies that can be applied to user accounts that are defined as members of the groups.

User accounts utilize the establish permissions and policies that can be applied to an individual user (i.e. teacher, principal, etc.).
STEP 1 - Setting up the CONNECT Groups
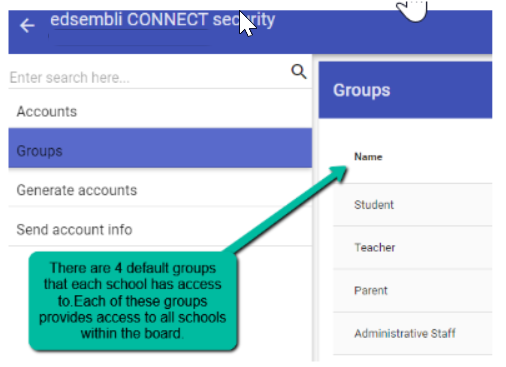
Teachers, Parents, and Students each belong in their own CONNECT groups and have separate URLs to access Edsembli CONNECT. Each group defines its own permissions that act as defaults for any accounts made within that specific group. This way, rather than setting up the permissions for each individual account upon creation, you can decide what permission group they will fall under first, then when created the individual account will populate the permissions defined in the group they were created under.
Scenario: What if I need to create a new group?
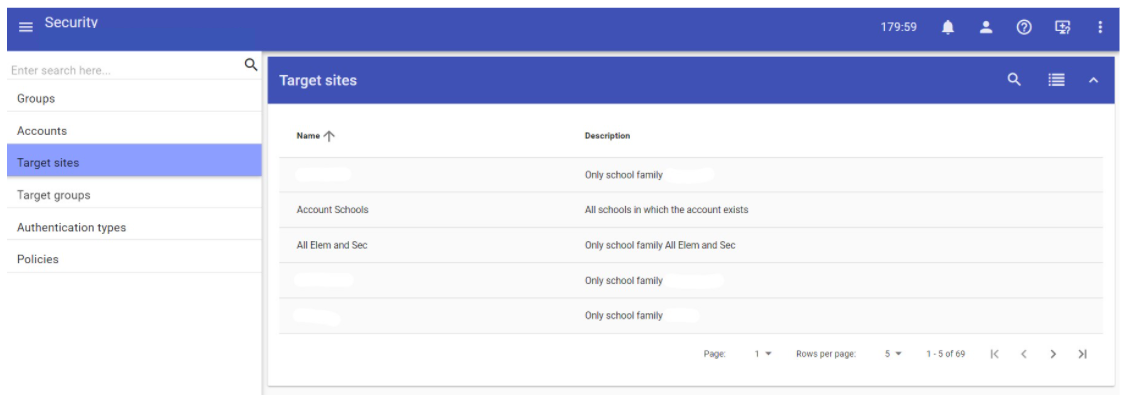
If groups don’t currently exist or you want to make a new group within the school, then you can go to the Board level and go to More Tools- Security- Edsembli CONNECT, click on the Groups tab. Then click the plus icon in the top right section. In the screen that comes up you can set it up for a specific group at a specific school:
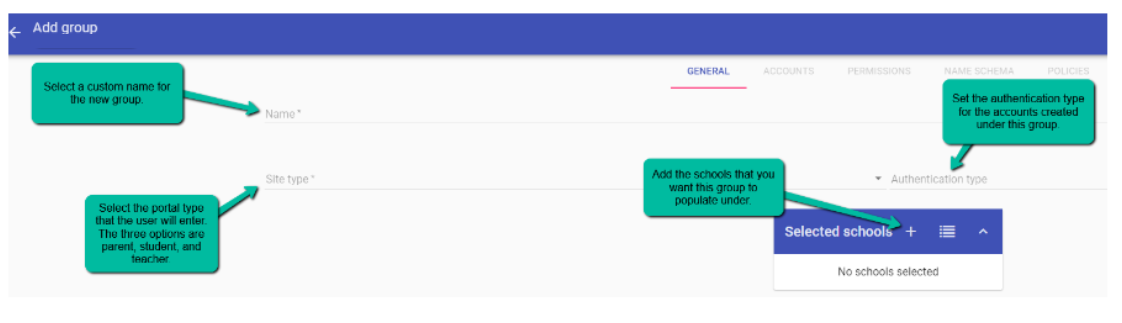
Clicking save will create the group.
Scenario: Is it possible to create a CONNECT group for a single school to access?
Yes, you can either create an account at the board level and select the school you want to access it with or you can create it directly at the school level. Note that if you do create the group at the board level then all the editing for naming schema and policy can only be done at that school. If you plan to make a group for multiple schools to use then it is recommended to create the group at the board level.
Editing CONNECT Groups
To set up the default permissions within a CONNECT group, go to the board/central office level and go to More Tools- Security- Edsembli CONNECT, click on the Groups tab. Click on one of the available groups and click edit.
Whether you are creating a new group or editing an existing group, the following applies to both scenarios. Click on the group and click edit, you will see that multiple tabs are available to be clicked on. Click on the Accounts tab to see the accounts that currently exist under this group.
Scenario: Why don’t I see any accounts under the group accounts tab when I know I’ve created new accounts?
The accounts that show up will be directly related to the school that you are viewing the group at. If you are at the board/central office level then don’t expect to see any parent or student accounts populated since they would all be populated at the school level.
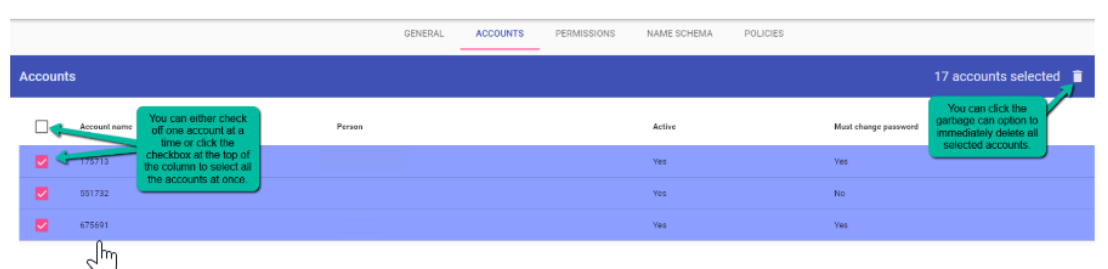
In the accounts tab you can delete existing accounts in bulk at the school level:
Moving on to the permissions tab, here you can apply the default permissions that all users generated under the group will receive. This can only be done at the board level:
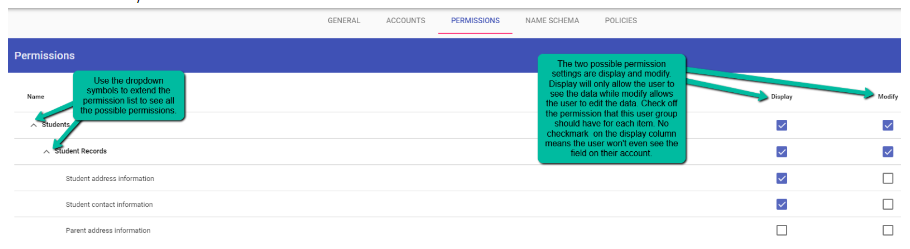
Any change you make to the group permissions will modify existing and newly made accounts under the group at all schools using this group.
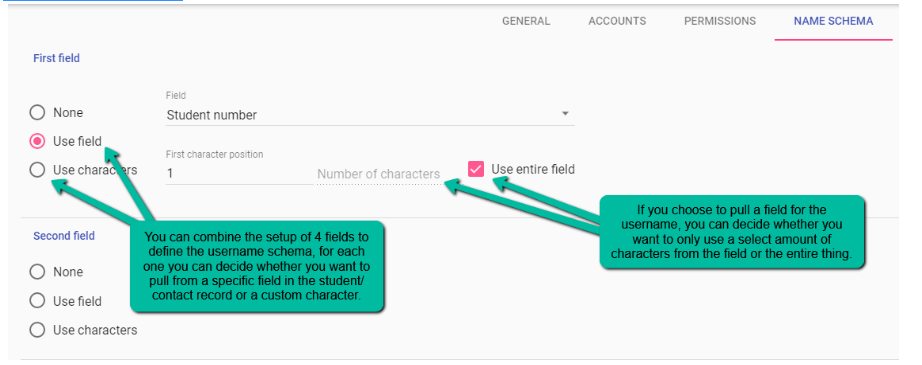
The Name Schema tab is where the username for each account is defined. Each account username must be unique so it’s important to set a name schema that populates a username that is custom to each account. In the scenario that the schema results in the same username for two accounts, the system will automatically add a ‘1’ to the end of the username for the second account. The number will continue increasing by 1 if multiple accounts receive the same username. This can only be defined at the board level:
Scenario: Why are accounts with blank or single digit usernames being generated when I already defined the group username schema?
The fields that you set as the name schema pull from the related fields in the student record. For example, if you set the parent group name schema to be the contact email, if the parent record’s email field is blank then there is nothing to create the username with. This results in the system leaving the name blank for the first case of this, then a 1 for the next case and a 2 for the next case.
Scenario: My parent group is using the contact email field as the name schema and some parents share the same email.
It is recommended that each parent contact has a unique email. In the scenario that two parents share the same email then only one parent account should be created for them to access as a family account. It is recommended for all parent contacts to have a populated email field in the contact record.
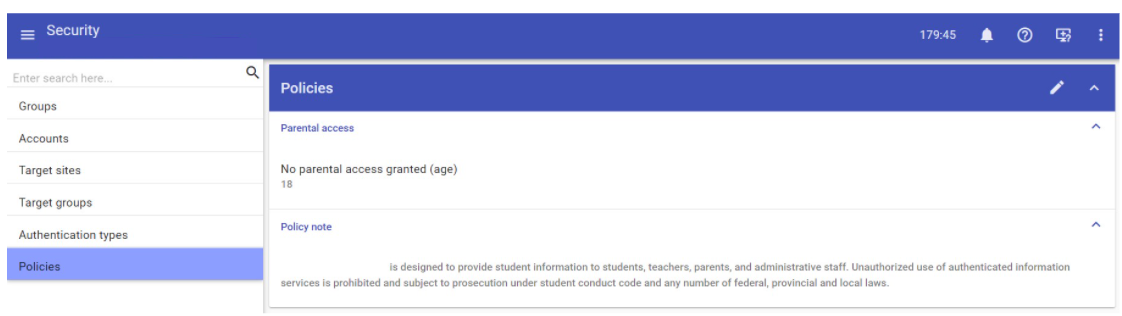
Lastly, the Policy tab allows the user to adjust a few administrative settings. This can only be defined at the board level:

STEP 2 - Generating Accounts
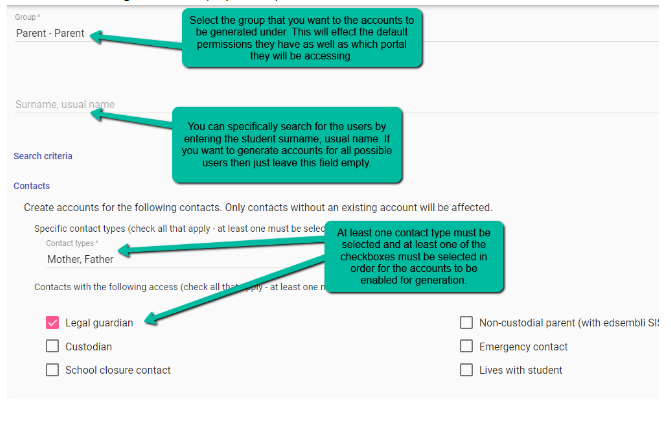
Once you have the account groups defined, you can start generating the CONNECT accounts. To do this, go to the school level and go to More Tools- Security- Edsembli CONNECT, click on Generate Accounts. Click on the Group dropdown and select the group that you want to make the accounts under. Depending on the group you choose here, the search results will display accordingly. For example, if the parent group is chosen then only parents will show up in the search results. When the following is all set up, you can click the pink search icon on the right side to display all the possible accounts:
The search will display all possible accounts regardless of whether they currently exist or not. You can see which accounts don’t currently exist by looking at the Account column. Any account that has ’Will be created’ in this column is not yet generated. If you want to completely remake an account, you must first delete it before attempting to generate it again as accounts will not automatically regenerate through this process.
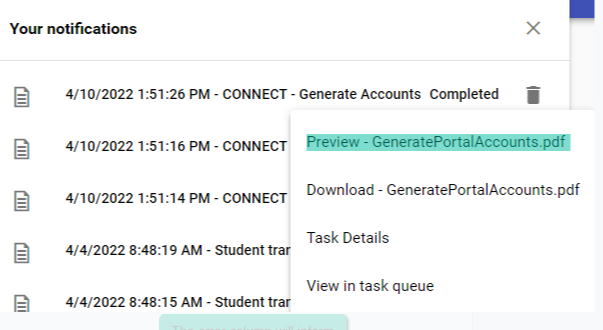
Once you generate CONNECT accounts, you can click on the bell icon, then click on the completed notification and preview the pdf file to see the success or failure of the account generation process. In the scenario that the accounts don’t get created, this pdf file is the first place to look when finding out why it was unsuccessful:
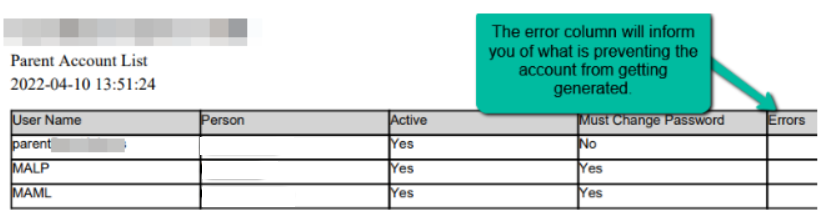
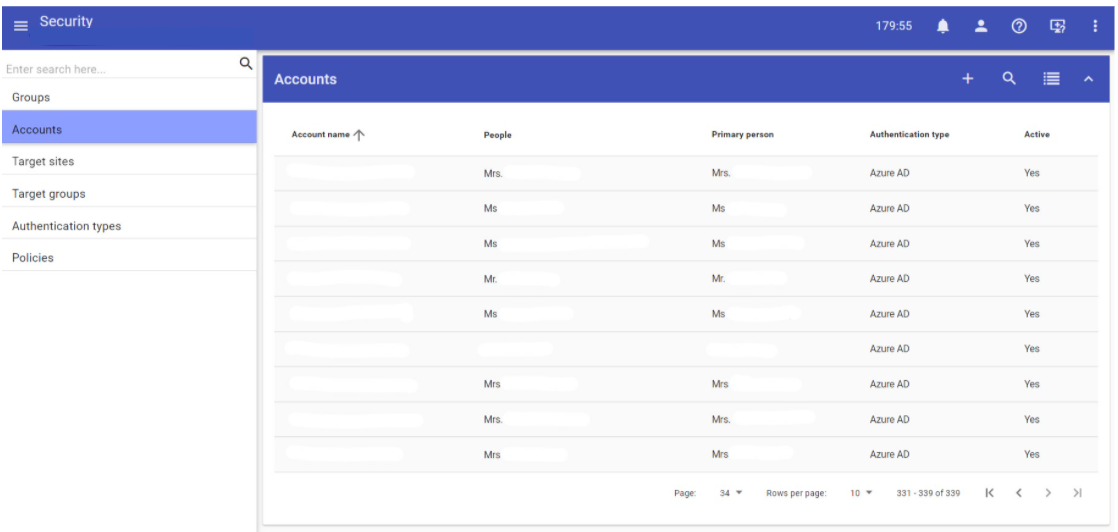
If this pdf doesn’t show any errors, then the accounts were successful in generating. You can now go to the Accounts tab in CONNECT Security and view the accounts you just created.
Scenario: I have a teacher whose parent account is only showing one of their two students even though they have access both siblings shown in their parent connect account permissions.
The issue here is that there are two connect accounts for this user, a parent account and a staff account and both accounts have the same username. This often comes up from a combination of the staff member having parent/staff accounts at multiple schools within the board, the naming schema for the connect account being the contact's email, and the staff record having the same email as the parent record. Within a single school the system will prevent the two connect accounts from having the same username but if the staff member has an account at the central office or another school and uses the same email as the username it can lead to problems like only showing one of the two siblings. It is recommended that if you are using the contact's email as the naming schema for generating accounts, any staff who are also parents for children within the board should use their personal email for their parent record. This will guarantee that the usernames are all unique. A manual fix is to simply modify either the staff connect account username or the parent account username to make them unique.
Editing Existing Accounts
If you want to add a new sibling to an existing parent account so that the parent can access both, then edit the parent account and go to the permissions tab. In this tab click on the plus icon and search for the student you want the parent to access. Assuming that these students are connected as siblings and the parent contact is the same between both siblings, they should come up in the search.
You can add them and edit the permissions for both on an individual level. This is the recommended way of updating a parent account when a new sibling enters the school.
NOTE: If you try regenerating the parent account for just the new sibling, the existing parent account will replace the current student they have access to with the new sibling. This is not the proper way of adding siblings to existing parent accounts.
Scenario: I am trying to create a mother parent account for 2 siblings but the system generates an individual parent account for each sibling. It should only make one account with access to both siblings.
The most likely cause of this is that one sibling has a parent contact record that is not the same as the other sibling's parent contact record. Situations like this come up when the user manually enters the contact record for each student rather than manually creating it for one sibling and then just pulling it onto the second sibling. You can check to see if this is the issue by going to one of the sibling's student records and going to Family & Contacts- Contacts, click the pink plus button to add a new contact and click the radio button for ‘Person exists as a contact for the related student’. If the contact shows up on this list, then you can confirm that this is the issue.
To fix this issue, you will need to delete the contact from one of the sibling student records and repopulate it by pulling it from the other sibling by going to Family & Contacts- Contacts, click the pink plus button to add a new contact and click the radio button for ‘Person exists as a contact for the related student’. Click the contact here to pull it from the sibling.
If no contacts show up in the list to pull, then ensure that the siblings are connected as siblings by going to Family & Contacts- Siblings.
Scenario: I would like to create all of the passwords myself for each account or manually change them.
You are able to manually change an account password by clicking on the account and selecting the Change password option. Here when you enter the new password you can uncheck the box for ‘User must change password’. This will make it so the user is not prompted to change their password after the account is created. You can also apply this at the group level under the policies tab.
STEP 3 - First-Time Login Expectations and Testing
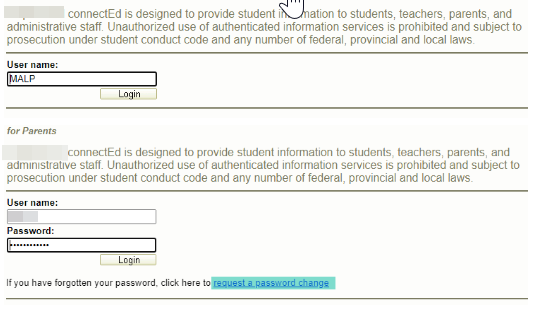
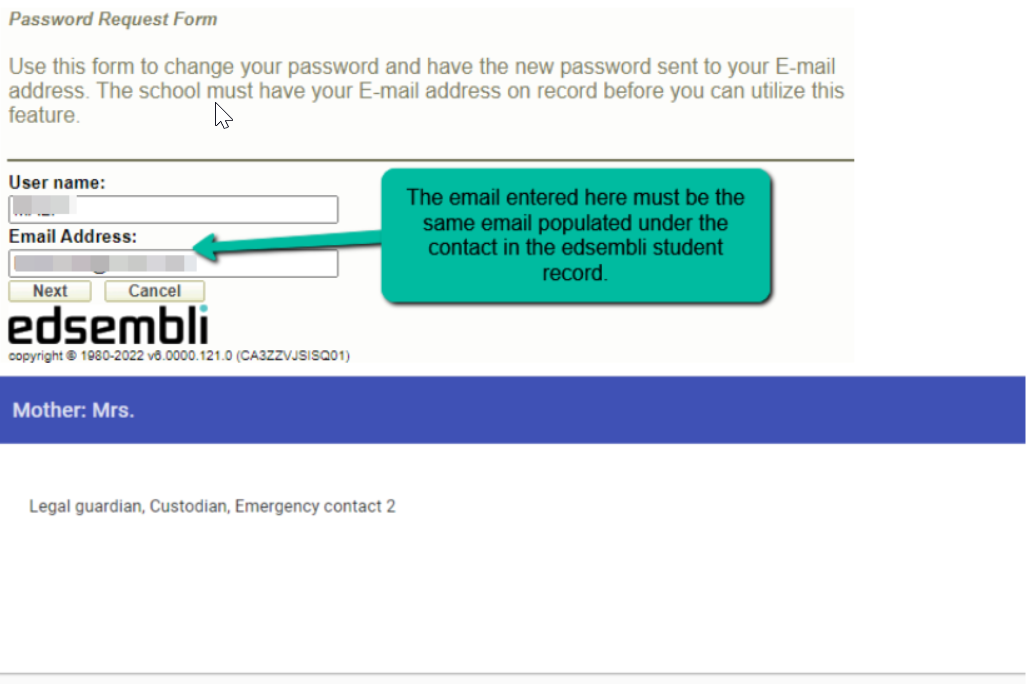
The expectation for a parent logging in for the first time into the parent portal is for them to enter their username, click Login, then when prompted to enter a password they must click on ‘request a password change’. There is no way in Edsembli to view the user's password, so they must go through the reset password process in order to receive a temporary password to login for the first time. Then, they’ll get prompted to manually set it as something custom:
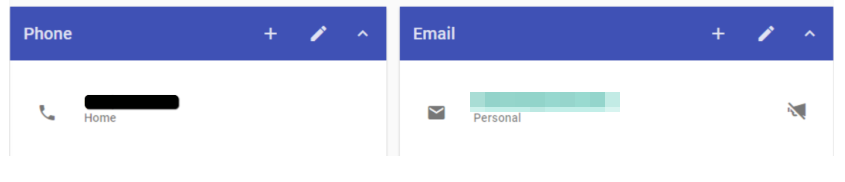
When the user clicks on ‘request a password change’ they will be prompted to enter their username along with their email address. The user must ensure that the email they are entering is the same email that is populated for the contact in the student record:
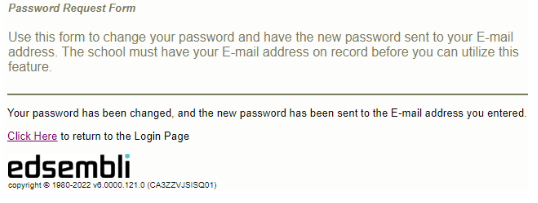
Once the user enters the info and clicks Next, they will see the following screen stating that the password has changed and they will receive an email.
Scenario: The user entered the wrong email into the password reset process and received an error.
In the scenario that the user is entering the wrong email they will get the following error message:
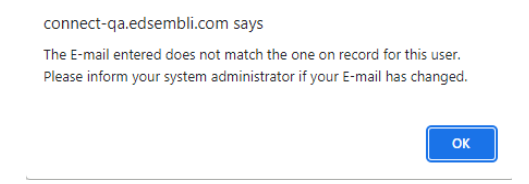
If this happens, confirm with the parent that they are using the same email as what is entered in the student record under their contact information. Once the email is sent to the parent, they can expect it to look like this:
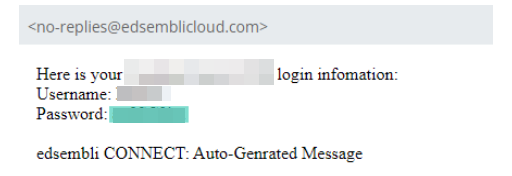
They can now log in using the username and password from the email. After they enter the info for logging in, if their account is set to require a password change after the first login (defined in the CONNECT group under the policy tab) then they will be given the opportunity to enter a custom password:
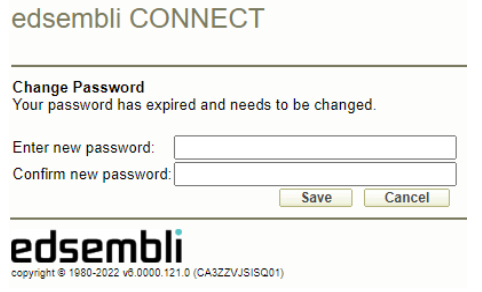
The user is now successfully logged in to their CONNECT account.
Scenario: I would like to test this password reset process.
To test this process, find an example student whose parent you can temporarily use. Go to the parents contact record and temporarily swap out their email for yours in the email field. Now go to the CONNECT parent portal and enter the username and click Login. When prompted for the password select the option to change the password. Enter the username along with your email and click Next. You should receive the email with the temporary password.
STEP 4 - Sending Out Account Info and Testing
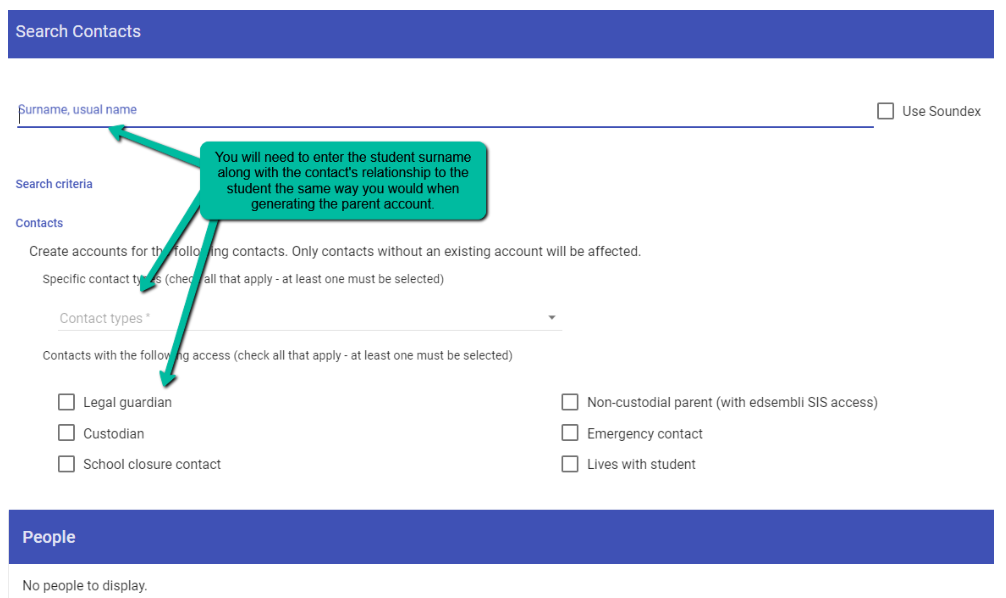
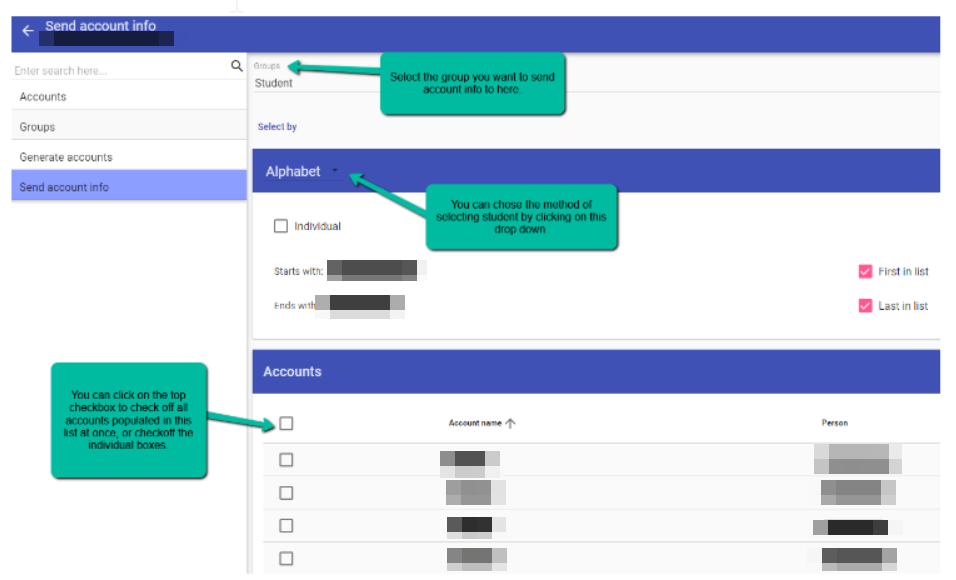
The Send Account Info process allows you to send out a mass email to chosen accounts within a group. This email by default will provide the specific username and account status for each email recipient. To send out account info first go to the school level and select the group that you want to send the info out to. Next select the students within that group who you want to send the info to. Click on the pink search button to generate the list of accounts that you are about to send a mass email too.
Scenario: When I select the parent group the search filter only searches for the students.
This is correct, the search criteria will look for the students whose parents you want to send the info out to, not the students themselves.
The recommendation for sending out account info is that you should provide the parents with the purpose of this account, the CONNECT parent portal URL, their username, and the expectation for their first-time login experience. You can enter the purpose of the account as well as the URL and first-time login expectations through the note or policy note. These options can be enabled below the list of accounts by clicking on the checkboxes. The note is a temporary field that allows you to enter any text you want. Once you send off the account info or leave this page, the note gets deleted. The Policy note is a more permanent option where the text you want populated there can be saved so you can use it again in the future. To populate the policy note, please inform the SIS support team what content you want populated there.
To send out the account info once you have it all set up and the desired accounts checked off, click on the mail icon in the bottom right of the screen. This will send out the mass email and populate a report on the success of each email for you to view. If a problem occurred when sending out the emails then this report will let you know the error message.
Scenario: None of the emails are getting sent out for Send Account Info. The process fails.
If no emails are being sent out then go to Setup- School- Email Settings. In this screen ensure that you have email settings populated. If you do then you can click Edit and click on the Test button to make sure the email system is set up. If no email settings are populated then please contact SIS support for us to help get you set up.
Scenario: The Email settings are blank and I don’t know what to populate the fields with.
Please refer to the following solution article on what email setup options edsembli has available: https://sis.support.edsembli.com/en/support/solutions/articles/8000104598-setting-up-your-own-email-provider-gmail-office-365-
Scenario: I want to test what the Send Account Info email looks like before sending it to parents and students.
To test the Send Account Info process, find an example student whose parent you can temporarily use. Go to the parents contact record and temporarily swap out their email for yours in the email field. Now run the Send Account Info process on that parent and you can expect to receive the email. Ensure that after you’re done testing to replace the proper email back into the contact record.
Also see the following solution article for more information: Emailing Parents (Send Account Info)
STEP 5 - Publishing Digital Documents to the Parent Portal
In Edsembli the only way to send out report cards digitally to parents is by populating it within the parent portal as a digital document. To set this up you will first have to go to the board/central office level and go to Setup- User-Defined Fields- Digital Document Types. Here you will have to add a new digital document type if none currently exists. You can add multiple if you plan to send different types of documents out to the parent portal. The only required fields when creating the digital document are the ‘Document Field’ and the ‘Ministry Code’. This code can be anything you want it to be. Click save when finished to finalize the new digital document type.
With the digital document types set up, you can now publish a report as a digital document. Currently all reports located in report builder can be sent out as digital documents. To send out a digital document, go to the school level and go to Student Reports- Report Builder- Report Builder, select the report you want to run and in the setup screen, select the group you want to run the report on. Scroll down to the bottom of the screen and check off the box for ‘Create digital documents’, then scroll down to see the new options available. In those options you can check off the box to publish the digital document to the parent/student portal as well as email out notifications that let the contact know the document has been uploaded to the portal.

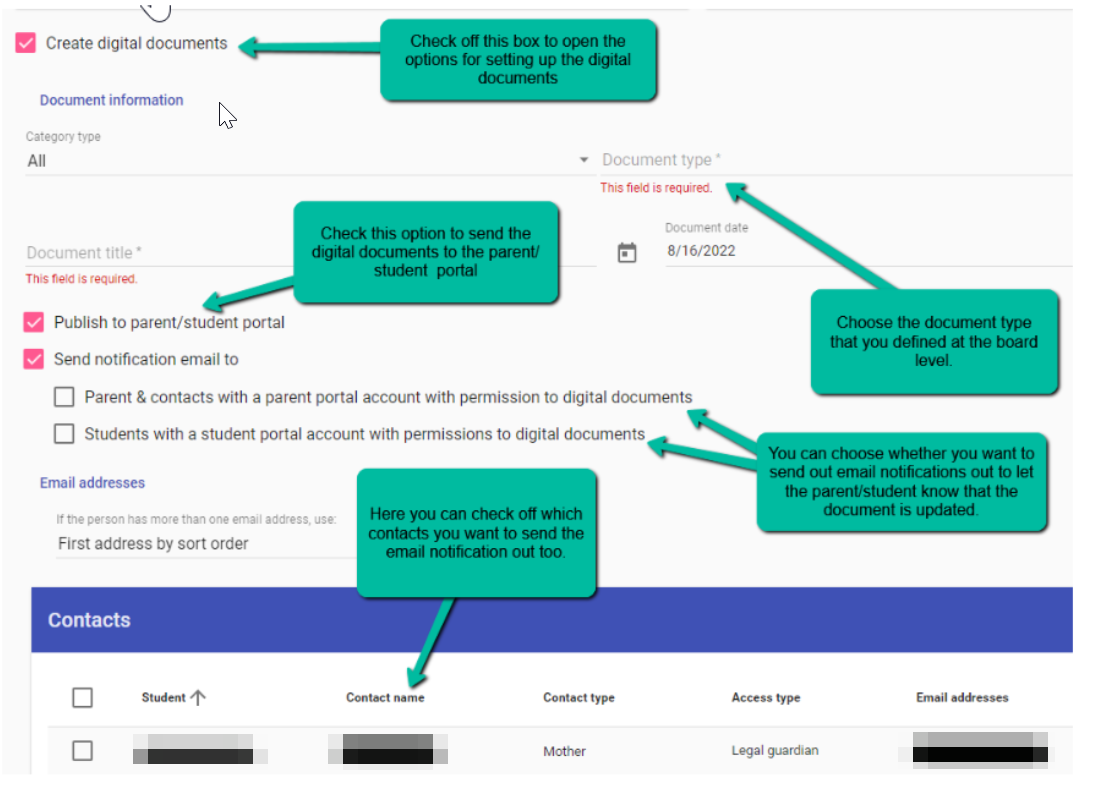
You do not have to send out email notifications when creating digital documents. If you do then you can specifically choose which contacts receive the email. When ready click on the pink Create Reports button in the bottom right of the screen to proceed. When the notification bell completes the process, you should be able to click on the complete status and have the ability to open a report that details the success of the emailing.
Scenario: How do I delete a digital document from the parent/student portals?
All digital documents that get created will populate in the student record under Personal- Digital Documents. If you delete a digital document here that is also populated in the parent/student portal then it will get deleted in the portal as well.
Scenario: How do I test if publishing digital documents to the parent portal worked?
If you have the credentials for a test parent account you can run a report builder report and create a digital document for the student and set it up to get sent out to that parent’s account. If you replaced the test parent’s email with your own then you can even test the email notification process to see what that looks like by allowing the notification to get sent out to that test parent. Log into the test parents account and go to Digital Documents to see the newly populated report.
Scenario: The notification email that gets send out with the digital document has the incorrect parent portal URL.
Edsembli populates the URL in the email notification from what is entered in More Tools- Security- edsembli CONNECT- Settings. The Application Entry Point URL path that is populated in the settings will need to be updated to what the proper path is. You can do this by clicking the edit button and making the necessary change.

Configuring Google Authentication
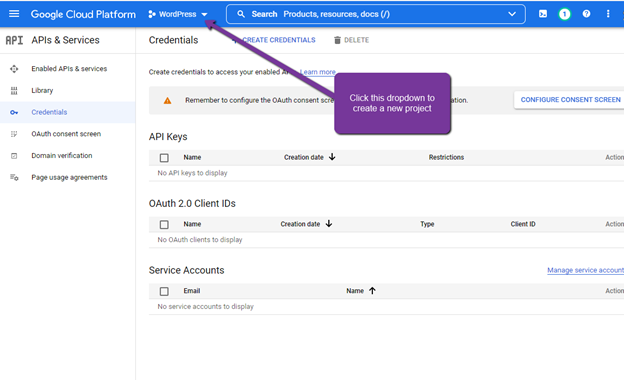
The first step is to login to the Google Cloud Platform https://console.cloud.google.com/apis/credentials
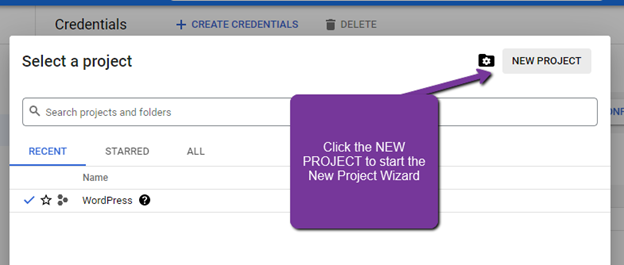
Next, click the drop down to create a new project
Next, select New Project
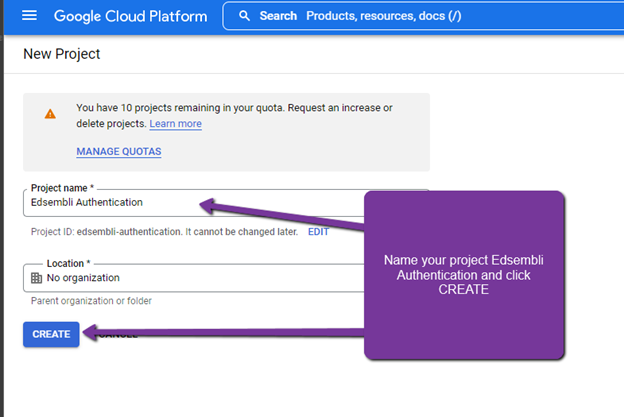
Add "Edsembli Authentication" as the Project Name and click CREATE
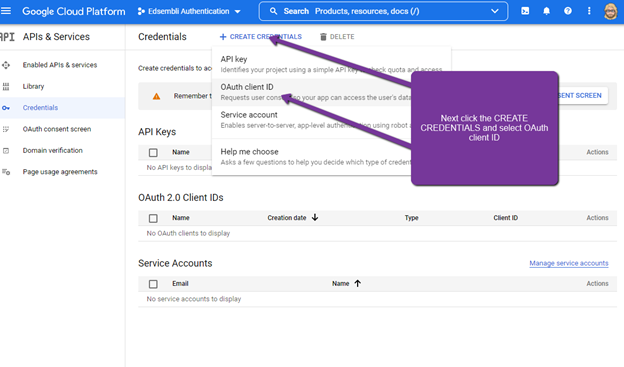
Next, click the CLIENT CREDENTIALS and select OAuth client ID
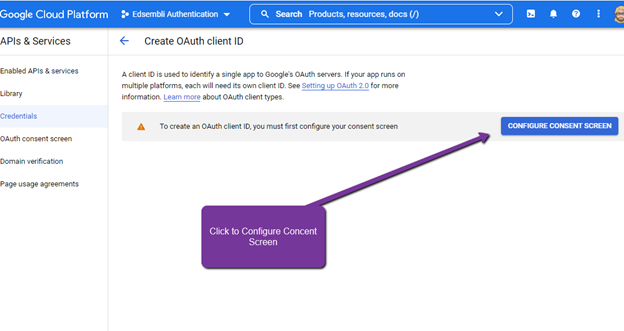
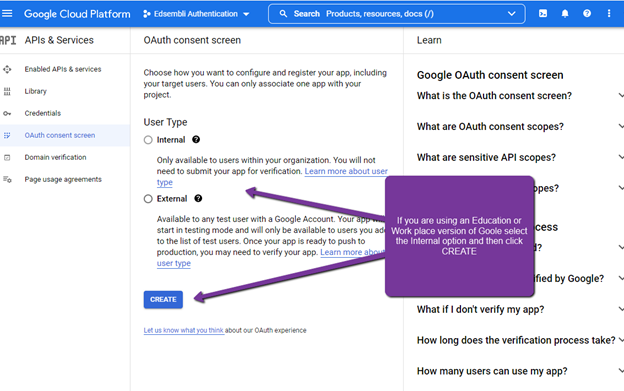
Next, we need to configure the content screen. Click on the CONFIGURE CONSENT SCREEN to begin this process.
If you are using an Education or Workplace version of Google, select the Internal option otherwise select External and click CREATE.
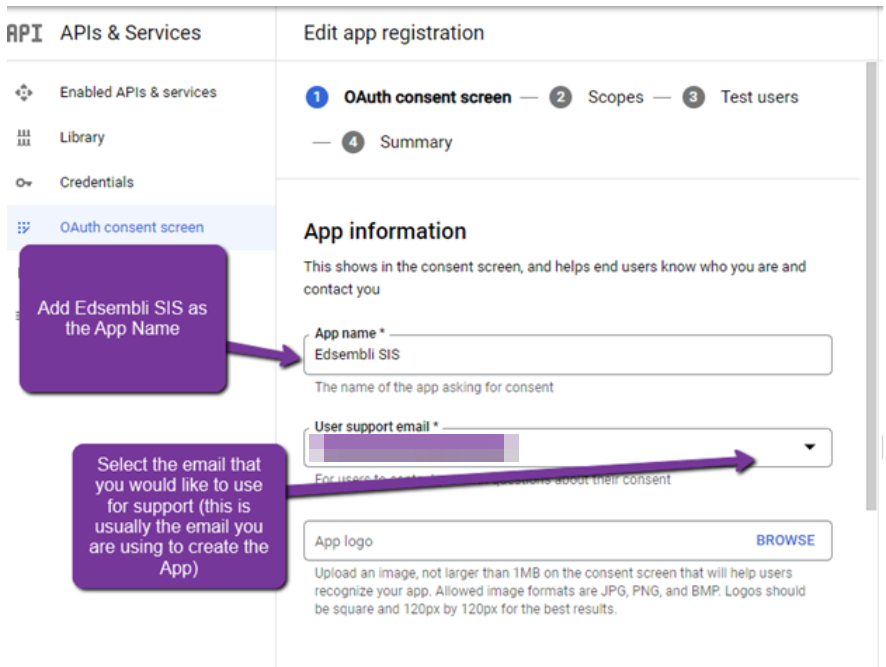
Next, add Edsembli SIS as the App Name and select the email address to be used as support (this is usually the email you are using to create the app).
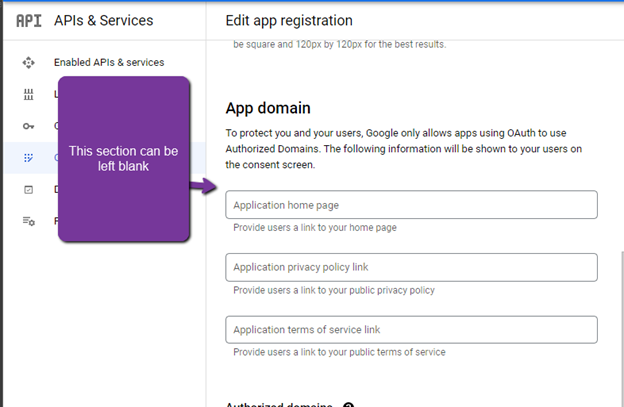
The App domain section can be left blank
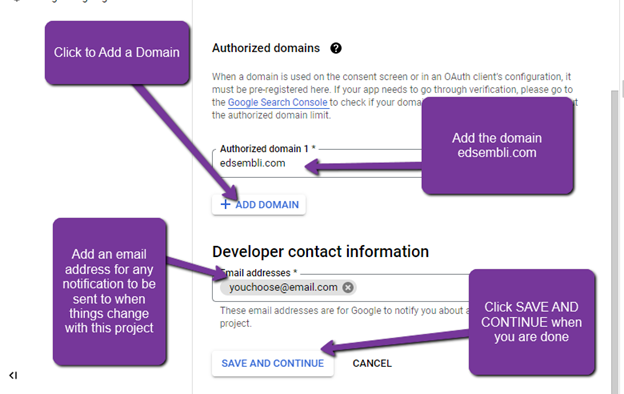
Under that Authorized domain, click the ADD DOMAIN.
Enter in Edsembli.com into the authorized domain field.
Enter an email address that you would like notification to be sent to when changes are made to this project.
Click SAVE AND CONTINUE when done
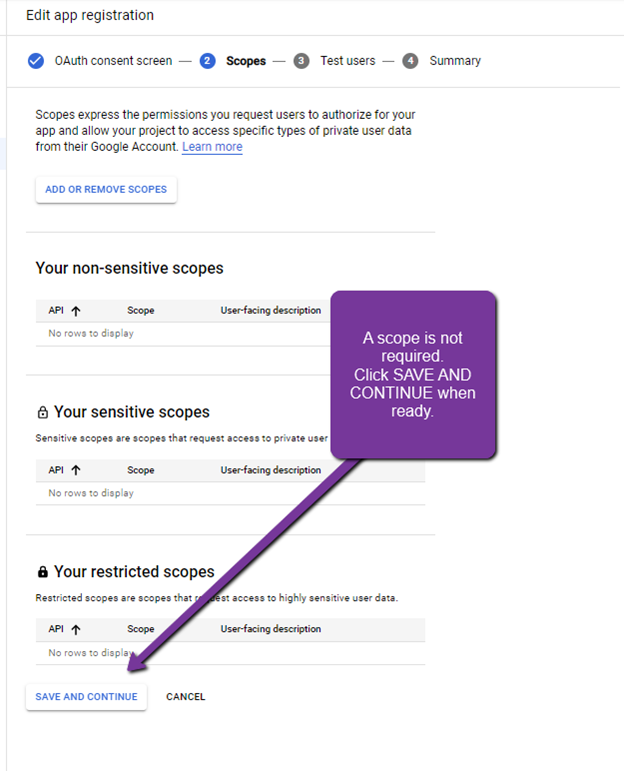
Since scope is not required, click SAVE AND CONTINUE when ready.
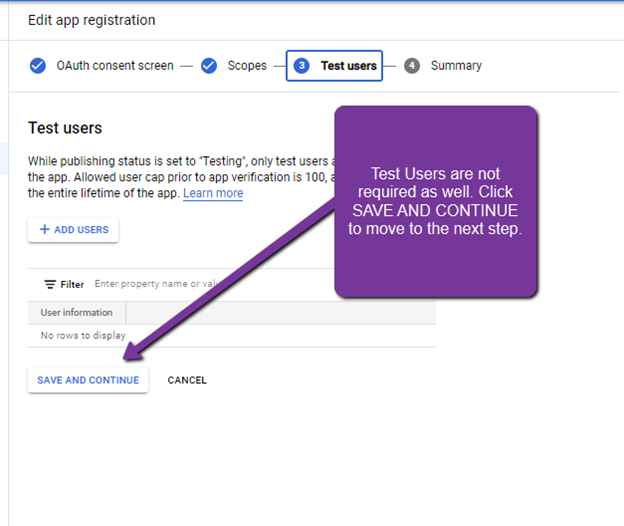
Test users are not required. Click SAVE AND CONTINUE to move to the next step.
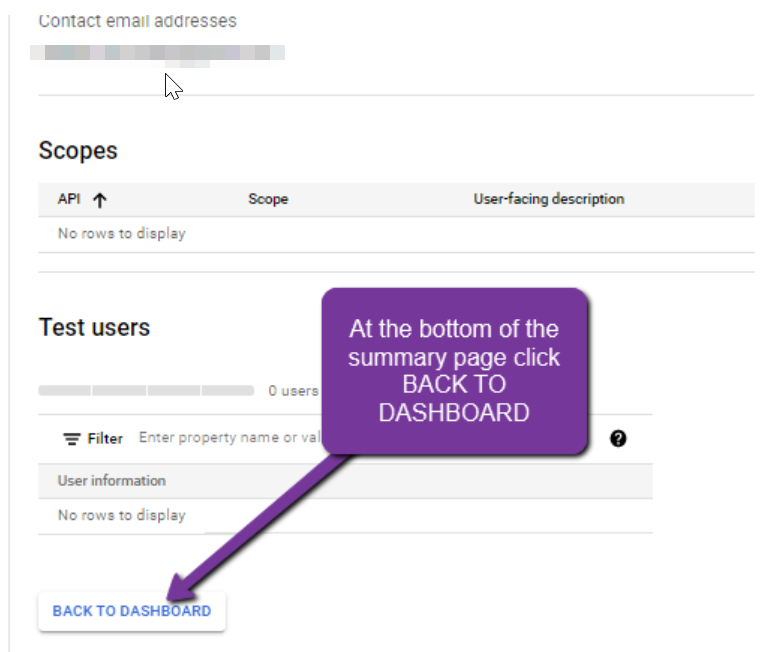
At the bottom of the summary page click the BACK TO DASHBOARD button.
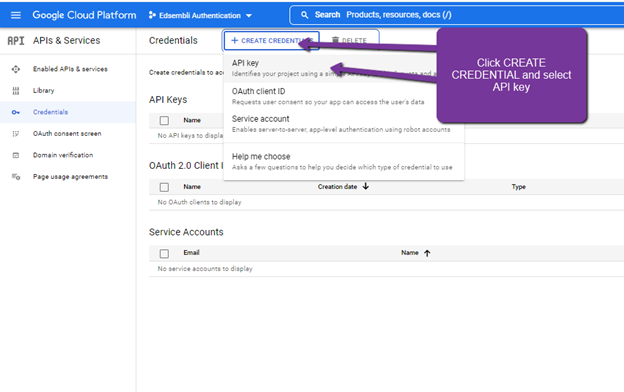
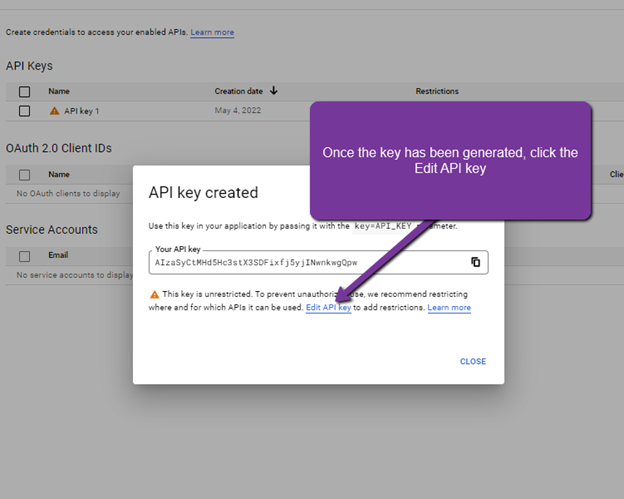
Next we need to setup an API credential. Click on CREATE CREDENTIAL and select API key.
Once the key has been generated, click on the Edit API key.
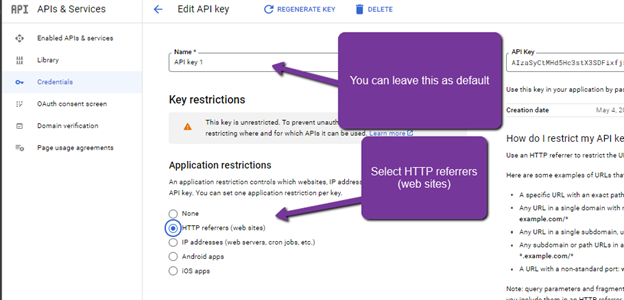
You can leave the default name for the API and then select the HTTP referers (Web sites) option.
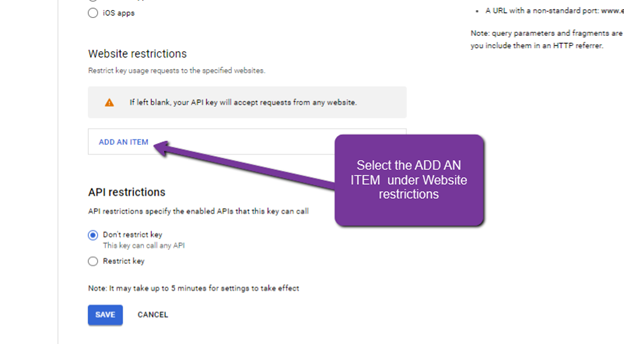
Select the ADD AN ITEM under Website Restrictions.
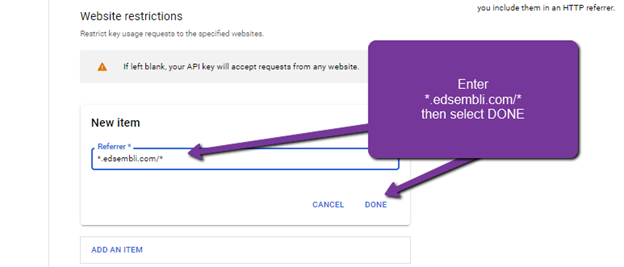
Enter *.Edsembli.com/* into the Referrer field and select DONE when finished
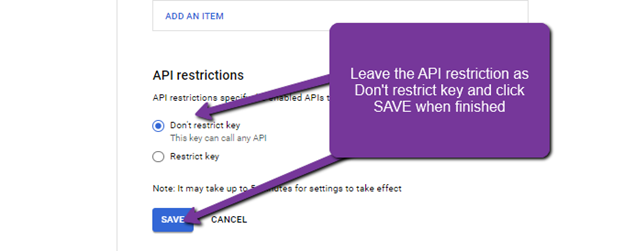
Leave the API restriction as Don't restrict key and click SAVE when finished
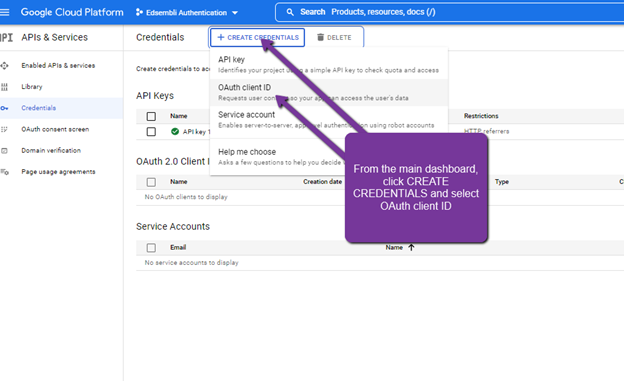
From the main dashboard, click CREATE CREDENTIALS and select OAuth client ID
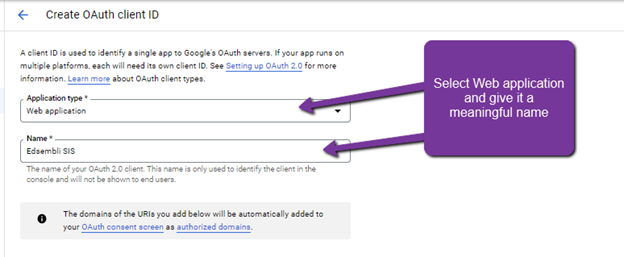
Select Web application and give it a meaningful name.
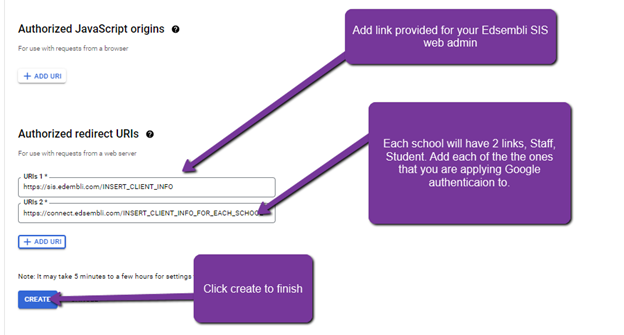
Add the link provided for your Edsembli SIS web admin and the links for the ConnectED Staff and Student as required. Click Create when you are done.
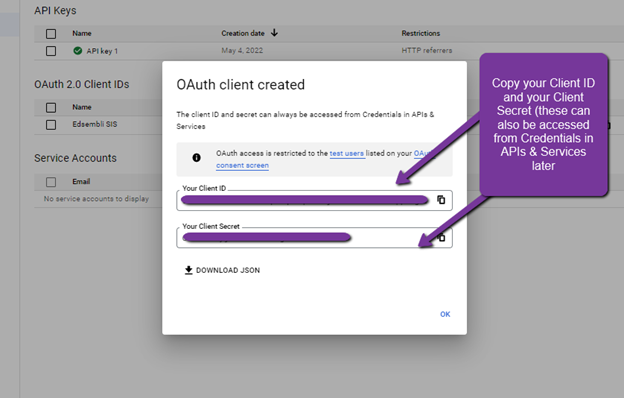
Copy your Client ID and your Client Secret (these can be access from the Credentials in APIs & Services later).
Enabling Google Authentication within Edsembli SIS
Login to Edsembli SIS as an administrator.
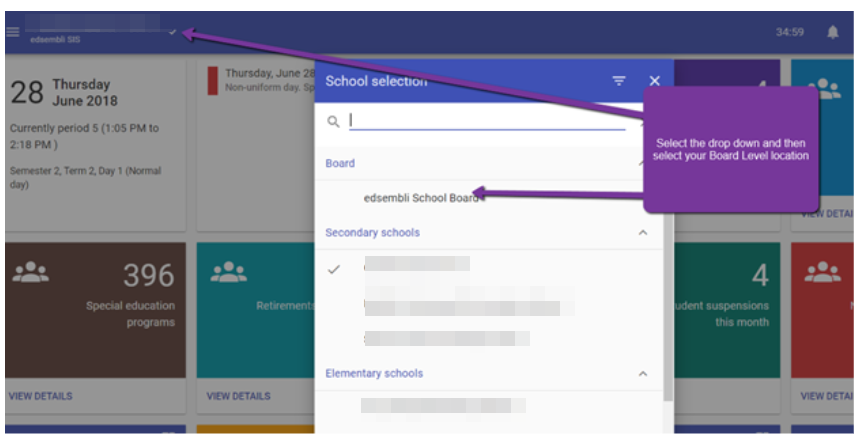
Next, select the drop down and then select your Board Level location.
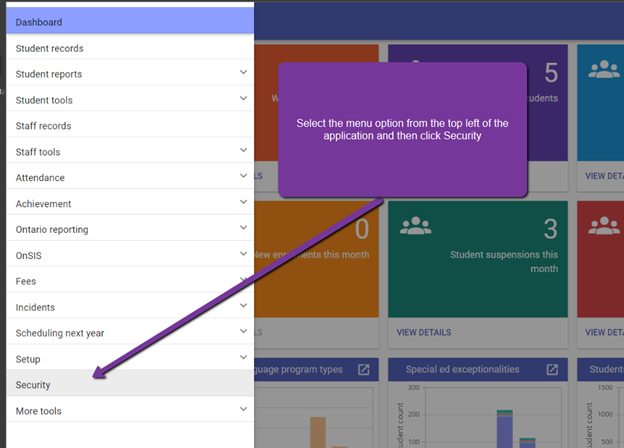
Select the menu option from the top left of the application and then click Security.
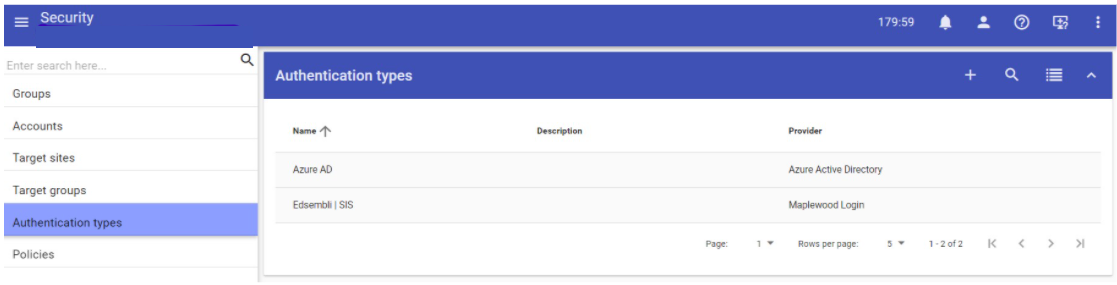
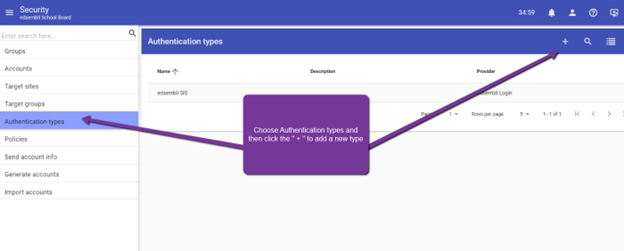
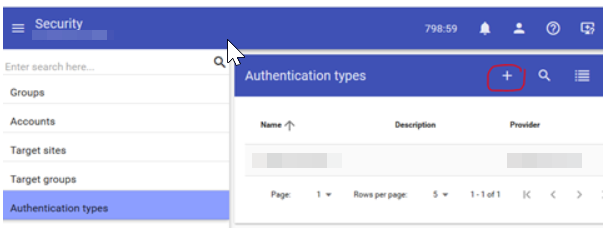
Choose Authentication types and then click the "+" to add a new type.
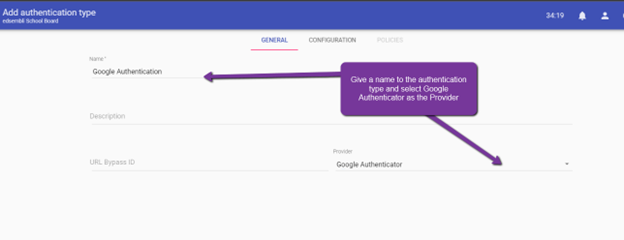
Give a name to the authentication type and select Google Authenticator as the Provider.
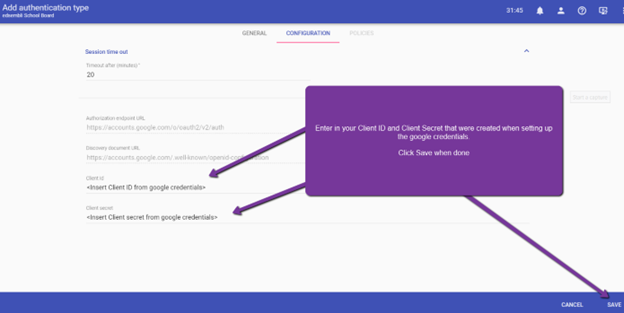
On the Configuration tab, enter in your Client ID and Client Secret that were created when setting up the Google credentials.
Click Save when done.
1. Login to the Azure console https://portal.azure.com/
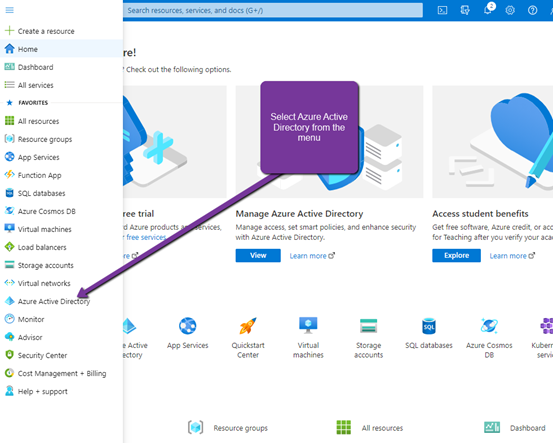
2. Go to Azure Active Directory
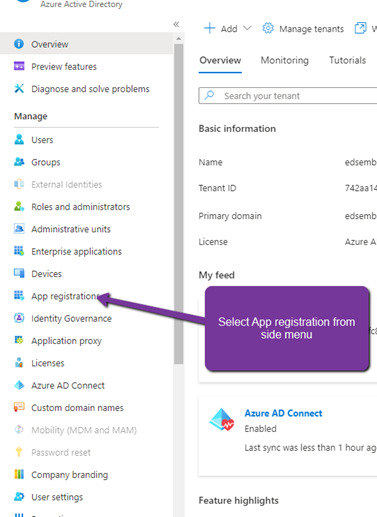
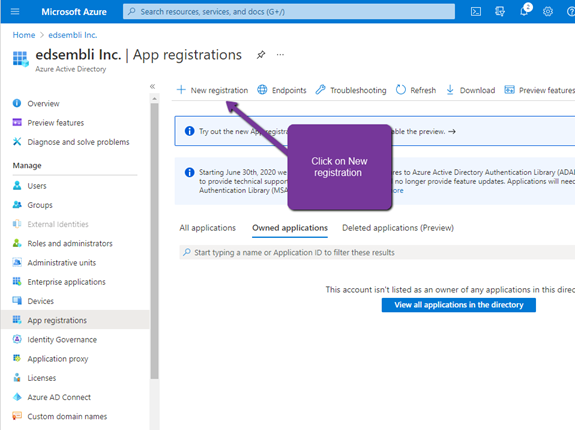
3. Select App registration from the side menu
3. Click on New registration
4. Provide an application name
Select “Accounts in any organizational directory”
Under the Redirect URL, select Web and enter in the URL for your admin site.
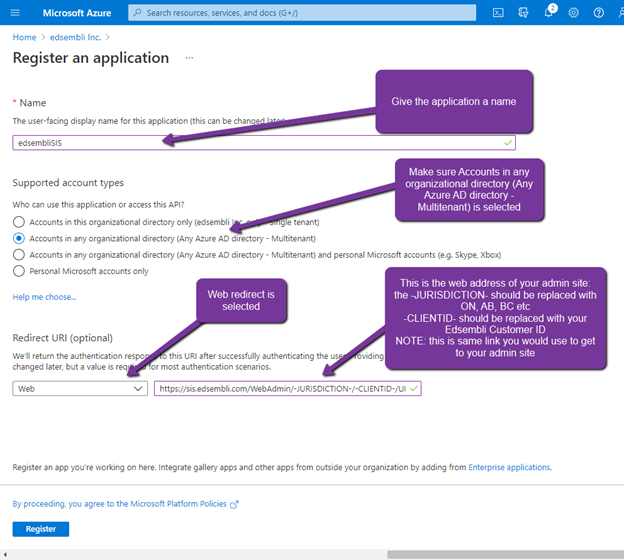
5. Click the register button to continue
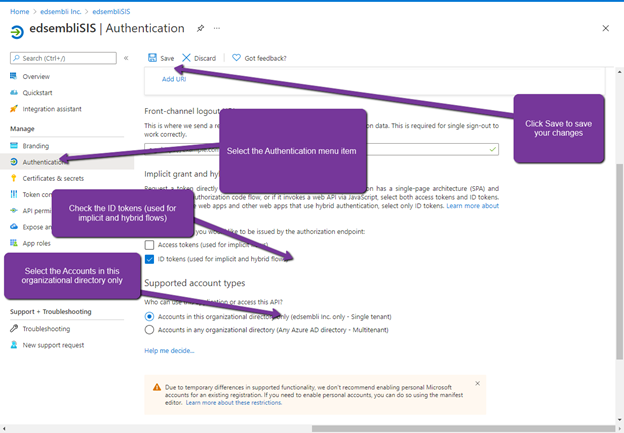
6. Select the Authentication menu item
7. Check the ID tokens (used for implicit and hybrid flows)
8. Select Accounts in this organization directory only
9. Click Save to save changes
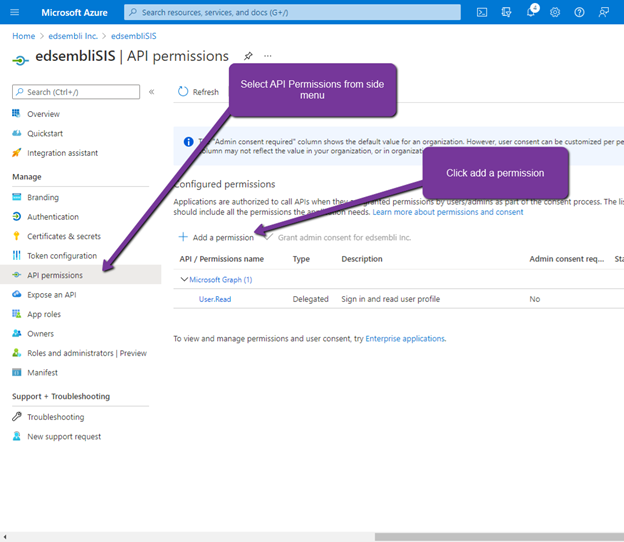
10. Select API permissions from the menu
11. Click Add a permission
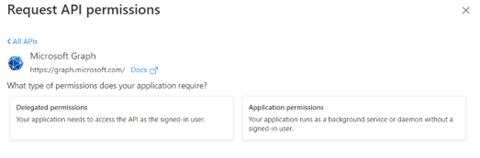
12. Select Microsoft Graph

13. Select Delegated permissions
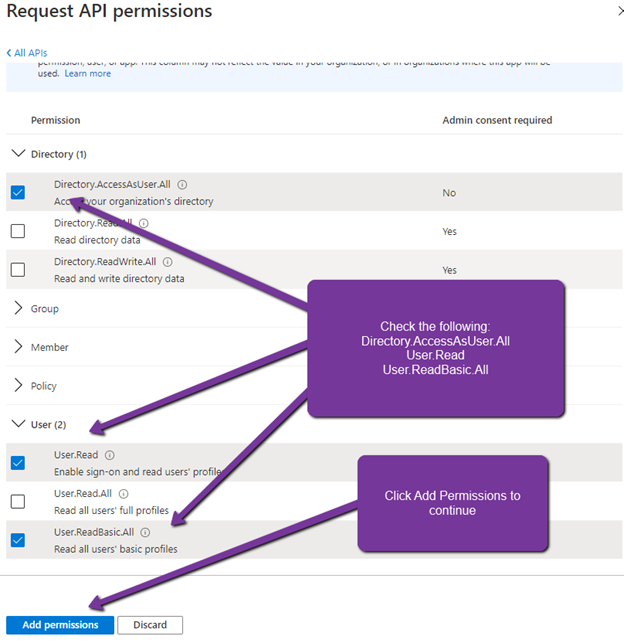
14. Select the following:
Directory.AccessAsUser.All
User.Read
User.ReadBasic.All
15. Click Add permissions to continue
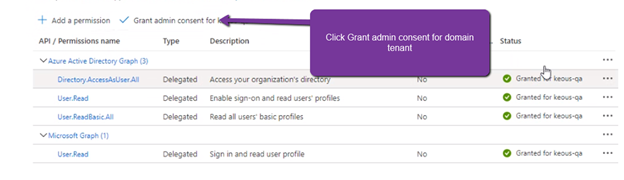
16. Click Grant admin consent for domain tenant
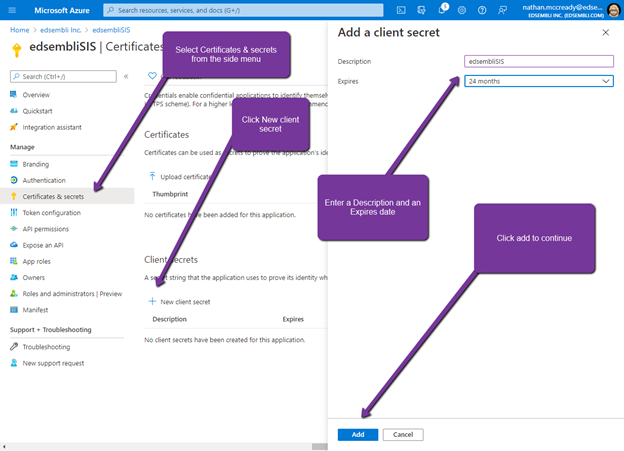
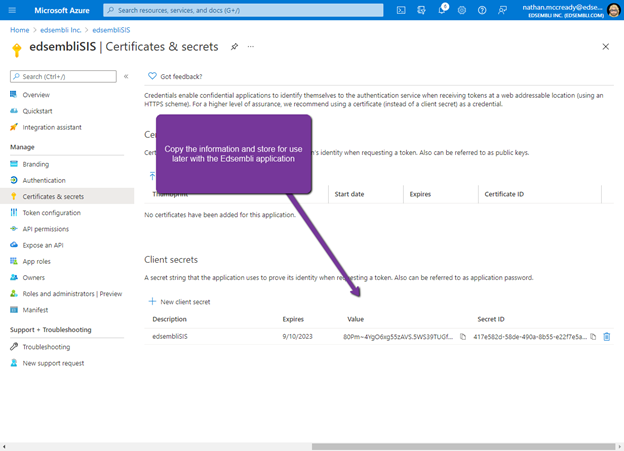
17. Select the Certificates and secrets from the side menu
18. Click New client secret
19. Enter a Description and Expires date
20. Click add to continue
21. Copy the client value and paste it somewhere you can copy it from later. (If you leave this screen without first copying the secret you won't be able to see it again.)
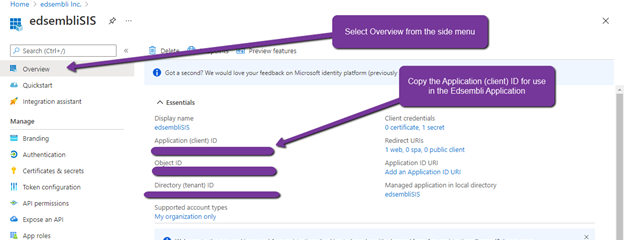
22. Select Overview from the side menu
23. Copy the Application (client) ID for use in the Edsembli Application
Enabling Azure Authentication within Edsembli SIS
1. Login to Edsembli SIS as an administrator.
2. Select "Security - Authentication Types" then click the "+" button to add a new authentication type.
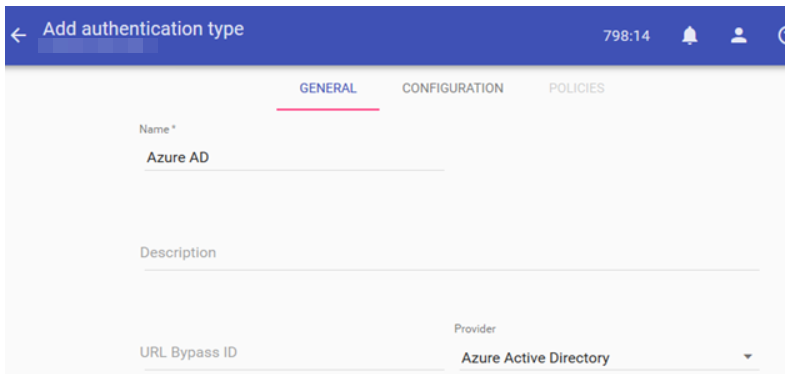
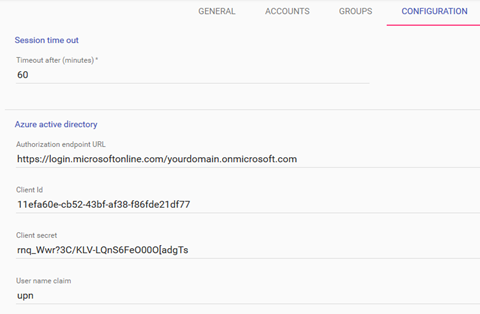
3. On the General tab provide a name for the authentication type and select "Azure Active Directory."
4. On the “Configuration” tab copy and paste the application Client ID and secret and enter the authorization endpoint for your Azure active directory.
Example: https://login.microsoftonline.com/yourdomain.onmicrosoft.com.
Also provide the name of the claim that will be used to match the user account name in the Edsembli SIS. The “name” claim is the AD account name the “upn” claim is the AD login name (email address).
5. Click Save.
6. On the login page you will now have the option to select Azure AD authentication.

Note: The Edsembli user account's Authentication type must be set to Azure AD in order to login successfully.
