.png)
K212 HRP Windows
K212 HRP consists of one ‘parent’ window which may contain multiple ‘child’ windows.
The Parent Window
The parent window appears when you first open K212 HRP and always remains open while K212 HRP is running. If you close the parent window, K212 HRP closes.
Parent Window Elements:
The parent window consists of five elements as illustrated below:
Illustration of the Parent Window with the various components labeled
1. Title Bar
The Title Bar contains the following:
•Small K212 HRP icon
•“K212 HRP”. Note: K212 HRP is followed by a dash (-) and the child window title in square brackets ([ ]), when the child window is maximized
•Minimize, Maximize / Restore Down and Close buttons (These button effect the parent window and have no effect on the child windows)
2. Menu Bar
The menu contains different options, depending on the child window that currently has the focus.
When the K212 HRP menu is selected:![]()
When any other child window is selected:![]()
The contents of each menu option are listed in appendix A
3. Toolbar
The tool bar contains a set of buttons that perform commonly used functions. The buttons displayed depend on the child window that currently has the focus.
When the K212 HRP menu is selected:![]()
When any other child window is selected:![]()
Clicking on the button has the same effect as selecting the same option in the menu.
4. Status Bar
The status bar contains the following segments.
Application Status
The following messages indicate the current status of K212 HRP:
•“Ready” K212 HRP is not performing any task; it is ready for user activity.
•“Ready to Search” K212 HRP is currently displaying a search form and is ready for the user to provide search criteria and perform the search.
•“Ready to create New Record” K212 HRP is currently displaying a blank record and is ready for the user to enter data and to add the record to the database.
•“Searching…”† K212 HRP is searching the data base for records to fulfill a user search.
•“Saving…”† K212 HRP is saving data entered or updated by the user to the database.
•“Data Changes were Saved” K212 HRP has completed the save operation
†When “Searching…” or “Saving…” the cursor is displayed as an hourglass to indicate that K212 HRP is not ready for any user activity.
Record Count
“Record Count” indicates the number of records in screen element 1. It is only displayed when the status is “Ready”
Workspace for Child Windows
All child windows are contained within this workspace. One child window contains the menu page, while others contain individual functions as selected from the menu.
Child Windows
Child Windows within the Parent Window
Child windows can only exist within the parent window (within the Workspace for Child Windows). When a particular child window is active, it’s name appears in the title bar of the parent window.
![]()
Example of the Title Bar when the Locations child window is active.
Each child window contains different functionality. For example, one child window might contain the Employee Identification function while another may contain the Employee Group Maintenance function. In this way it is possible to have two or more functions visible side-by-side on the screen together.
Opening a Child Window
The Menu window can be opened at any time by:
•Press Ctrl + M
•Click on the Menu Toolbar Button
•Select View > Menu from the Menu Bar
Windows for all other functions can be opened from the menu page by:
•Double click on the menu option
•Use the arrow keys to move between menu options and press Enter to make a selection.
Note: Use the Tab key to toggle focus between the left and right screen elements.
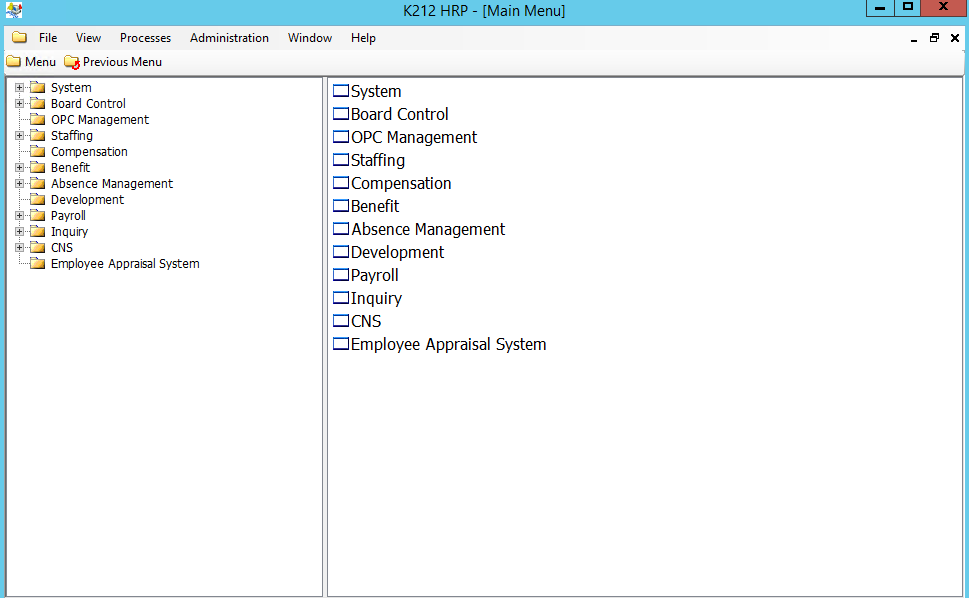
Illustration of the K212 HRP Main Menu
Redisplaying an Open Child Window
It is possible to have many child windows open at the same time. A child window may be open even if it is not currently visible.
To redisplay a child window that is already open click on the Window menu in the Menu Bar and then select the name of the child window / function you wish to display.
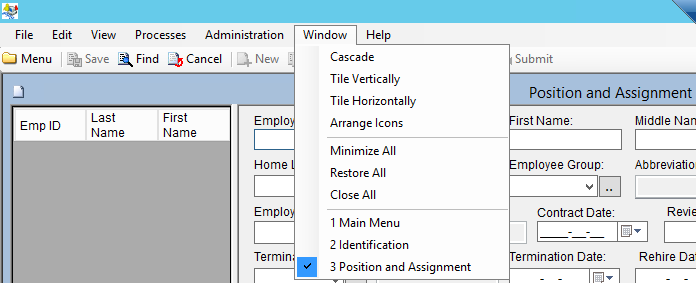
Selecting from the list of open windows (in this example 3 child windows are currently open)
Closing a Child Window
A child window (except for the menu window) may be closed using any of the following:
•Pressing Ctrl + F4
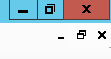
•Clicking on the ‘X’ at the inner top right of the child window as shown below:
Note: “Exit” closes the page. If you have modified any data and have not yet saved, a pop-up message provides you with the option of saving, abandoning the modification, or canceling the exit operation.
Closing any or all of the child windows does not close K212 HRP. K212 HRP remains open as long as the parent window remains open.
Screen Elements within a Child Window
Each Child Window contain different screen elements depending on it’s functionality. The details of each screen element are documented in the individual user guide for each function.
Screen Elements are numbered from left to right and top to bottom
Screen Elements for a Typical Child Window
A typical child window example contains multiple screen elements.
.png)
Example of a child window with each Screen Element labeled.
Screen Element 1 - List of Records
In most cases the record being accessed is one of many possible records available on the system. In these cases, Screen Element 1 usually contains a list of available records.
When you select a record from this list, details of that record are displayed in the screen elements on the right of the screen.
Screen Element 2 - Record Details
Screen Element 2 typically contains detailed information from the record selected in Screen Element 1.
If the Status Bar contains the message “Ready to Search”, then this screen will contain a blank form so that you can enter your search criteria.
.png)
Example of a Blank Form (note the ‘Ready to Search’ message in the bottom left hand corner)
Screen Element 3 - Further Details in a List
Sometimes additional “repeating” details (child records) are available for a record. For example, in Absence Groups there are multiple Algorithm Records for each Absence Group/Account, these Algorithm Records are displayed in Screen Element 3.
Additional Screen Elements
If more information is associated with each code than could reasonably fit on the list in Screen Element 3, then a fourth screen element is used. In this case, Screen Element 4 would contain details of the record currently selected in Screen Element 3. Theoretically this could continue through many more levels. In practice, it is unusual to encounter more than 4 screen elements on a single child window.
Window Resizing
Fields in K212 HRP do not move or resize when you change the size of a window; however, columns in a list of data will automatically change width and height to fill the screen element as you change the size of a window.
The size of individual screen elements can also be changed by clicking and dragging the border between any two screen elements.