Enterprise Test Environment Setup From Production
This document outlines the steps required to create a Maplewood Enterprise test environment from an Enterprise production environment.
1. Create a new share for the test environment (example \\servername\EnterpriseTest.
2. Apply the appropriate share and file level permissions.
3. Copy the contents of the Enterprise production environment to \\servername\EnterpriseTest . (After copying the files the new share should now have a Central and Schools folder).
4. Create a new database using SQL Server Management Studio (example. mwEnterprise_Test).
5. Create a backup of the Enterprise production database.
6. Restore a backup of the Enterprise production database to the mwEnterprise_Test database
7. Run the following script on the Enterprise_Test database to change the structure and data paths in the schools table to the new data location. NOTE the appropriate paths needs to be specified before running the script. ‘\\servername\ProductionPath' is the location of the production data and '\\servername\Enterprise_Test' is the location of the location of the test data.
Declare @OldPath as varchar(500),
@NewPath as varchar(500)
Set @OldPath = '\\servername\ProductionPath'
Set @NewPath = '\\servername\Enterprise_Test'
update school set schools_path = replace(schools_path,@OldPath,@NewPath)
update school set structur_path = replace(structur_path,@OldPath,@NewPath)
8. Run Destlo and change the data paths in the central office structure file ( \\servername\enterprisetest\central) to the new data location. In the Enterprise settings change the server and database to the appropriate names in test environment.
9. Create a shortcut to Central Office School Setup (\programs\wpr\coutils32.exe) on the \\servername\enterprisetest\central
10. Update the Central Office schools file by selecting Create Schools File and specifying the location of the schools folder (\\servername\enterprisetest\schools) and then selecting create.
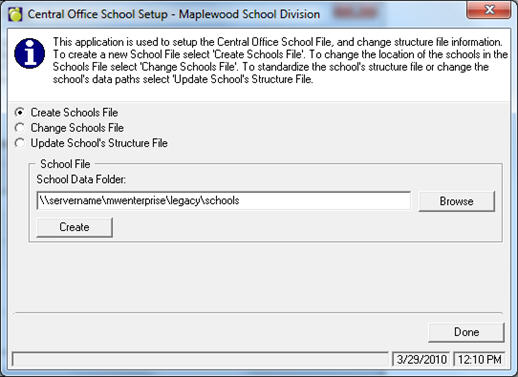
11. Verify the paths and school number.
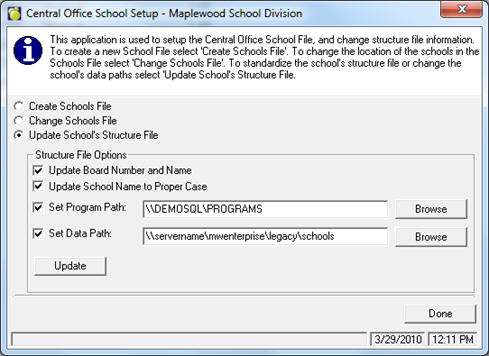
12. After the schools have been verified change the program path and data path of each school by selecting Update School’s Structure File option and select update. NOTE: Replace \\servernamemwenterprise\legacy\schools with the test environment location.
13. Create a shortcut to run Central Office and verify that the schools are properly setup by login in to central office and going to File, Setup. If there are items in the table that are red the path is incorrect or there is no data for that school.
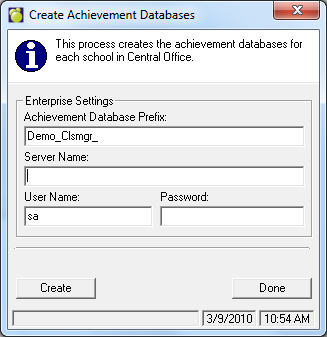
14. The test Enterprise environment is now setup, however the test environment is still using the achievement databases (Classroom Manager) from the production environment. To ensure the achievement databases are not impacted when using the test environment we will need to create a copy of the databases or create an empty set. For testing we recommend creating new databases for the test environment. To create new achievement databases for the test environment create a shortcut to wpr\MWEnIm32.exe and add -ClsMgrDB at the end of the target line. The latest version of mwenim32.exe is available on http://www.maplewood.com/files/forcustomers/Enterprise. The Start In path should be to the test Central Office structure file (\\servername\enterprise_Test). Once the program loads you will have the opportunity to specify the database prefix and server information. We recommend using Demo_Clsmgr_ as the prefix.
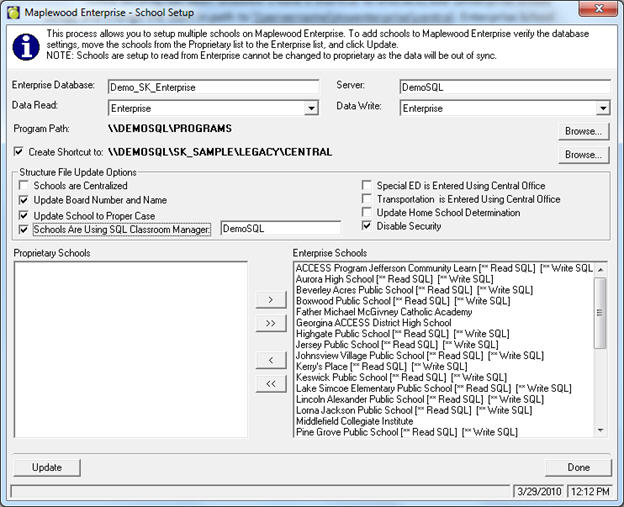
15. NOTE: the next step will require security to be disabled in Central Office. To do so login as supervisor to test Central Office shortcut (\\servername\enterprise_test\central and go under File, Change Security Windows Security.
Once security has been disabled create a shortcut to enscse32.exe (enterprise school setup) and change the start in path to \\servername\Enterprise_Test\central. Enterprise School Setup is used to verify the server, database, and data access flags to ensure they are set to run from the test environment. At this time you may also want to create a shortcut for each school using the Create Shortcut To: option. Once the server, database and data access flags are set to match the test environment click update.