Schools that are part of a school board/division that are using Maplewood Enterprise: The Transfer to Current function is done through Central Office, typically over the summer.
A backup of the Enterprise database is automatically created when the first school transfers to current. It will also create an archive of the past school year, adding each school to the archive as it is transferred to current.
The following steps provide information on how to roll over the schools to the new school year.
STEP 1. Run Transfer to Current for the Central Office
The administration date (e.g. the date set in Maplewood Central Office) must be set to the last date in the central office calendar. The actual date (system date) must be on or after the last day in the school calendar.
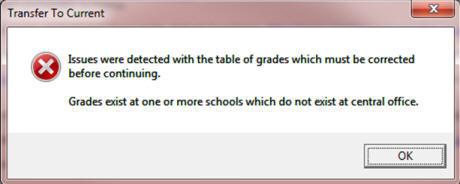
The Central Office table of grades will be used in the Transfer to Current process. Please make sure the table of grades in Central Office contains all possible grades defined in all schools. If there are grades missing from the Central Office table of grades, the Transfer to Current will not run. The following message will appear.
Non-hosted customers only: When creating the archive database, the archive database will need to be defined (database name and where it is located). This step needs to be done by a user with an SQL account equivalent to a System Administrator. You will also need to ensure that you have a location to store the needed configuration files and shortcuts created during the Transfer to Current process. As discussed later, we suggest that the location be a new file share (note that the archive data path cannot exceed 20 characters in length). The SQL Service domain account will need change permissions to this share and modify NTFS rights.
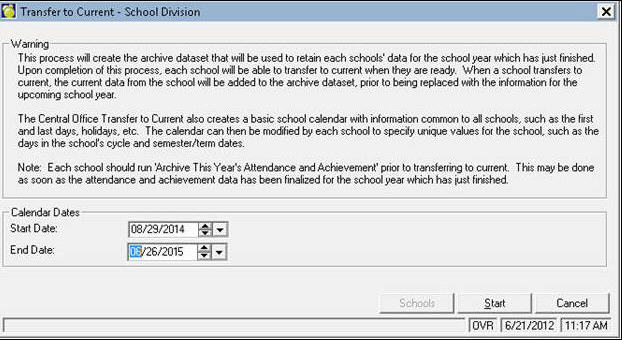
Central Office will need to run Transfer to Current first to prepare the archive database for the schools’ data. This will also allow the central office to enter a start and an end date for the default calendar provided to the schools. Please note:
-
Central Office will receive a message if they select transfer to current when there are schools that have not transferred to current from the previous schools year. This would be typical of a summer school that might still be working in the 2012-13 school year. By now, summer schools should be working in the 2013-2014 school year (for summer school 2014). After summer school is finished, please remember that it also needs to be transferred to current (step 5) so that it gets added to the archive database. This should be done shortly after summer school is finished (and provincial data reporting is completed, if applicable).
-
If schools have not initialized scheduling, they will not be transferred to current. This information will be available when looking at the School Transfer Queue log file.
Here are the steps to Transfer to Current at the Central Office:
A. Within Central Office, change the date to the last day in the calendar using File, Change Date.
B. Select Scheduling, Transfer to New Year, Transfer to Current. Click the Start button and Yes button if you ready to transfer to current.
C. (Maplewood hosting customers may proceed to step D) as the archive databases have been established and the database update message, if applicable, is the only thing that will appear).
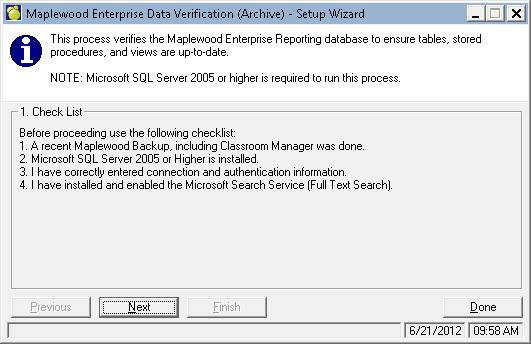
The previous year's archive database needs to be established (e.g. 2013-2014 archive is created when rolling over to the 2014-15 school year):
(Note: the above screen may appear multiple times and if so, click on it each time). Read the following check list and then click Next button to proceed:
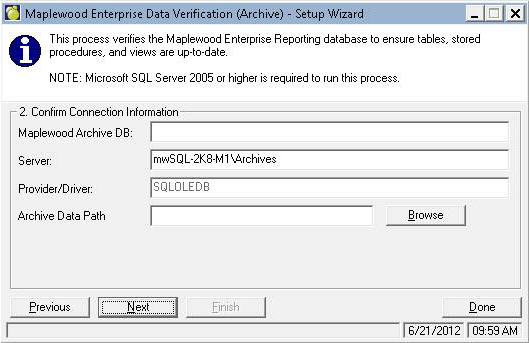
At the next screen (shown below), enter the name of the archive (reporting)database (e.g. YourSchoolName_2013_2014). It will default the Server and Provider/Driver information, however we recommend that the archive databases are placed on a non-production server so that any reporting on the archive database will not impact the performance of the live database’s server. The Archive Data Path should be a new share that will contain the configuration files and shortcuts for the archived data. This path cannot exceed 20 characters in length.
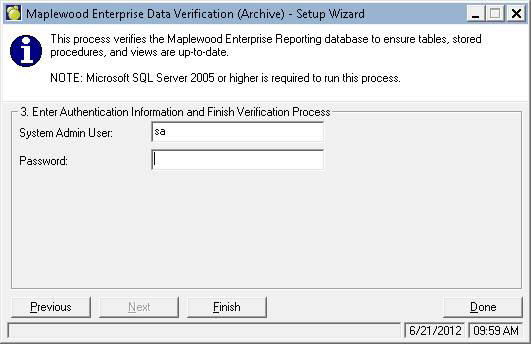
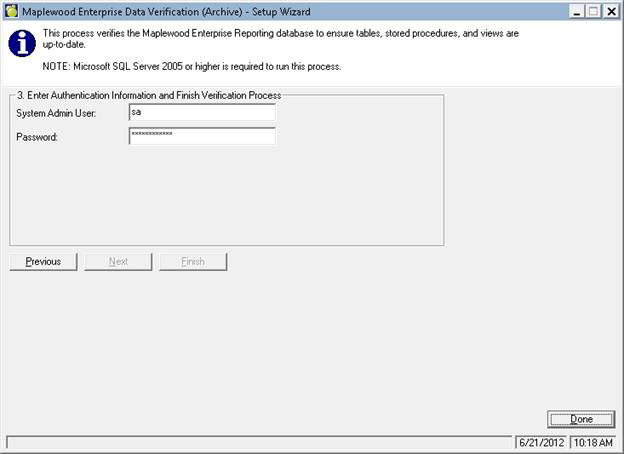
Click the Next button when the above information is entered, then enter the user name and password for the system administrator equivalent account as shown here:
Click Finish button. A message should appear the setup was successful as shown here

Click the OK button (above) and then click Yes to read the log file (below). Make sure there are no error messages in the log file. If any exist, please contact Maplewood.
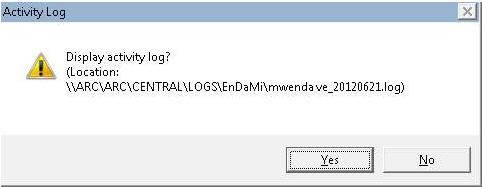
Click Yes to see the log file to ensure no errors, then click Done when finished with the log file.
When returned to the setup wizard (below), click Done.
Upon completion of the archive, shortcuts can be found in the Archive Data Path specified during the Setup Wizard.
D. Upon completion of the transfer to current, the Central Office can use File, School Setup, Calendar, Edit to setup the non-school days in the calendar (e.g. holidays, PD days, etc).
That information will appear in each school’s new calendar when they transfer to current. Once the school has transferred, they will still need to setup the days in the cycle, semester/term dates and exam dates as needed.
STEP 2. Run Transfer to Current for Each School
Individual schools no longer have the option to transfer to current. The ability to transfer a single school, or a group of schools has been added to Maplewood Central Office. Only schools of the same license type can be transferred at the same time (e.g. a group of Secondary schools, or a group of Elementary schools).
*Note: Schools must have their calendar set to the last day of school, and have run initialize scheduling In order for Transfer to Current to run.
Here are the steps to run Transfer to Current for the schools within Central Office:
A. If not already done, within Central Office, change the date to the last day in the calendar using File, Change Date.
B. Select Scheduling, Transfer to New Year, Transfer to Current. Select the school or schools to be transferred to current, or the group of schools for which you wish to run the Transfer to Current.
Click here for a detailed description of the transfer to current options that are presented on the interface. Depending upon the school type (elementary or secondary) and the province/territory, the transfer to current interface will present a list of options tailored for the school or schools (if multiple schools selected via Central Office). Please make sure the settings are correct before clicking the Start button.
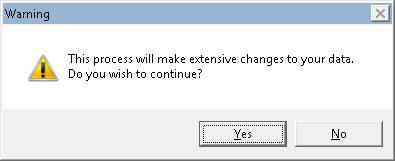
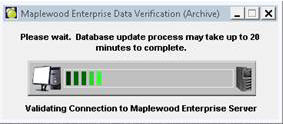
When you start the transfer to current process and say ‘Yes’ to the warning “This process will make extensive changes to your data. Do you wish to continue?”, a new screen will appear when the current year’s data is transferring to the archive database established in step 1. Shortcuts to the school’s archive data will be established for the board/division to use.

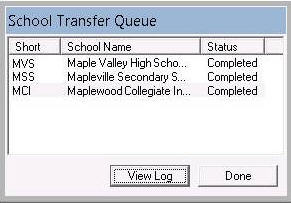
A School Transfer Queue window will open, with the list of schools selected to be transferred, along with the status of those schools. If for any reason a school does not transfer successfully, information about why the school did not transfer can be seen by “mousing over” the name of the school in this list. There is also the option to view a transfer log when all of the schools have completed.
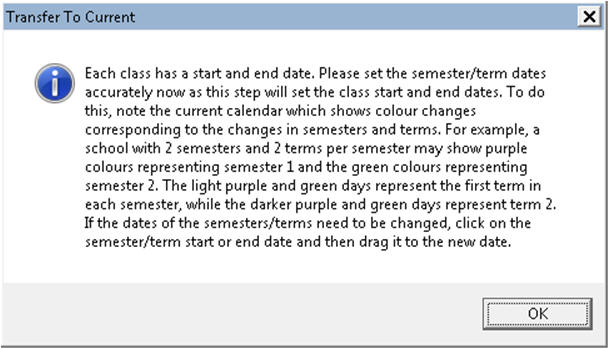
If the school has more than 1 semester or more than 1 term, the following message will be prompted indicating that the proper semester and term dates should be defined.