Electronic File Transfer within SDS
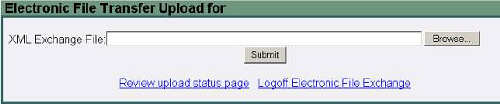
From the SDS website, select the Electronic File Transfer option and login, if needed. The screen should be similar to this one:
Select Browse to find the file to be sent to SDS (it will normally be found in the Maplewood Export\Batch folder) and then select the Submit button. A message should appear indicating that the file was successfully uploaded. Select the Review Upload Status Page link to see the files that have been sent through the “batch" method.

The Message column will indicate Pending until it has been processed by SDS. Periodically check back to this site to see if the Status has changed (hint: Click the Search button (or F5 key) to "refresh" the page without having to leave and then come back). When the Message column includes a link to Error/Warning Details, select the link to see detailed descriptions of the errors. This link is not provided for all file types in which case selecting on the Response file will open it (or right select it and select Open In New Window) to provide more information. At times, the response file doesn't provide specific detail as to who or what class has the error, in which case it must be saved and imported into Maplewood to provide more detailed information.
There will be times when the Response File may need to be processed by Maplewood (e.g. if it contains DEN# for new students). By saving the response file and then importing into Maplewood, the DEN#s are automatically recorded in Maplewood. The instructions for each of the Maplewood options will inform you when it may be necessary to save the response file.
To save the response file, follow these steps: