The Special Ed tab is available to those students with the Special Education box checked within the Enrolment tab. Special education students should have their special needs (exceptionality) selected from the list. A student can have up to 3 exceptionalities. The table is user-defined, but should only be modified upon the recommendation of the Ministry of Education. The table setup is found in Students, Custom Fields/Tables, Special Education, Exceptionalities.
Choose Students, (select student), Special Education tab.
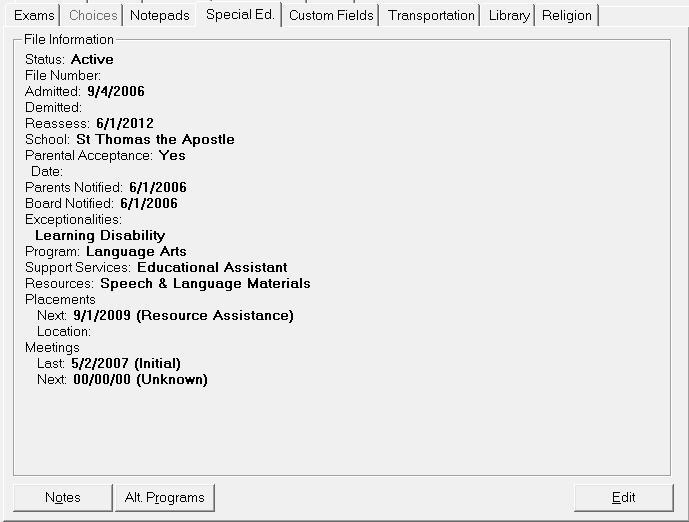
When a student is identified as being in the Special Education program (Edit Enrolment), the program will compare the Mident (Ministry of Education Identification) number of the structur file with the List of Schools. If it finds the matching Mident number, it will enter the school name in the School field of the Special Education tab as it is entered in the List of Schools. If there is no matching Mident number it will include the name of the school, as reported on the structure file.
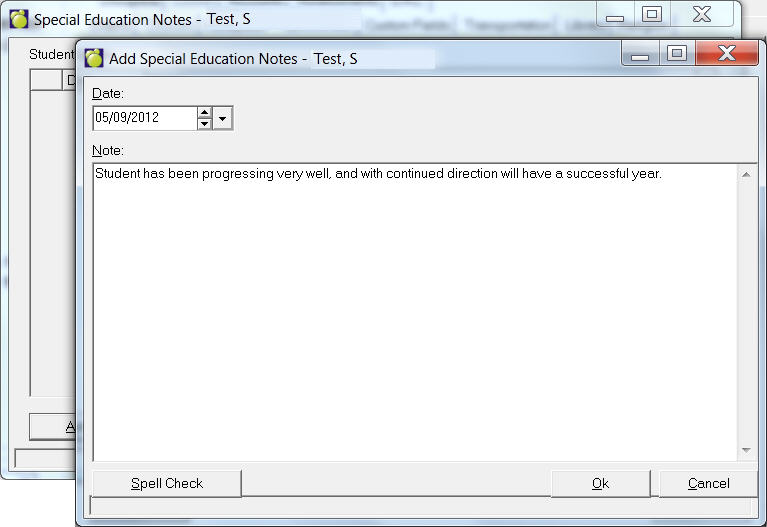
Special Education Notes - Click the Notes button to make Special Education Note entries.
In the Student Notes there will be a list (if any are already recorded). Here you can select the note and click Edit to make changes. You can click Add to enter a new note. Select a note and click Delete to remove a note.
Below is an example of an editing screen for an Special Education note. Use the Spell Check button to check your work before saving.
Alternate Education Notes - Click the Alt. Programs button to make Alternate Education Note entries.
In the Student Notes` there will be a list (if any are already recorded). Here you can select the note and click Edit to make changes. You can click Add to enter a new note. Select a note and click Delete to remove a note.
Printing Special Education Information
When the user clicks the Print button for a student's special education information in student records will now include board defined special education custom fields.
Edit Special Education
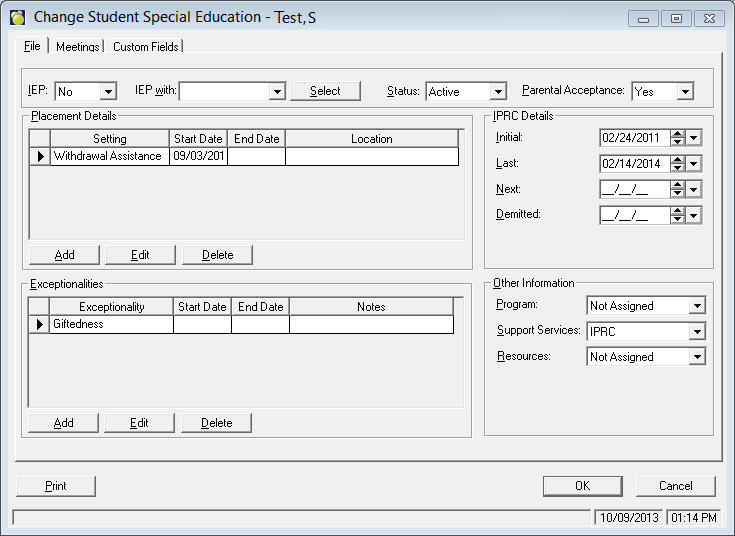
You can edit Special Education File Information by choosing Students, Student Records, selecting a student and clicking Edit on the Special Education tab.
The program is divided into three tabs:
File Tab (which includes Exceptionalities and Specialized Equipment)
Meetings
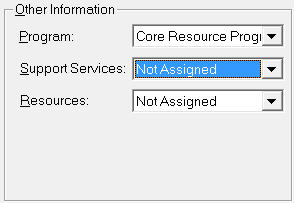
Status, File number, School Name and Parental acceptance. When selecting Program, Support Services and Resources, select from the drop-down list of options. These options are set up under Students, Custom Fields/Tables, Special Education, Programs and Students, Custom Fields/Tables, Special Education, Support Services and Students, Custom Fields/Tables, Special Education, Resources, respectively.
IEP: Select Yes or No from the IEP box.
IEP With: If there are modifications to accompany the IEP, select from the IEP With drop-down list. To add available Modifications to the list click the Select button, click to highlight a modification and click OK. Now you will see the selections in the IEP With drop-down list.
Status: Select Active or Inactive from the drop-down list.
Parental Acceptance: Select Yes or No depending on the parental acceptance of the IEP plan.
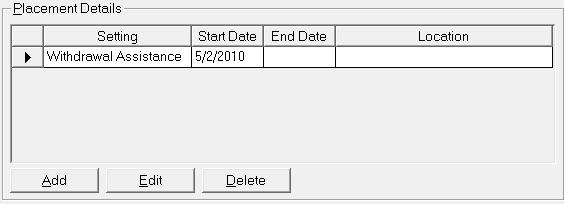
Placement Details
To add a placement click the Add button.
The add screen will look similar to the edit screen below except there will be no fields filled in.
To edit a placement, double-click the placement or select the placement and click Edit.
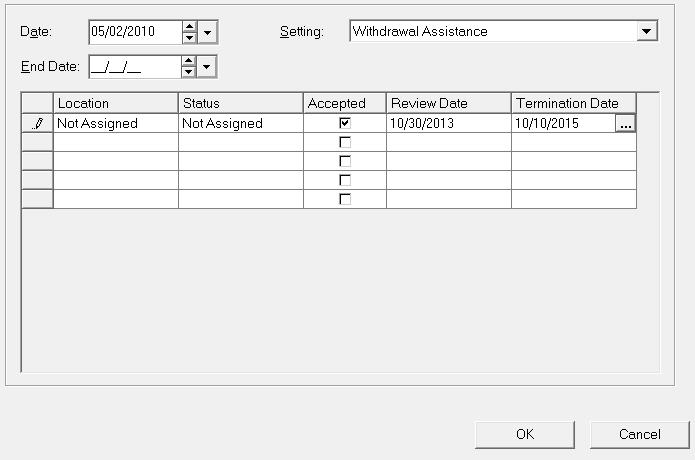
Select the Setting and Date for each placement. In the grid, select the Location, Status (active or not), whether or not the placement was accepted, and Review and Termination Dates. Placement options are set up under Students, Custom Fields/Tables, Special Education, Placement Settings/Placement Locations/Placement Status.
Note: The most recent (date) entry should always be visible on Edit Special Ed so that the most recent entry will be picked up by September Report.
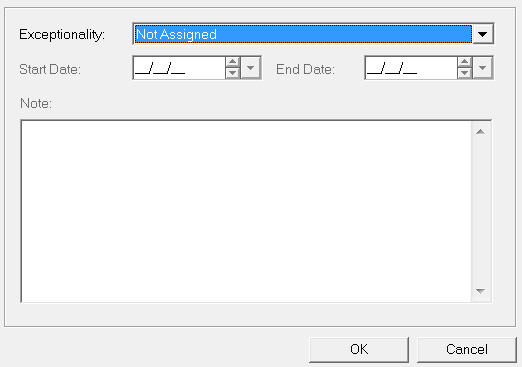
To add an exceptionality click the Add button.
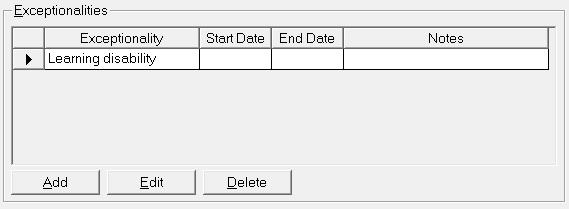
To edit an exceptionality, double-click the placement or select the exceptionality and click Edit.
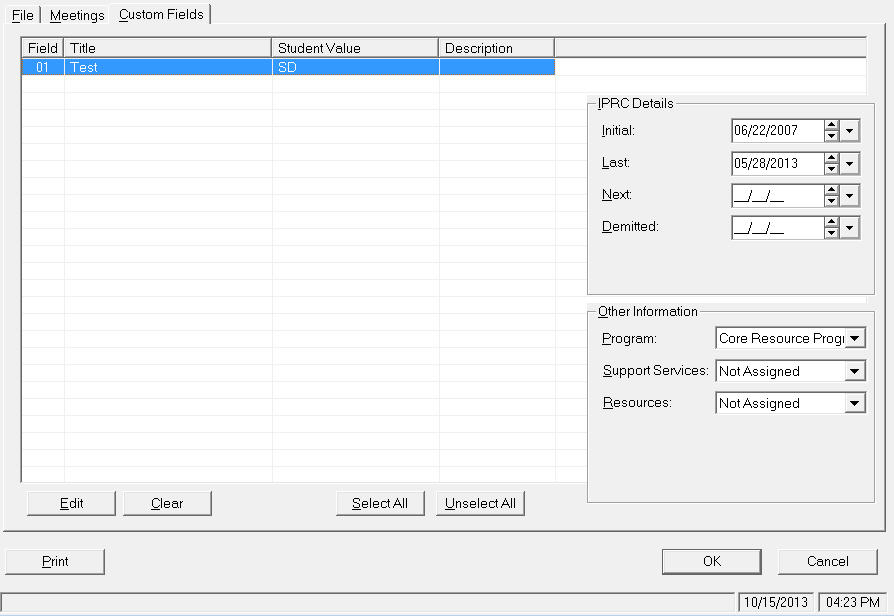
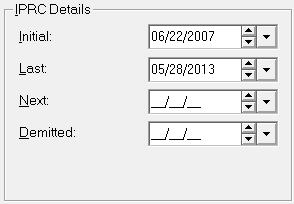
IPRC (The Identification, Placement, and Review Committee):
Enter the Initial Meeting, Last Meeting, Next Meeting and Demitted Dates.
Program, Support Services and Resources: Select an option from the drop-down list for each of these areas.
Set up these Other Information fields under Students, Custom Fields/Tables, Special Ed.
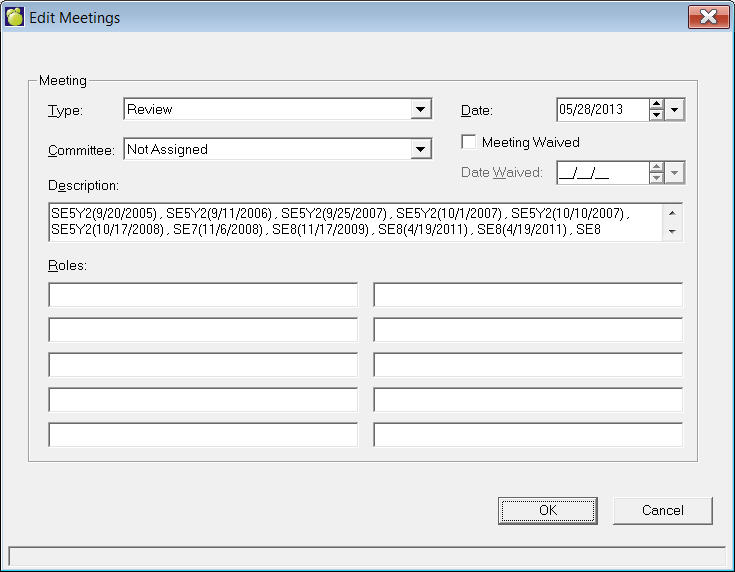
Any previous and next meeting information will be displayed in the box. To set up meeting information, click the Meetings button (the system can store up to 3 meetings.)
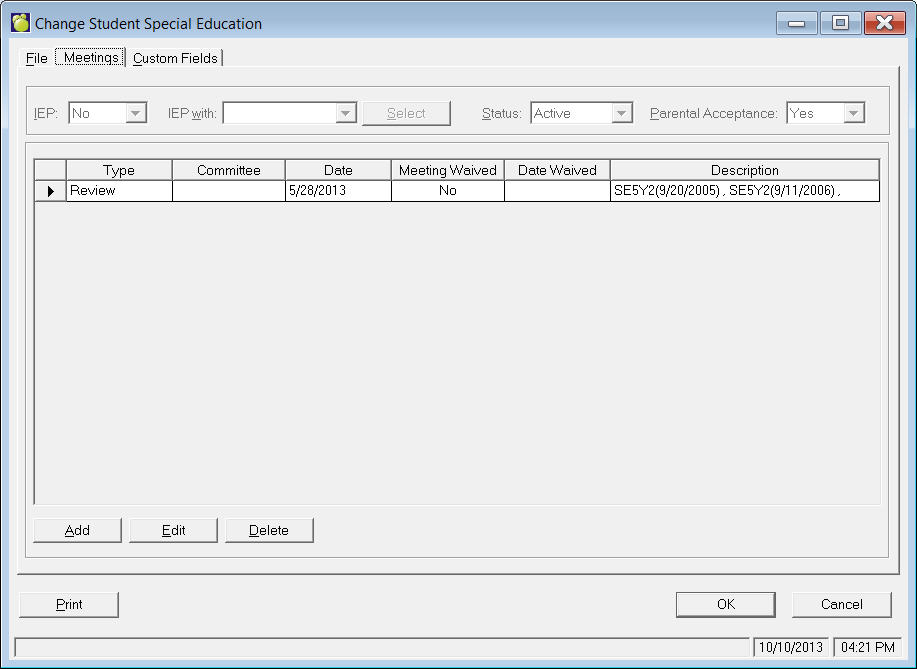
To see details about a meeting, double-click the row containing the meeting that you want, or single click the row and click Edit.
This tab can be displayed in a grid format. By default, all fields are highlighted, and if the user selects Edit, all fields are available for edit. The user can select an individual field, or multiple fields for editing. There is an option to clear, and the clear will remove data from whatever fields are selected.
The table for these Fields is set up under Students, Custom Fields/Tables, Special Education, User Defined Fields. Here you can set up Special Education List Titles and Types for new items or edit existing ones. Types of List items can be List, Text, Numeric Field, Date Field or Yes/No. To edit Alternate Program Notes click the Alt. Programs button on the Special Education tab. There is a box for entering your notes.
In the Custom Fields tab, the tab can be displayed in a grid format.