Prior to adding a charge or payment, please note that recording a dollar value, entries must be a positive number. It is neither necessary to enter the dollar symbol ($) nor the decimal for whole numbers.
Charges are monies that a student owes the school. They can only be positive numbers and are assigned either en masse or individually though the student record. Typically, a school sets up its Fee Types prior to entering charges. If a school makes an error, Charges may be Edited, (adjusted).
Charges appear as black entries on the student record and will appear on Account Bills and other similar reports as a C with their respective invoice number. Please note, if a Charge has been edited, only the new amount will appear on a student record, not the original. To record details of a charge, choose Accounts, Assign Charges and Payments. Select the student or group, and click the Charge button.
Notes:
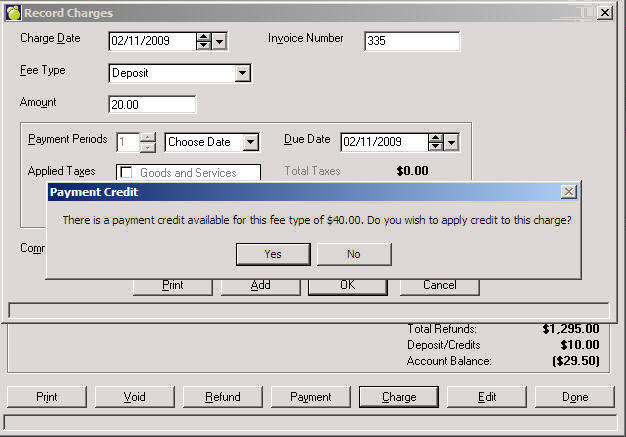
When you create a charge and if there are payment credits it will now ask you if you would like to apply the credits. When you adjust a charge that has a payment associated with it you will get a warning so you can go to the payment to adjust the payment.
Dropping a class that has been charged to a student will result in changing the charge to $0.00 if the class was dropped within the allotted refund period. If the class was dropped after the allotted refund period, the charge will remain in the student's account record.
If a student displays a charge of zero, this in indicative that the original charged amount was edited to zero.
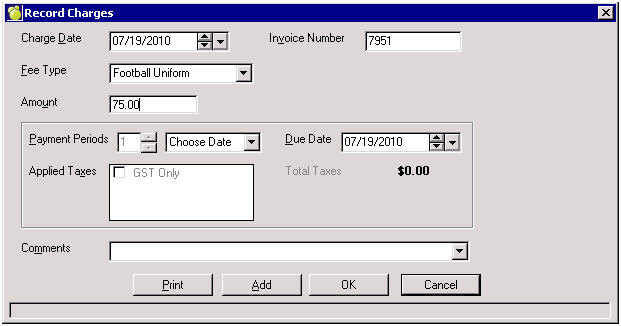
Charges can be assigned individually as well as en masse. A charge is a fee that a student or group of students owes. To record details of a charge, choose Accounts, Assign Charges and Payments. Select the student or group, and click the Charge button to see this box:To make an individual charge, simply press the Charge button. The following fields are explained:
Amount
Simply enter the amount to charge the student. There is no need to enter a $ symbol.
Payment Periods associated with semesters, 'End of Semester' and Beginning of Semester' will only allow a number up to the actual semesters in the school's setup.
Payment Periods for 'End of Year' and 'Beginning of Year' will render the numeric field inactive and the date field will default to the 1st and last date of the calendar upcoming date. i.e. if current date is July, 2008, the 'beginning year' date is Jan 1, 2009 and 'end year' date is December 31, 2008. When a student is charged for future classes (Semester 2 classes) at the beginning of the school year but drops the class within the allowable 'refund' time once he/she participates in the class, the program will change the charge to $0.00.
i.e. All classes for Semester 1 and 2 are assigned at the beginning of the school year. Student drops a Semester 2 class within the 'refund time'. Program will calculate the 'refund' option as of Semester 2 start date. The Account transaction for the class fee will be changed to $0.00.
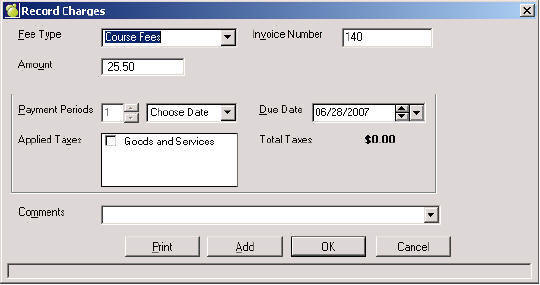
Applied Taxes Any defined taxes will appear in the box. Simply check the tax to apply the tax to the amount. The tax will be automatically calculated and added to the amount to calculate the total charge to the student upon pressing the Print/Add/OK button. If Fee Type has already been associated with a tax, the box will be automatically checked and the amount calculated.
CommentPrint
Will both print an invoice for the student and add the charge to the student account.
Add
Adds the Charge to the student’s account and keeps the user in the charge screen to add another charge, thus saving time on the data entry.
OK
Adds the Charge to the student’s account and exits the Charge option.
Note: If a Deposit/Payment Credit exists when making a charge a message will appear asking if user would like to apply the credit to the payment. If select yes, the next screen will require an amount, from the credit, to be applied to the charge.
Note: If a Deposit/Payment Credit exists when making a charge a message will appear asking if user would like to apply the credit to the payment. If select yes, the next screen will require an amount, from the credit, to be applied to the charge.
Only Charges may be edited (adjusted). When editing a Charge, a comment must be entered to explain the action. Although hidden on the Students’ Account Tab, there is an audit trail behind-the-scenes which is included with exports and available for any forensic auditing purposes.
Edits do not appear as entries on the student record and will appear on Account Bills and other similar reports as an A with their respective invoice number.
1. Select a Charge and click the Edit button. The Add button will be disabled since you are only adjusting the selected Charge.
Note: When editing, be sure to select a Charge and then click Edit because the Transaction will correspond to the selection that you make, unlike when you set up a Charge or make a Payment.
2. Make any necessary adjustments. A Comment is required to complete the edit (adjustment). If you don't have any set up, see Comments for setup information.
3. Click OK. This new amount will appear in on the Account screen of the student.