Note: Please consult the manual for Report Card Marks/Comments by Class and Report Card Marks/Comments by Student for general reference on navigating around this screen, entering marks (including entering overrides and mass-assigning a mark), entering comments, and how to enable/disable optional features. This section of the manual concentrates specifically on the creation and maintenance of a markbook.
When the markbook feature is enabled, From and To date fields will appear
in the header to allow the user to show markbook information dated within
the specified date range.
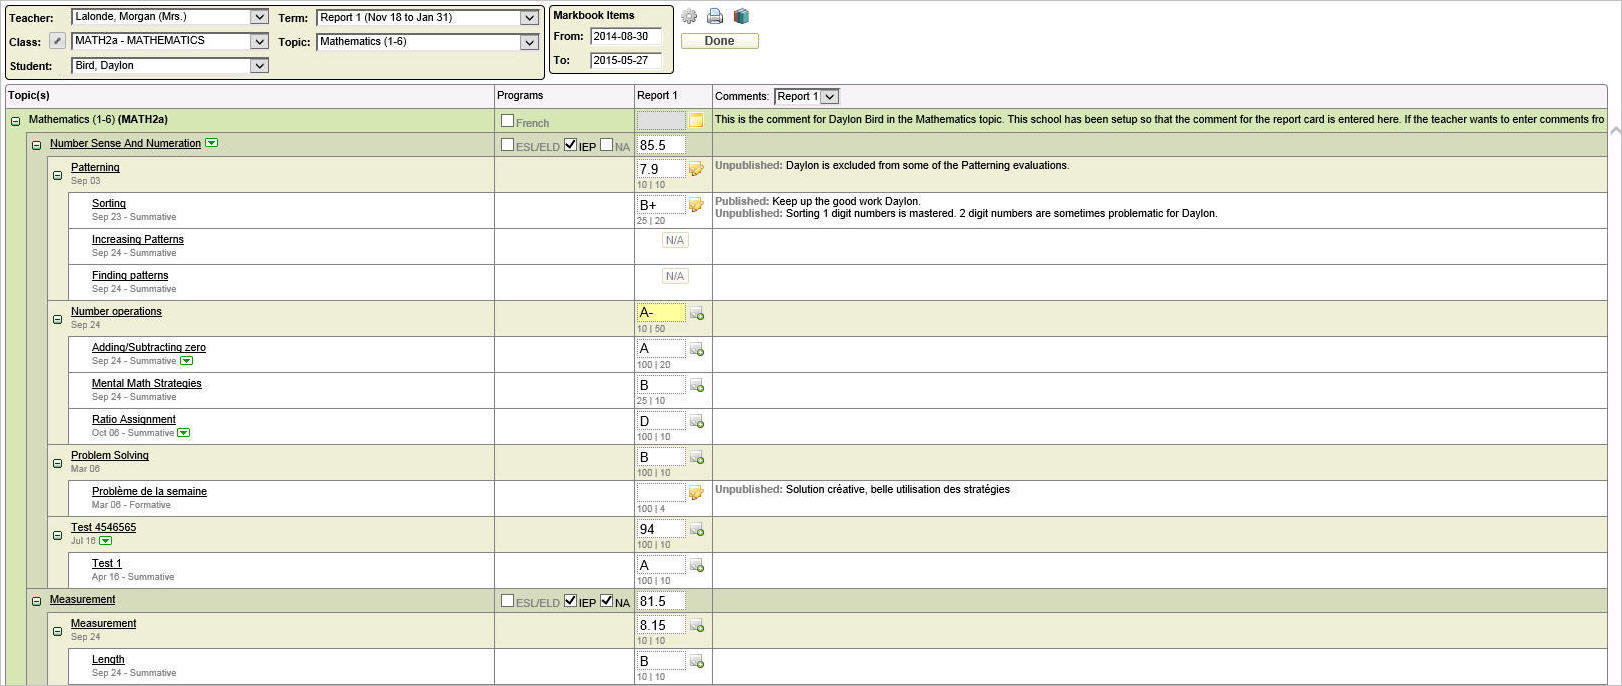
To help illustrate the potential of markbooks, here is an example of a markbook that is already set up.
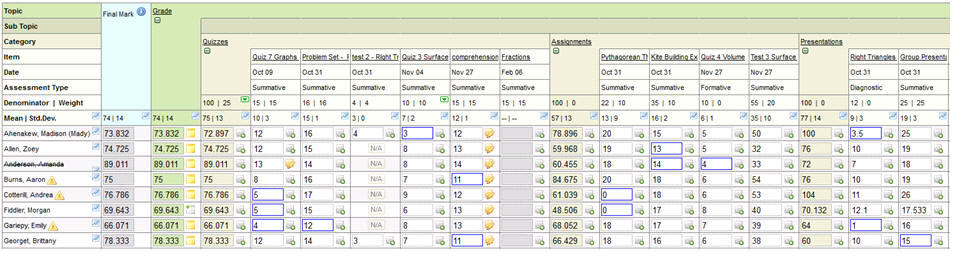
As you read the information below, there are many features that can be turned on or off. For example, this image shows deleted students, alerts/flags, Final Mark enabled, markbook comments, statistics including a blue box around students with marks below the standard deviation, curriculum defined for some areas, and no formatting of numbers so that all decimals appear. Many of the options are controlled Options icon located above the markbook as explained in Options in Marks/Comments by Class, and others (like alerts/flags and final mark) are controlled by the school office. The Options settings can provide some control over the markbook information presented on the screen (e.g. Categories followed by Markbook Items), but there features that allow the order of columns to be changed (Sorting Markbook Items and Categories ), as well as easy ways to hide categories and topics (Expanding and Collapsing Categories and Topics).
Just like the entry of report card marks, there may be some mark cells that are disabled. In the above example, the cells in the Final Mark column have a grey background because the office has locked that term for now (note: many schools don't use the final mark but if they do, the office would enable it for the final report card, however marks will still calculate to that term even though it is locked). With markbooks, mark cells may also be disabled for mark entry by showing N/A if the student is excluded (see Excluding Students from Category or Markbook Item). Markbook items, such as "Fractions" in the above example, are given a date, and if that date is entered after the end of the term, the mark cells are also disabled. If the user holds the mouse over one of these mark cells, a message will appear indicating this. In this example, the date may be edited by clicking the Fractions hyperlink to access the Edit option (as explained later)
Now that you have a general idea of the capacity of the markbook, the information below will start from the beginning to explain how to set up and use markbooks.
When you begin a new school term, your class may look something like this in the markbook screen:

If you teach classes that have the same terms and topics, and there is the possibility that you may want to view/enter marks and comments for the students in these classes using one combined class lists, use the Link Similar Classes feature prior to setting up the markbook. Once they are linked, the class selection box will still provide the ability to select each class individually, in addition to the ability to select those classes that are linked together. Linked classes must be done prior to the markbook setup.
Rather than create a markbook from the beginning, the Copy Markbook feature can be used to select the markbook setup from another class. This may include the markbooks of classes taught by any teacher at the school this year or last year. Schools typically clear out the markbook templates beyond this, therefore, older markbook templates may or may not be available.
Every topic/subtopic that gets evaluated in the report card can have its own markbook*. For example, if the report card has an overall grade along with an evaluation for the Learning Skill 'Responsibility', the markbooks may be created for the Grade topic as well as the Responsibility subtopic, however, a teacher will typically only create one markbook (usually tied to the overall grade).
*Just like the entry of report card marks where marks cannot be entered for topics that have subtopics, markbooks can only be created under topics that do not have subtopics. For example if the main topic is Mathematics and underneath Mathematics are four subtopics: Numeration, Measurement, Geometry and Algebra, the markbook cannot be created under Mathematics itself, but a separate markbook can be created under each subtopic. If a topic has no subtopics, for example the secondary topic of “Grade”, the markbook can be built directly under that topic. Also, please note that the school office may exclude specific terms, topics and letter grade groups from the markbooks (e.g. the office can prevent a teacher from creating a markbook for the Responsibility subtopic).
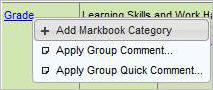
Categories are teacher-defined, and are used to help the teacher organize the marks that will be stored in the markbook. To build a brand new markbook, begin by creating categories under the topic (or subtopic) that will contain the markbook (e.g. Grade topic). When no markbook exists, as in the image above and below, all topics that allow a markbook are highlighted by a blue hyperlink. Click the topic or subtopic hyperlink and choose Add Markbook Category to begin.
At least one markbook category must exist, and once it is defined, a markbook officially exists and all the hyperlinks turn from blue to black hyperlinks.
The definition and layout of the categories is completely up to the teacher. Categories can be: Tests, Quizzes, Assignments; or something like Knowledge, Communication, Application, or any configuration that makes sense to the teacher.
Note: If the categorization of items is not required, create a category such as "Assessments" and then all markbook items are entered under this category. Although not recommended, it is possible to create only categories (e.g. one category for every assessment) with the category mark representing the student's mark in the assessment. We strongly discourage this approach, since the category marks may be easily overwritten by a calculated value if a markbook item is accidently added and marks are entered for that item.
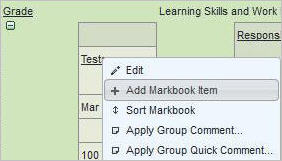
Markbook items are the individual assessment results (e.g. test scores, project marks, participation marks, etc.) that the teacher wants to record in the markbook. The markbook item is added according to the category that best fits the item. The teacher decides the category from their user-defined categories. Click the category hyperlink (e.g. Tests in the image below) and choose Add Markbook Item:
Note: Markbook items are added under the category. Entering achievement at the category level may be used when a single mark is required and there is no other course work for that evaluation (e.g., an exam).
Beyond the storage of the students' assessment results, the markbook
can be used to help the teacher determine the student's report card mark.
This process can only be done accurately if the categories and markbook
items are defined correctly. Please read the following detailed
information to ensure that the markbook is set up correctly for the class. This
includes weighting the categories and markbook items, sharing information
with students and parents, and excluding certain students from the category
or markbook item.
Add/Edit/Save/Delete/Copy
Category
Add/Edit/Save/Delete/Copy
Markbook Item
Excluding
Students from Category or Markbook Item
Student specific comments may be recorded for every category and every
markbook item. For more information, please see:
Comments in the Markbook
As the categories and markbook items are added, the layout of the markbook
can be customized. Please read the following sections for information
on changing the presentation of the markbook information:
Options in Marks/Comments
by Class
Sorting Markbook Items
and Categories
Expanding and
Collapsing Categories and Topics
Working
with an Individual Student's Markbook (Using Marks/Comments by Student)
Some teachers may want to also expand the use of the markbook to tie curriculum
to the markbook, and assign homework briefly explained in these sections:
Add a new category by clicking the topic/subtopic hyperlink then select Add Markbook Category: As explained in Creating a New Markbook Step 1. Create Categories, a category is added under the topic (or subtopic) that contains the markbook (e.g. Grade topic). Click the topic (or subtopic) hyperlink and choose Add Markbook Category option to begin.
Edit an existing category by clicking the category hyperlink then select Edit: As shown in the image in Step 2. Create Markbook Items, click the Tests hyperlink to access the Edit option.
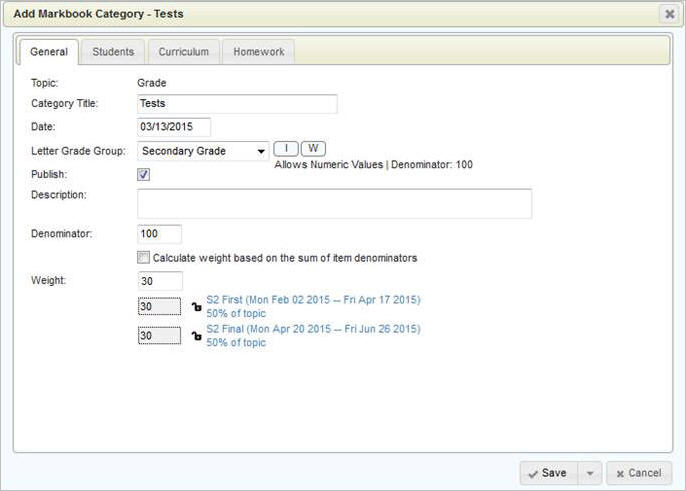
When adding a new category or editing an existing one, a screen similar to the example below will appear:
The Cancel button in the lower right corner can be used to exit the screen without saving any changes, while the Save button will exit the screen upon Saving the information. There is a drop down button beside the Save button to provide additional save options. See Save Options for more information. If editing an existing category, a Delete button and a Copy button will also appear in the lower left corner. See Delete Category and Copy Category for more information on these features.
The add/edit category interface has 4 tabs. The General tab is where the category must be defined accurately. The Students tab presents the students in the class and allows the teacher to exclude students from the category as explained in Excluding Students from Category or Markbook Item. The Curriculum tab allows a teacher to associate curricular elements with a markbook category or item, while the Homework tab allows homework to be associated with the category or markbook item.
Topic: This field is not editable as it is for reference only. It displays the topic under which you are building this markbook.
Category Title: Must be unique within this topic in this class.
Date: The date is for the teacher's reference only. Click the box to get to the calendar to change this date.
Letter Grade Group: This determines which letters, if any, will be allowed in the calculated (or manually entered) category mark. The school office can control the defaulted group that appears* when adding a new category, so the correct value should automatically appear, however, the drop down arrow will allow a different group to be selected. The letter grade groups are school defined, whereby the school controls what letters may be allowed and whether numeric grades are allowed for each group. The option of “Numeric Only” is also available. Each time you change the letter grade group selection, the potential letters will display on the right, along with a note as to whether numeric entry is allowed. The Denominator is the denominator of the numeric equivalents of any letters in the group (e.g. the school office can set numeric equivalents such as A- is equivalent to 83/100).
* From the school office, the Define Topic setup includes the markbook defaults for this field.
Publish: This determines if parents and students will be able to see the category through the Maplewood connectEd Parent/Student site. Important notes:
- If a category is not published, items underneath it will not be published even if they are marked as published.
- All weighted marks entered still calculate into the summary mark. Unchecking publish causes the Categories/Items to be excluded from printouts and the Maplewood connectEd Parent/Student site.
Description: A description is optional, but if necessary, it provides space for a more detailed description of the markbook category.
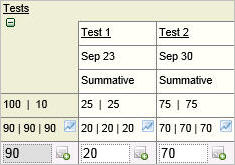
Denominator: The ‘out of’ mark. For a category, the denominator is usually out of 100, if you want the markbook items to calculate a category mark displayed as a percentage, as shown in this first example below where the Tests category has a denominator of 100, and the student's Tests category is calculating to a mark of 90.
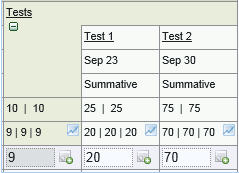
Or, sometimes, the teacher wants the category mark to represent the weighting of the category group. If the Tests category is weighted as 10 toward the report card mark, if the denominator of the Tests category is set to 10, then the student's Tests category is calculating to a mark of 9 as shown below.
Calculate weight based on the sum of item denominators: This setting will force the category’s weight to match that of the sum of the markbook item denominators. This setting is not recommended but is available for use by those teachers who simply want the report card mark to represent the sum of the students marks divided by the sum of the denominators. If using this option to get this overall affect, we strongly suggest the following:
- only record markbook items that you want
included in the calculated report card mark (e.g. do not include markbook
items with 0 weight because their denominators will still be summed)
- make sure this setting is checked off for all categories in the markbook
- make sure all markbook items are weighted the same as their denominator
- do not use the feature to exclude students from a category or markbook
item as their marks will be calculated as if they are included.
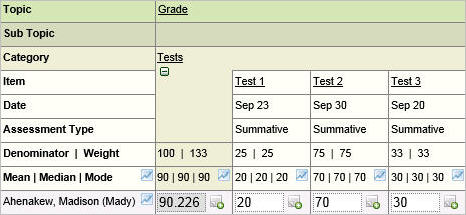
Here is an example 3 tests with a denominator totaling 133, and therefore, the Tests category is weighted as 133 toward the overall report card mark. Also note that each test is weighted the same as the test denominator.
Note: When this setting is used, the Weight field (below), is not applicable and therefore the weight fields are removed from the interface. The term dates are still displayed for reference though.
Weight: The weight of this category when calculating the topic (report card) mark for a term. If a teacher creates 3 categories, and the 3 categories are weighted 10, 20, and 10 respectively, the category with the weight of 10 (as shown in the first example below) will mean that the student's category mark (which is automatically calculated based on the markbook items added for that category) will count 25% toward the topic mark. This % of the topic mark is calculated by taking the weight and dividing it by the sum of all the category weights for the term (e.g. 10/40 =25%).
This weighting section is slightly different depending on whether the markbook is using the cumulative or non-cumulative markbook style (this style is determined by the school office). If check boxes appear beside the weights, then refer to the instructions for the non-cumulative markbook. If no check boxes appear beside the weights, refer to the cumulative markbook.
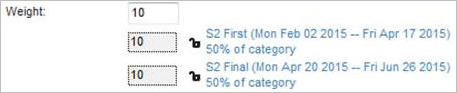
When entering weights in a cumulative markbook, there is only one weight value that can be entered and this value will get populated to all applicable terms in the markbook. An example of the weights area is shown below. You can enter the weight into the top box, and it will get copied into the appropriate terms below. The ‘unlocked’ symbol does not necessarily mean the term is unlocked, just that the category is going to be applied to that term. Here is an example of a category added during the first report card term for the class, and its weight is set to 10. The same weighting will appear in the second term automatically so that the marks entered in term 1 (first term) are also considered in the calculation of the term 2 (final) report card mark (the final mark considers all the marks for the entire year).

Note: the weighting can be changed in later in time, however, the new
weight will only apply to those terms that have the 'unlocked' symbol.
Therefore, changing the weight during the second term will show the original
weight in the locked first term, and the new weight in the unlocked term(s).
Here's a different example of a cumulative markbook where the weight was
changed from 0 to 10, and since the first term report cards have been
locked to prevent any changes, the new weight is only applied to the unlocked
terms:

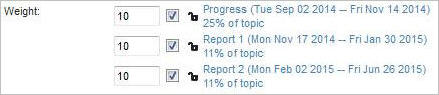
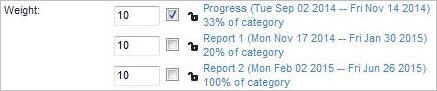
When entering weights in a non-cumulative markbook, the teacher checks off the terms that will use the category, and then enters the weight of the category for the each selected terms. Only the unlocked terms may be edited and each term can have a different weight. Here's an example, showing a category that is weighted as 10 for the 3 report card periods. The % of the topic mark will vary depending upon the other categories selected in each term.
Note: At least one term must be checked off before saving the category in a non-cumulative markbook.
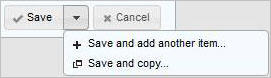
Once the category is defined, the category must be saved by clicking the Save button or choosing one of the Save Options that are presented upon clicking the drop down arrow to the right of the Save button, as shown below when saving a category for the first time. All options except “Save and copy” are also available when editing an existing category (since the edit category interface has a separate Copy button).
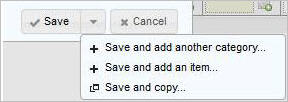
Save: Simply save the current category and close the window.
Save and add another category: Save the current category and leave the window open, ready for the addition of another category.
Save and add an item: Save the current category and open the Add New Item window to allow the entry of a new markbook item for this category (see for Add/Edit/Save/Delete/Copy Markbook Item for information adding items).
Save and copy: Save the current category and bring up the Copy dialog to copy this new category to another topic (in this class or another one). See Copy Category for additional information.
When editing an existing category, a Delete button appears in the bottom left corner.
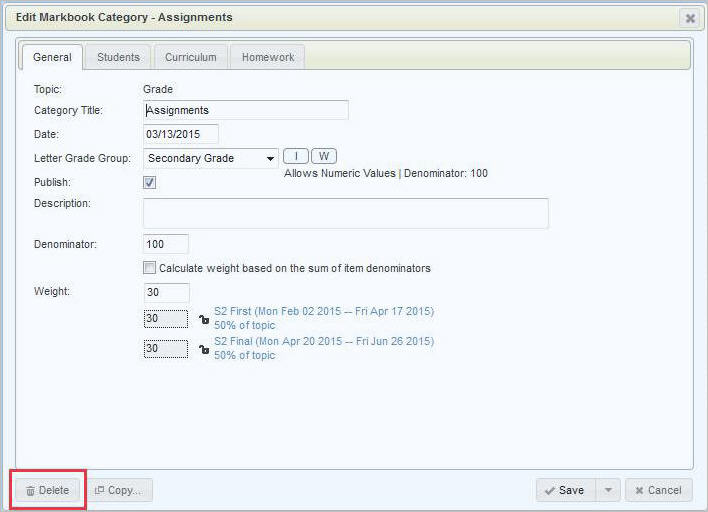
When attempting to delete the category, you will be reminded that any items under this category will also be deleted, however, you will be prevented from deleting a category in which there are any marks or comments:

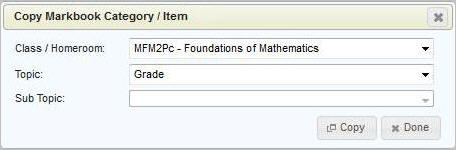
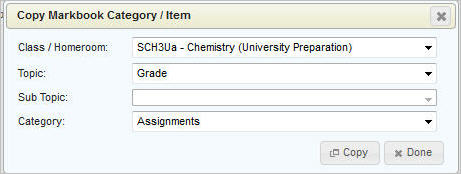
When you edit a category, you will have access to a Copy button at the bottom so that you can copy this category to another topic within this class (e.g. if maintaining multiple markbooks for one class) or to another class completely.
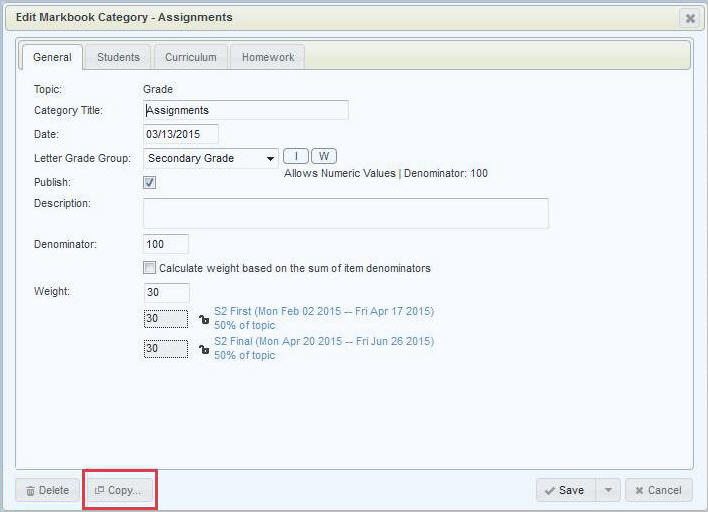
Your copy Markbook Category/Item screen will default to the current class and topic but you can change it to copy to any one of your classes.
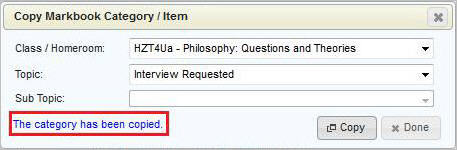
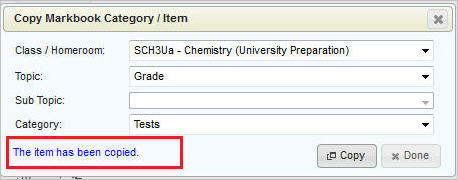
Once the category is successfully copied, blue text will appear for a few seconds, indicating success. The window remains open, to allow you to keep copying if you wish to.
It will not allow you to copy to a topic that already has a category with the same name:

Markbook items are the individual assessment results (e.g. test scores, project marks, participation marks, etc.) that the teacher wants to record in the markbook. The markbook item is added according to the category that best fits the item. The teacher decides the category from their user-defined categories.
Add a new markbook item by clicking the category hyperlink then select Add Markbook Item: As shown below, clicking the category title Tests will show the Add Markbook Item option:

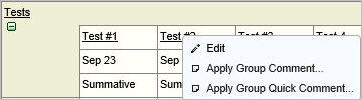
Edit an existing markbook item by clicking the item's title hyperlink then select Edit if a menu appears: If the markbook item is no longer available for mark entry (e.g. editing an item from a previous report card term), the edit screen will automatically appear, however, if the markbook item is for an unlocked term, as shown below, clicking the title (e.g. Test #2) will show the Edit option:
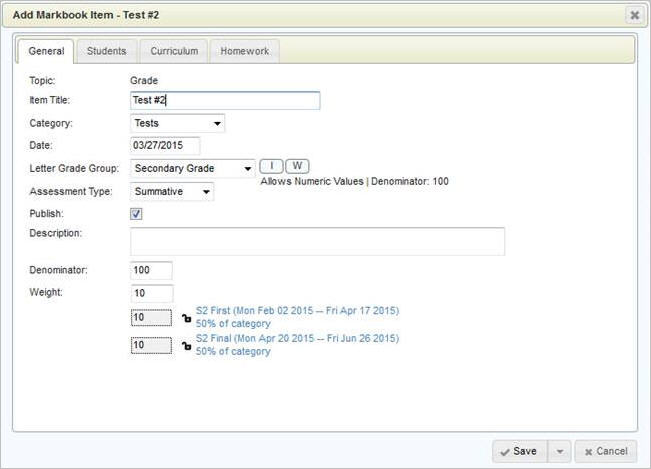
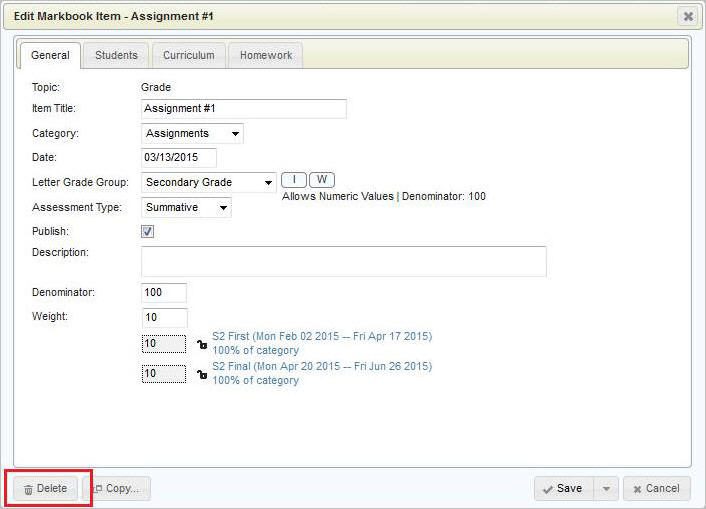
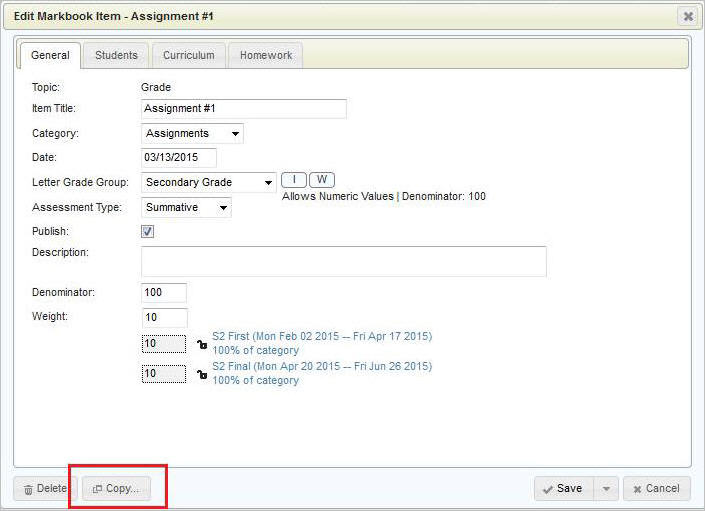
When adding a new markbook item or editing an existing one, a screen similar to the example below will appear:
The Cancel button in the lower right corner can be used to exit the screen without saving any changes, while the Save button will exit the screen upon Saving the information. There is a drop down button beside the Save button to provide additional save options. See Save Options for more information. If editing an existing markbook item, a Delete button and a Copy button will also appear in the lower left corner. See Delete Markbook Item and Copy Markbook Item for more information on these features.
The add/edit category interface has 4 tabs. The General tab is where the category must be defined accurately. The Students tab presents the students in the class and allows the teacher to exclude students from the category as explained in Excluding Students from Category or Markbook Item. The Curriculum tab allows a teacher to associate curricular elements with a markbook category or item, while the Homework tab allows homework to be associated with the category or markbook item.
Topic: This field is not editable as it is for reference only. It displays the topic under which you are building this markbook.
Item Title: Must be unique within this category, and should represent the assessment being recorded in the markbook.
Category: This is the category in which this markbook item will count towards. It will default the category selected when adding the item. You can change the category of an existing markbook item, as long as there are no marks in previous terms that have been locked by the office.
Date: This should represent the date of the assessment. When a new markbook item is added, it will default to today's date. Clicking the date box will allow the date to be changed either by typing in a new date or selecting the desired date from the calendar that automatically appears. Note: if you enter a date that falls in the range of a locked term (e.g. a date corresponding to a past or future report card term), entry of marks will be prohibited.
Letter Grade Group: This determines which letters, if any, will be allowed to be entered into the students' marks for this markbook item. The school office can control the defaulted group that appears* when adding a new item, so the correct value should automatically appear, however, the drop down arrow will allow a different group to be selected. The letter grade groups are school defined, whereby the school controls what letters may be allowed and whether numeric grades are allowed for each group. The option of “Numeric Only” is also available. Each time you change the letter grade group selection, the potential letters will display on the right, along with a note as to whether numeric entry is allowed. The Denominator is the denominator of the numeric equivalents of any letters in the group (e.g. the school office can set numeric equivalents such as A- is equivalent to 83/100).
* From the school office, the Define Topic setup includes the markbook defaults for this field.
Assessment Type: Each markbook item will default to summative, however, it may be changed to diagnostic or formative. By default, summative markbook items are weighted (e.g. they count toward the report card mark) while diagnostic and formative markbook items typically are not counted toward the report card mark (e.g. they should be weighted zero). Here are general descriptions of the three assessment types:
· Diagnostic - This type of assessment can help you identify your students’ current knowledge of a subject, their skill sets and capabilities, and to clarify misconceptions before teaching takes place. Knowing students’ strengths and weaknesses can help you better plan what to teach and how to teach it. Types of diagnostic assessments may include pre-tests, self-assessments, and interviews.
· Formative - Formative assessment provides feedback and information during the instructional process, while learning is taking place, and while learning is occurring. Formative assessment measures student progress but it can also assess your own progress as an instructor.
· Summative - Summative is the default option in this dropdown box and will likely be used most often. Summative marks should be included in the report card mark calculation and therefore should be assigned a weight. Summative assessment takes place after the learning has been completed and provides information and feedback that sums up the teaching and learning process.
Note: Maplewood does not force a zero into the weight field when Formative or Diagnostic is chosen, but prompts you to change the weight to zero. Every item with a value above zero in the weight field will be included in the mark calculation regardless of the selected Assessment Type.
Publish: This determines if parents and students will be able to see this markbook item through the Maplewood connectEd Parent/Student site. Important notes:
- If a category is not published, items underneath
it will not be published even if they are marked as published.
- All weighted marks entered still calculate into the summary mark. Unchecking
publish causes the Categories/Items to be excluded from printouts and
the Maplewood connectEd Parent/Student site.
Description: A description is optional, but if necessary, it provides space for a more detailed description of the markbook item.
Denominator: The ‘out of’ mark (e.g. the denominator of the test). Note: sometimes teachers award bonus marks where a student's mark can be greater than the denominator. A mark up to 150% of the denominator will be accepted (e.g. if a denominator is 50, a student can have a mark from 0 to 75).
Weight: The weight of this markbook item when automatically calculating the category mark for a term. If a teacher has a category called Tests with 4 tests. The 4 tests have a denominator of 100 each. If the weighting of the 4 tests were equal (eg. 10, 10, 10, 10 or 25, 25, 25, 25), then a student with marks of 60, 70, 80 and 90 would have a 75 in the Tests category. The student's marks in each of those tests will count 25% toward the category mark. This % of category mark is calculated by taking the weight and dividing it by the sum of all the item weights in that category (e.g. 10/40 = 25%). As more markbook items are added, this % of category value will change.
If those same tests were weighted as 10, 10, 10, and 20, the student's Tests category mark would be 78 (the sum of (60x10) + (70x10) + (80X10) + (90x20) divided by the sum of the weights 50). Tests 1 to 3 would count as 20% of category mark, and test 4 would count as 40%.
Weights are often weighted the same as the denominator of the item (e.g. a test out 83 is weighted as 83), but the weighting can be anything the teacher wants.
This weighting section is slightly different depending on whether the markbook is using the cumulative or non-cumulative markbook style (this style is determined by the school office). If check boxes appear beside the weights, then refer to the instructions for the non-cumulative markbook. If no check boxes appear beside the weights, refer to the cumulative markbook.
When entering weights in a cumulative markbook, there is only one weight value that can be entered and this value will get populated to all applicable terms in the markbook. An example of the weights area is shown below. You can enter the weight into the top box, and it will get copied into the appropriate terms below. The ‘unlocked’ symbol does not necessarily mean the term is unlocked, just that the category is going to be applied to that term. Here is an example of a category added during the first report card term for the class, and its weight is set to 10. The same weighting will appear in the second term automatically so that the marks entered in term 1 (first term) are also considered in the calculation of the term 2 (final) report card mark (the final mark considers all the marks for the entire year).
Note: the weighting can be changed later in time, however, the new weight will only apply to those terms that have the 'unlocked' symbol. Therefore, changing the weight during the second term will show the original weight in the locked first term, and the new weight in the unlocked term(s).
When entering weights in a non-cumulative markbook, the teacher checks off the term (or terms) that will use the markbook item, and then enters the weight of the item for the each selected terms. Only the unlocked terms may be edited and each term can have a different weight. Here's an example, showing a markbook item that is weighted as 10 for the only the first report card period. The % of the category mark will vary depending upon the other markbook items selected in each term. NOTE: although weights are entered for the 2nd and 3rd report card periods in this example, they will not count unless the box beside the weight is checked. Every term is given a default weight of 10, but these do not need to be cleared out if the term is not selected (box is unchecked).
Once the markbook item is defined, the item must be saved by clicking the Save button or choosing one of the Save options that are presented upon clicking the drop down arrow to the right of the Save button, as shown below when saving a item for the first time. All options except “Save and copy” are also available when editing an existing item (since the edit markbook item interface has a separate Copy button).
Save: Simply save the current item and close the window.
Save and add another item: Save the current item and leave the window open, ready for the addition of another item.
Save and copy: Save the current item and bring up the Copy dialog to copy this new item to another category in this class or another one, and it may even be copy to another topic/subtopic. See Copy Markbook Item for additional information.
When editing an existing markbook item, a Delete button appears in the bottom left corner.
When attempting to delete the markbook item, you will be prompted "Are you sure you want to delete this item?", however you will be prevented from deleting an item in which there are any marks:

When you edit a markbook item, you will have access to a Copy button at the bottom so that you can copy this item to another category within this class or to another class completely, and to the same topic or to a completely different one.
Your copy Markbook Category/Item screen will default to the current class, topic and category, but you can change it to copy to any one of your classes.
Once the item is successfully copied, blue text will appear for a few seconds, indicating success. The window remains open, to allow you to keep copying if you wish to.
It will not allow you to copy to a category that already has an item with the same name:

 |
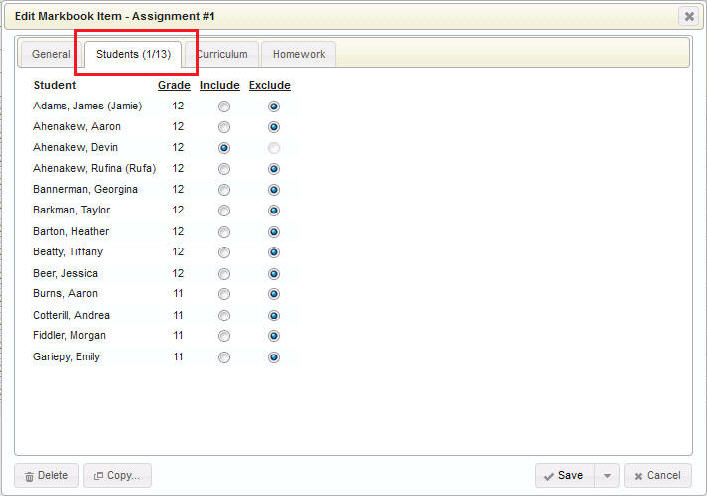 |
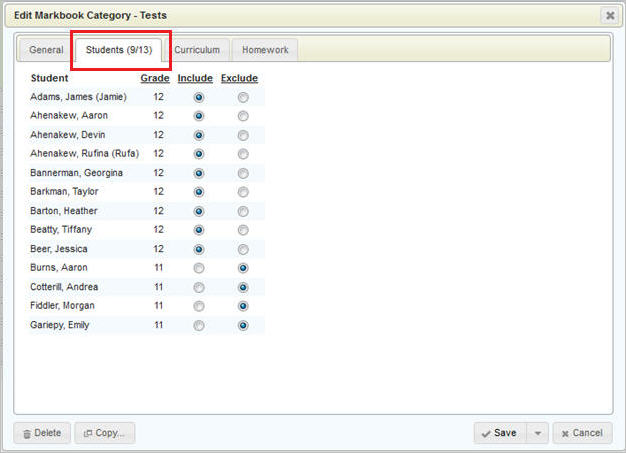
The number on the tab indicates how many students are being included (9 out of 13 possible students in this Category example on the left, and 1/13 for this Markbook Item example on the right).
Click the appropriate Include or Exclude button for each student to flag the student as included or excluded from this category or item. Hints: Click the Grade hyperlink to include/exclude students by grade.
Click the Include or Exclude hyperlink to include or exclude all the students, then, check off each student individually to include or exclude.
When a student is excluded from a category, they are automatically excluded from all items created in that category. A student cannot be excluded from a category if they already have a mark in that category.
A student cannot be excluded from an item if they already have a mark in that item.
When a student is excluded, an “N/A” icon appears in the cell that would normally contain a mark. Any automatic calculation of category marks and/or report card marks (topic/subtopic marks) will completely ignore the markbook items and categories in which the student is excluded.
Whether adding/editing a category or a markbook item, you can link your province’s curriculum to the category or item using the Curriculum tab as shown below.
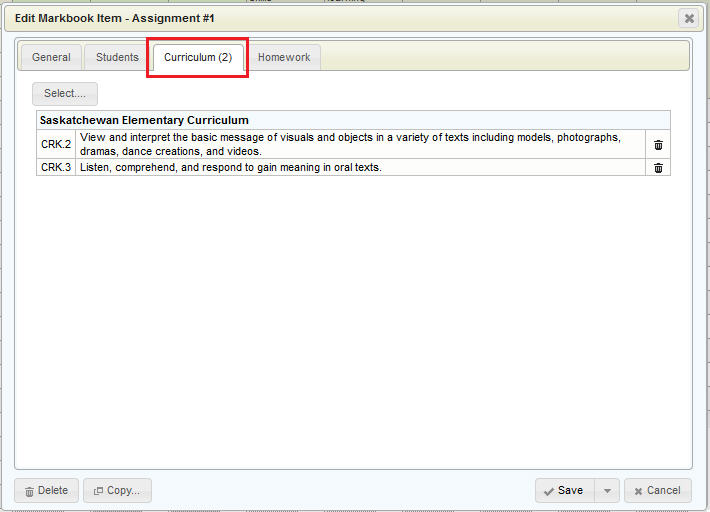
Click the Select button to open the curriculum tree and to select the curriculum associated with this category or markbook item. Please see Curriculum in Markbooks for more information on using the curriculum feature in markbooks.
Whether adding/editing a category or markbook item, you can assign homeroom to a markbook or category using the Homework tab as shown below.
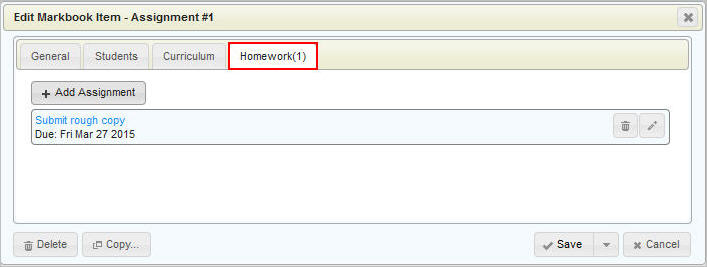
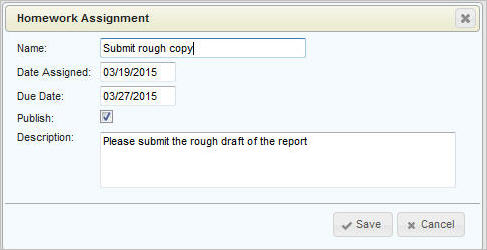
Click Add Assignment and fill in the Name, Date Assigned and Due Date. The homework must be published for the parents/students to be able to see it. Description is optional.
Please see Homework for more information on using the homework feature in markbooks.
Student specific comments can be entered for any item or category in a markbook. There are 2 distinct comments for each category and markbook item. One is a comment that is published (viewable by parents/students) while the other comment is unpublished (viewable only by the teacher or other staff with permissions to see all classes).
Beside every mark, the familiar comment icons (as used in the entry
of report card comments) can be used to enter comments pertaining to the
contents of the markbook. If the comment icons do not appear to the right
of the mark entry cell, use the Options icon ![]() located
above the markbookto enable this feature (check “Show Markbook Comments”).
located
above the markbookto enable this feature (check “Show Markbook Comments”).
A comment icon will appear to the right of each mark entry cell:
![]() indicates
that an item or category does not yet have a comment
indicates
that an item or category does not yet have a comment
![]() indicates that an item or category has a comment entered (unpublished,
published, or both) for that student
indicates that an item or category has a comment entered (unpublished,
published, or both) for that student
Click the icon to edit or enter a single student’s item or category comment. You will have the option to enter both the published and the unpublished comment:
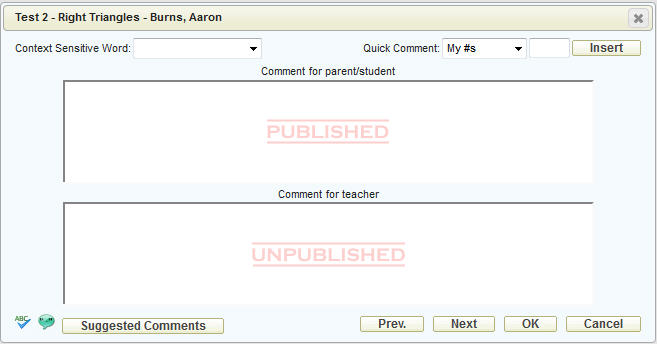
Use the Prev. and Next buttons to navigate to another student. Use OK to save and Cancel to close the screen without saving your changes.
Please see Additional Comment Information for additional information on entering comments including Context Sensitive Words, Quick Comment Numbers and Suggested Comments.
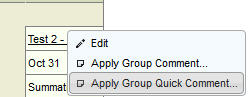
Rather than entering one comment at a time, it may be easier to apply a comment to a group of students first, as explained next, and then make individual comment edits one student at a time. There are 2 group comment entry options: Apply Group Comment (where the teacher composes the comment and applies it to the applicable students), or Apply Group Quick Comment (for those teachers that want to enter comment #s for students in a list form). Both group comment entry options in the markbook use the same principles as the group comment entry available for report card comments, except the markbook comments require the selection of the published or unpublished comment to be worked on.
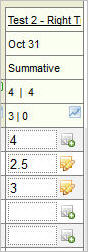
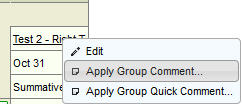
To apply a markbook comment to multiple students at once, click the item or category hyperlink (e.g. Test 2 in the example below) and choose Apply Group Comment:
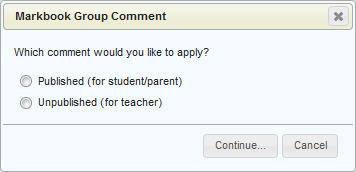
Choose which comment you wish to work with, published or unpublished, then click the Continue button:

Enter your comment using the usual methods (Please see Additional Comment Information for additional information on entering comments including Context Sensitive Words, Quick Comment Numbers and Suggested Comments):
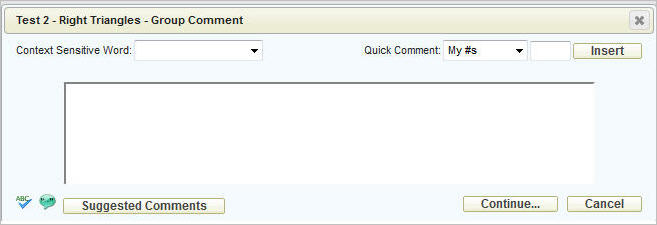
Click Continue… to select the students to whom to apply this comment.
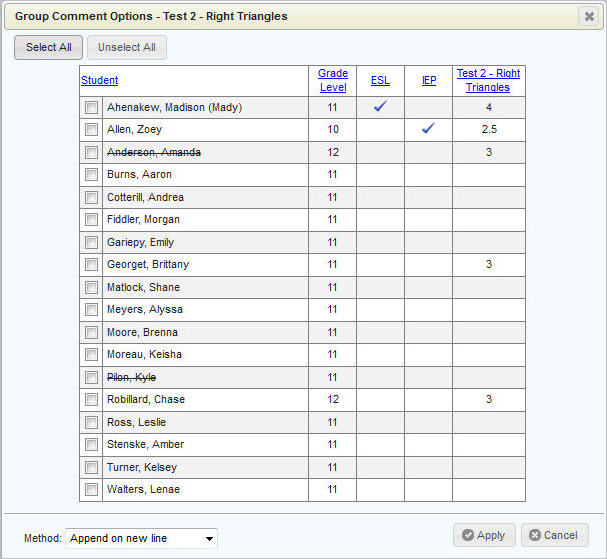
You can sort the students by any of the columns available, and check off
any or all students. Use the Method box to choose how this comment should
work with any existing comments for this item/category.
To apply a markbook comment to multiple students at once, click the item or category and choose Apply Group Quick Comment:
Choose which comment you wish to work with – published or unpublished:
Choose either: School Comment #s, Teacher Comment #s (default), or Board Comment #s and enter the desired number beside the appropriate student.
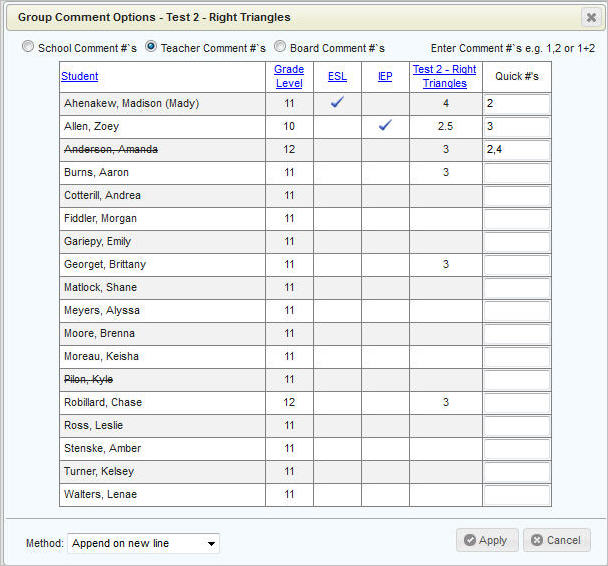
Choose your Method and click Apply to save those comments to those students.
Options in Marks/Comments
by Class
Sorting Markbook Items
and Categories
Expanding and
Collapsing Categories and Topics
Working
with an Individual Student's Markbook (Using Marks/Comments by Student)
Using Subcategories
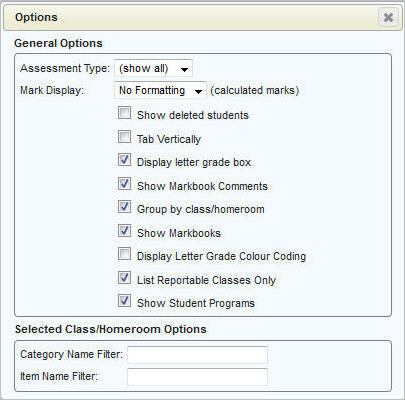
The Marks/Comments screen can be customized using the Options icon ![]() at
the top of the screen:
at
the top of the screen:

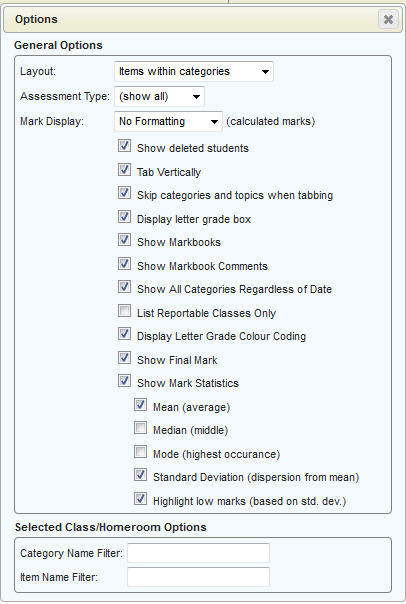
Layout: Items within categories: The default view. This will display the items grouped under their categories.
Items then categories: Items will be displayed at the left, and the categories towards the right.
Items only: Categories are excluded.
Categories only: Items are excluded.
Mark Display (calculated marks): If a markbook is in use, or there are subtopics that are weighted to calculate to a master topic, this option will govern how many decimal places the teacher will see for those calculated marks. Options are:
No Formatting: marks will appear exactly
as calculated
0 - marks will be rounded to a whole number
0.0 - mark will be rounded to one decimal place regardless of how many
digits are actually in the mark (e.g., 75 will appear as 75.0)
0.00- mark will be rounded to two decimal places regardless of how many
digits are actually in the mark (e.g., 75.5 will appear as 75.50)
0.000- mark will be rounded to three decimal places regardless of how many
digits are actually in the mark (e.g., 75.52 will appear as 75.520)
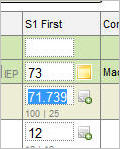
Please note: you can access the original mark by clicking in the individual
mark cell. (The mark is still stored in the database with no formatting).
E.g.:
Assessment Type: Show All, Diagnostic, Formative or Summative.
Show deleted students: When this option is selected, students who have a deleted enrolment status, and students who have dropped the class, will appear in the list but with strikeout text. (e.g., Pilon, Kyle)
Tab Vertically: Toggle the mark-entry method between vertical tabbing and horizontal. Note, using the arrow keys is not affected by this setting.
Skip categories and topics when tabbing: Allows the user to quickly enter marks into items only.
Display letter grade box: For any reason the teacher may want to hide the letter grade box that appears when they click in a marking cell. This may make the screen to look neater, but is not generally recommended as it may cause confusion as to which letter grades are allowed.
Show Markbooks: To clean up a busy markbook screen, you can temporarily hide your markbook and only see the topic/subtopic (report card) marks.
Show Markbook Comments: Shows the comment icons to the right of the mark entry cells for each markbook category and item. These icons allow the teacher to enter comments (published and/or unpublished comments) corresponding to each student's mark entry cell.
Show All Categories Regardless of Date: Allows all Categories to display even if they are outside the selected date range.
List Reportable Classes Only: For any reason the office may have set a class to not be reportable but the teacher still needs to enter marks for it. Unchecking this box will cause all classes to display regardless of reportable status.
Display Letter Grade Colour Coding: If the school has set up colours for each letter grade, this option will cause the mark cells to turn the appropriate colour when a specific letter grade is entered.
Show Mark Statistics: Under this option, you may select up to three statistics to display.
Under this option, you may select up to three statistics to display:
Mean (average)
Median (middle)
Mode (highest occurrence)
Standard deviation (dispersion from the mean)
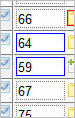
Highlight Low Marks (a blue border will display around cells containing
the low marks that are outside of the standard deviation as shown below)
Note: graphing functionality will still be enabled if no mark statistic options are selected.
Advanced users may want to use the Category Name Filter and Item Name Filter to narrow down which categories and items view on the screen. This can help clean up a very busy markbook screen.
These fields accept all manner of wildcard characters. Wildcards are explained below.
A reminder will appear when you choose your class from the list, if that class has a category/item filter applied:
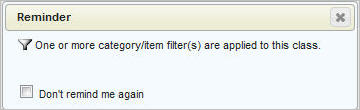
As well, the filter icons will appear beside the Category and/or Item titles. Click these icons to open the Options screen, to erase or change your filter:

The following chart explains the wildcard characters available for filtering
your items and categories. This can help to clean up a very busy markbook
screen.
Character |
Description |
Example |
* |
Matches any number of characters. You can use the asterisk (*) in a character string. |
wh* finds what and white but not awhile or watch. |
? |
Matches a single alphabet in a specific position. |
b?ll finds ball and bell. |
[] |
Matches characters within the brackets. You can specify ranges of characters using a hyphen. When wildcard characters are included in the brackets they will be interpreted literally. |
b[ae]ll finds ball and bell.
ball [#]* finds ball #1 and ball #2 but not ball 3 |
! |
Excludes characters in the brackets. |
b[!a]ll finds bell but not ball. |
- |
Matches a range of characters in the brackets. Characters must be in ascending order (a-z, not z-a). |
b[!a-m]ll finds bull but not ball or bell. |
# |
Matches any single numeric character. |
1#3 finds 103 and 113 but not 130. |
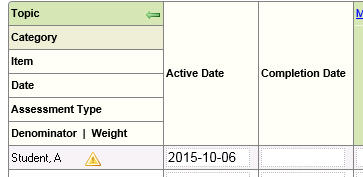
Classes that the office have flagged as Continuous Entry will show a unique green arrow in the Topic cell as shown below. Click this arrow once to display the columns Active Date and Completion Date, and click the arrow again to hide these two columns. The teacher may view and/or edit the dates that the student starts and completes a continuous entry class. Continuous entry classes allow students to start and finish a class at their own pace.
Sorting
Markbook Items and Categories
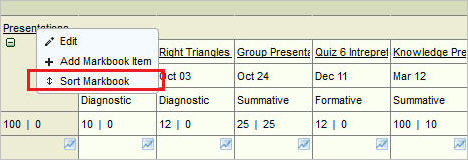
By default, markbook categories and items are displayed in the order in which they were created. You have the ability to change this order. To sort your markbook items within a category, click the category title and choose Sort Markbook.
A screen showing the current order will appear, similar to the example shown below.
Click Sort By Title to sort alphabetically. Click again to sort in reverse alphabetical order.
To sort by item date, click the Sort By Date button once (oldest to newest) or twice (newest to oldest).
To apply a custom sort, drag and drop the items into the desired position in the list.

Click Save on the Sort Markbook screen to save this order.
To sort categories, use the same method but click on the title of the topic (Grade, etc) and choose Sort Markbook. Sort your categories by title, date, or custom method.
In a well-used markbook, it may become difficult to find what you are looking for. You can use the minus sign beside the category name to collapse that category. This will hide the items under that category.
Fully expanded markbook:
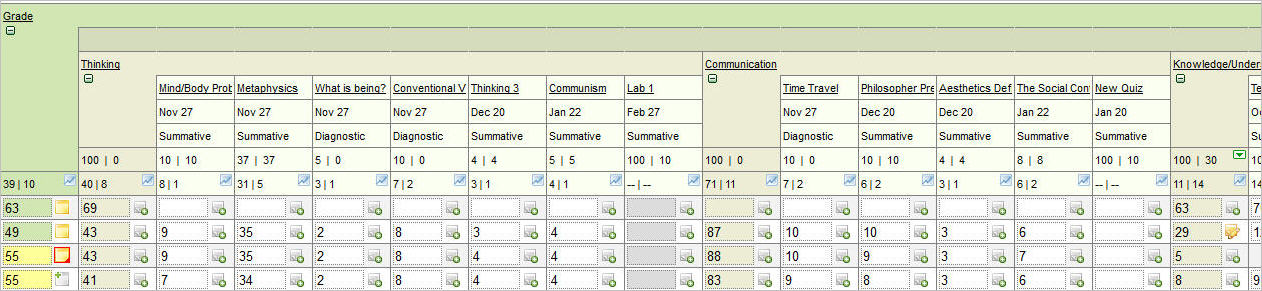
Clicking the minus sign under Thinking in the above image, will cause the markbook items under the Thinking category to be hidden (collapsed), and the minus symbol under Thinking changes to a plus symbol, as shown below. The plus symbol can be used to expand the category.

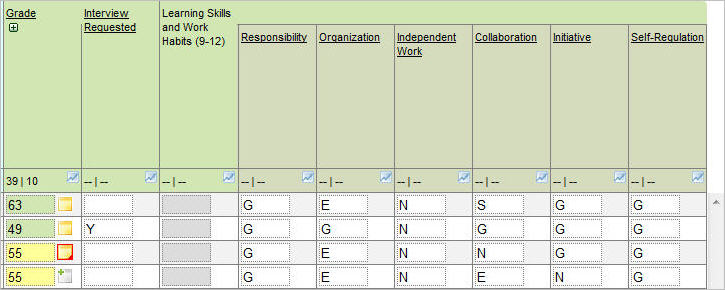
You can also collapse the topic. In the above example, clicking the minus sign under the Grade topic will cause the categories and markbook items for the topic to be hidden (collapsed), as shown below. This may be particularly useful when entering report card information where you might want to hide the markbook information.
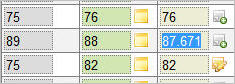
Reminder: The markbook information was used to calculate the report card mark (e.g. grade column), however, the calculated mark can be overwritten. Overwritten marks appear with a yellow background, and deleting the overwritten mark will return the mark to the calculated mark based on the markbook.
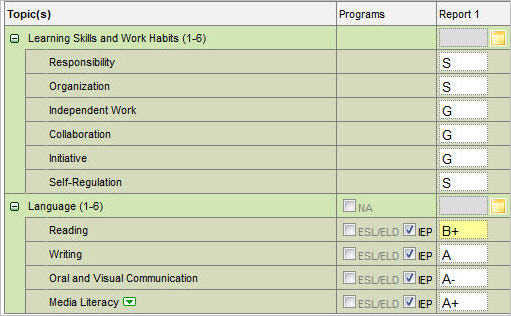
From the Achievent area of Maplewood connectEd, use the Marks/Comments by Student option to see a specific student's markbook(s) for all classes to which you have access. The Mark/Comments by Student screen is explained in detail in the manual section Report Card Marks/Comments by Student, and an example is provided below (showing just the math class but it could include all classes that this teacher teaches the student).
This screen is designed in the same way as the Marks/Comments By Class screen, except the topics, subtopics, categories and items are along the left-hand side instead of at the top. The user can expand and collapse the topics and categories using the plus and minus icons, and can select any or all terms and topics from the drop-down lists at the top. The comments along the right-hand side are from the Term selected in that particular column.
Users will be able to see all Terms and all Topics at once by selecting All from the Term and Topic drop-down lists, as well as All Classes. Selecting too much information at one time may cause the screen to load more slowly.
This screen remembers the user’s last settings, in terms of which class and topic were selected, and the “From” and “To” dates, but will always default to the first chronological unlocked term, and the first alphabetical student, when this screen is newly accessed.
If “All” classes are chosen, all terms will be available in the Terms list, which means that the user is able to choose a term that does not necessarily apply to the student selected. For example, if the selected student only has semester 1 classes (under this particular teacher), but S2 First is selected as the term, no information will display for that student.
The Options icon ![]() located above the markbook
information has some additional options when markbooks are enabled: Show
Markbook Comments and Show Markbooks, as well as the filters that are
also available in the Marks/Comments
by Class (explained earlier).
located above the markbook
information has some additional options when markbooks are enabled: Show
Markbook Comments and Show Markbooks, as well as the filters that are
also available in the Marks/Comments
by Class (explained earlier).
For reference, all the Options settings are explained below.
Assessment Type: Show All, Diagnostic, Formative or Summative.
Mark Display (calculated marks): If a markbook is in use, or there are subtopics that are weighted to calculate to a master topic, this option will govern how many decimal places the teacher will see for those calculated marks. Options are:
No Formatting: marks will appear
exactly as calculated
0 - marks will be rounded to a whole number
0.0 - mark will be rounded to one decimal place regardless of how many
digits are actually in the mark (e.g., 75 will appear as 75.0)
0.00- mark will be rounded to two decimal places regardless of how many
digits are actually in the mark (e.g., 75.5 will appear as 75.50)
0.000- mark will be rounded to three decimal places regardless of how many
digits are actually in the mark (e.g., 75.52 will appear as 75.520)
Please note: you can access the original mark by clicking in the individual mark cell. (The mark is still stored in the database with no formatting). E.g.:
Show deleted students: When this option is selected, students who have a deleted enrolment status, and students who have dropped the class, will appear in the Student list with the word “(Inactive)” after their name.
Tab Vertically: Toggle the mark-entry method between vertical tabbing and horizontal. Note, using the arrow keys is not affected by this setting. Also note that this setting only affects anything if more than one term is selected in the Marks/Comments by Student screen.
Display letter grade box: For any reason the teacher may want to hide the letter grade box that appears when they click in a marking cell. This may make the screen to look neater, but is not generally recommended as it may cause confusion as to which letter grades are allowed.
Show Markbook Comments: Allows the user to enter comments per markbook category or item.
Group by Class/Homeroom: When you have all classes selected, checking this box will cause all topics from each class to be grouped together. Unchecking it will cause all topics to be listed one after another regardless of class. Either option can be helpful depending on your method of mark and comment entry/review.
Show Markbooks: To clean up
a busy markbook screen, you can temporarily hide your markbook and only
see the topic (report card) marks and comments.
Display Letter Grade Colour Coding: If the school has set up colours for
each letter grade or level, this option will cause the mark cells to turn
the appropriate colour when a specific letter grade or level is entered.
List Reportable Classes Only: For any reason the office may have set a class to not be reportable but the teacher still needs to enter marks for it. Unchecking this box will cause all classes to display regardless of reportable status.
Show Student Programs: To show the programs that have been defined by the school, check this box. This includes IEP, N/A, ESL, EAL, etc. Please note, the Programs column will only display when only ONE term is selected as shown here for the term Report 1.
Use the Category Name Filter and Item Name Filter to Please note, proper permissions are required to see these program checkboxes. Contact your school administration if these are not displaying for you.
Selected Class/Homeroom Options (These filter settings apply only to the selected class or homeroom):narrow down which categories and items view on the screen. This can help clean up a very busy markbook screen. Click here to see Filter settings.
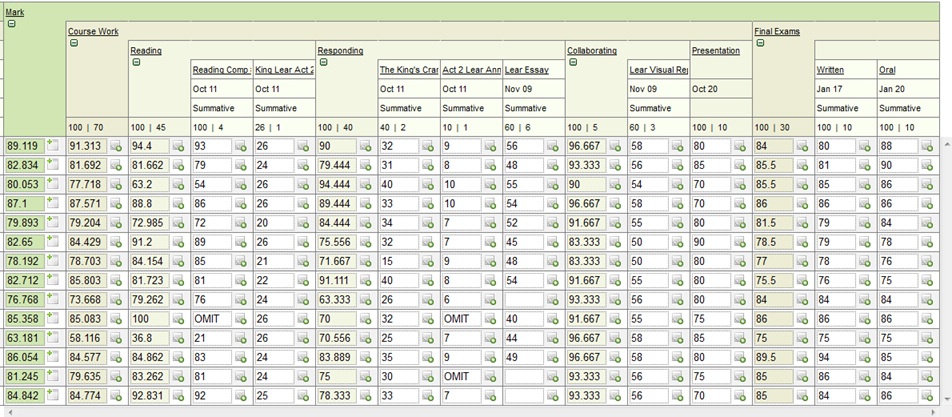
A teacher can set their markbook up with an additional level, called subcategories. There is one main rule when using subcategories: a category can have subcategories OR items, but not both. Once a category has one subcategory, items can be created under the subcategory, and additional subcategories can be created under the category, but you cannot have an item parallel to a subcategory. The same effect can still be achieved, however, by creating a subcategory that does not have any items under it – that subcategory would act like an item.
Below is an example of a markbook with subcategories in use:
- The topic Mark has a category, Course Work, that has three subcategories that have items (Reading, Responding and Collaborating) and one subcategory that does not have any items (Presentation)
- The topic Mark has another category, Final Exams, that has two items (Written and Oral)