Marks and comments for report card purposes may be entered using either the Marks/Comments by Class or Marks/Comments by Student options within Maplewood connectEd. This section describes the entry of report card information for an individual student. The Marks/Comments by Student option allows the user to easily see and enter marks and comments for one student. You can see all of one student’s classes, to which you have access. This means that if you are a teacher, you can see all of the classes that you teach for one student, and if you are an administrator with access to ‘all classes’ you will be able to see all classes that each student is taking, all at once.
For information on the entry of report card information by a class list, please see:
Report Card Mark & Comments By Class
Teachers should familiarize themselves with both methods, since they may be used interchangeably.
At a minimum, teachers are expected to enter the marks and comments that are required on the report cards, however, security rights may be granted to teachers to record detailed diagnostic, formative and summative assessments in markbooks. Those teachers who want to set up markbooks to record marks for additional classroom assessments, including comments and homework, we would suggest reading these sections:
The mark and comment-entry screens look basically the same whether markbooks are enabled or not. This section of the manual concentrates on how to use the Marks/Comments by Student option without markbooks.
Within Maplewood connectEd, select Achievement, then Marks/Comments by Student.
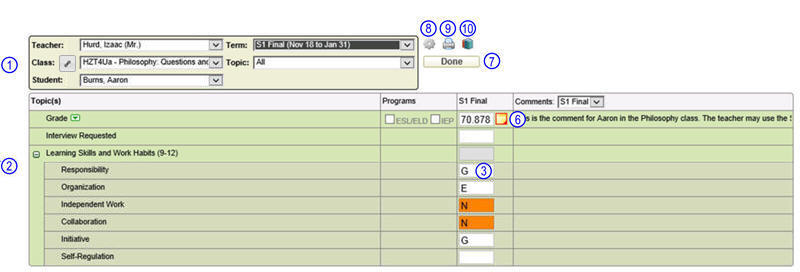
A screen similar to this will appear:
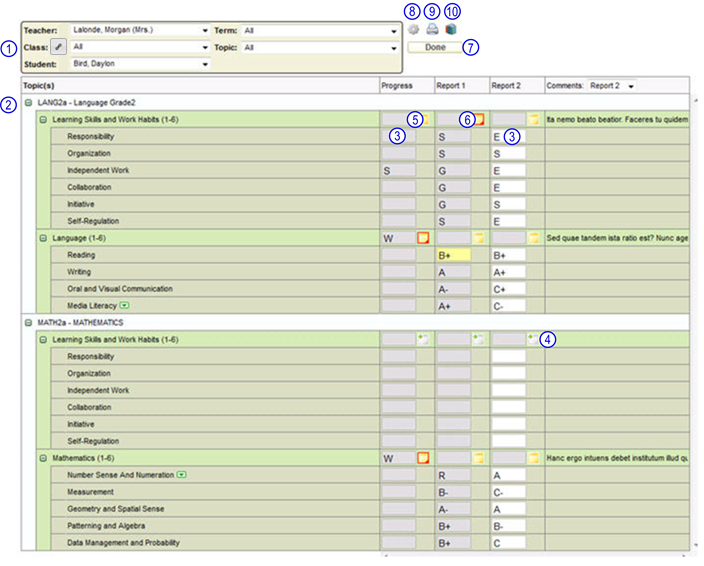
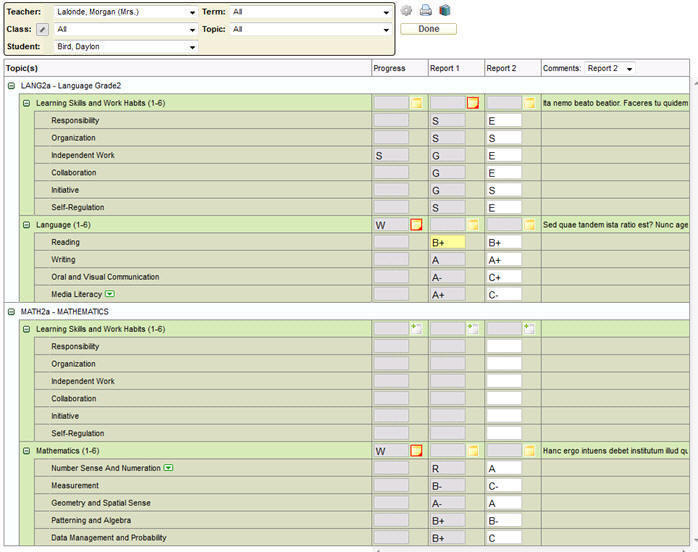
Here's another example, more typical of an elementary teacher, where it can show all the classes, terms and topics that are the responsibility of the teacher for the individual student:
As explained in General Overview of the Office Setup for Report Cards, the office will have determined what terms and topics are appropriate for each class. The office also determines whether a term is locked or unlocked for report card entries, and whether each topic or subtopic requires a mark and/or a comment, along with the allowable types of marks and comment size. With Maplewood’s guidance, the office setup should be done in such a manner that the teacher can simply focus on entering the marks and comments without any possibility for entry in the wrong spot.
There are other features in the Marks/Comments by Student application that may be of interest:
Note Regarding Usage Hints
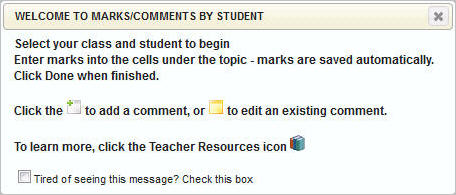
Typically with any release that has interface changes, Maplewood connectEd will present a “usage hint” on the affected screen, to alert you to these changes. Once the message has been read, check the box to prevent it from appearing again. Here is an example of a usage hint message:
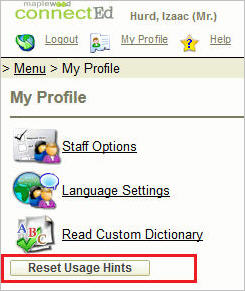
To reactivate all closed usage hints, go to My Profile and click the Reset Usage Hints button as shown here:
Select the student to be worked on. To do this, use the Student drop down list to find the student as shown in point 1.
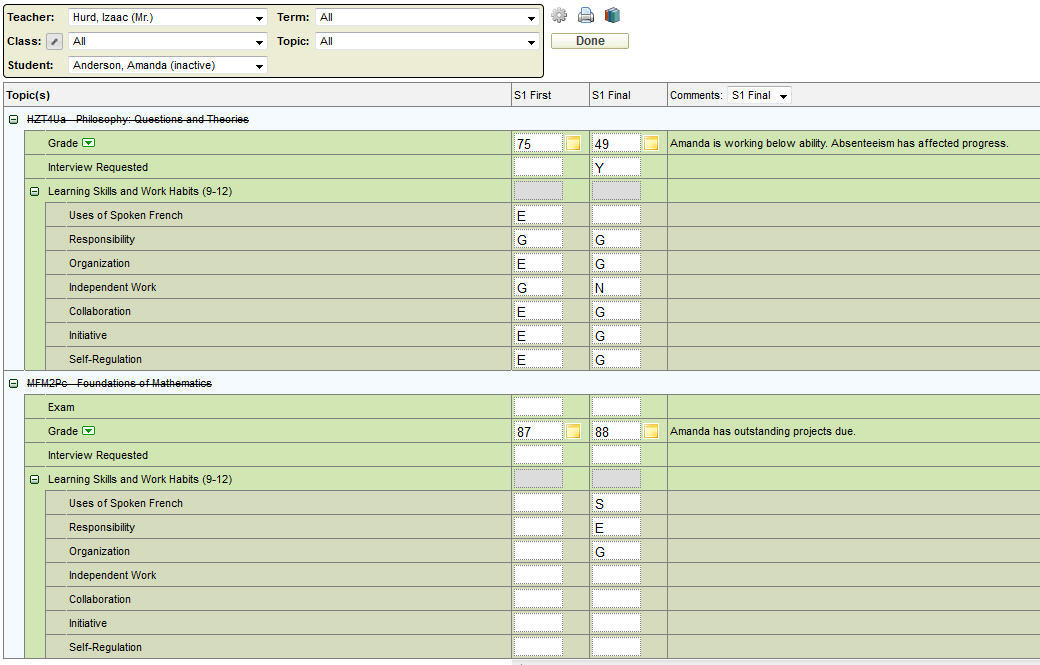
The students who are no longer registered in the class (either because they have left the school (deleted enrolment status) or they have dropped the class), can optionally appear in the student drop down list by checking the "Show Deleted Students" checkbox from the Options interface. These students will appear in the list with the word "Inactive" beside their name. If you have chosen to view all classes for a student, the dropped classes will also appear with strikeout text (e.g., HZT4Ua - Philosophy: Questions and Theories).
Since the teacher should be correctly set (unless the user is granted access to multiple teachers), typically the other filter options are set to "All", however they may be changed as follows:
Select the class to be worked on by clicking the drop down arrow in the Class area. All classes and homerooms assigned to the indicated teacher will be available for selection, in addition to an "All" option. Select "All" to see all the classes taken by the student and that are taught by the teacher. Some teachers may have classes that are established for other purposes (such as placeholder classes or study periods), and these classes may be setup by the office as non-reportable. If these non-reportable classes are to be excluded from the Class drop down list, check the "List Reportable Classes Only" checkbox from the Options interface.
Then select the Term, or "All" terms. The school office controls whether a term is locked or unlocked for entry of report card data, however, it may be useful to view previous report card information using the "All" option.
- Select one topic or subtopic, or All topics from the Topic area. We would suggest that 'All' be selected to ensure that nothing is forgotten in the report card entry.
As shown in point 2, the selected topics will appear in list format in the first column, followed by the selected terms (Progress, Report 1, Report 2) in the subsequent columns. followed by a comment column. Note the colour coding and indentations of the topics vs subtopics (e.g. Learning Skills and Work Habits is the topic, and Responsibility is a subtopic). A scroll bar will appear at the bottom (under the list of students) to move the columns right and left, if necessary.
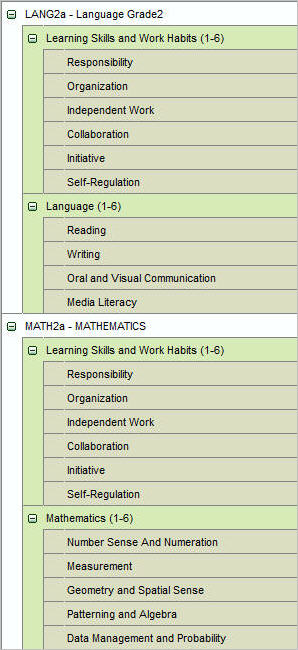
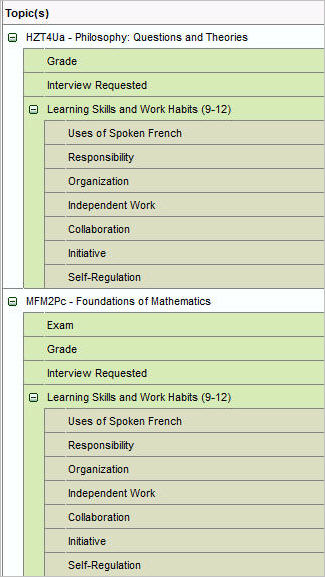
Note: When you have all classes selected, check the "Group By Class/Homeroom" checkbox from the Options interface to displaying all the topics from each class one after the other as shown in this example, where the learning skills and language topics are grouped under the LANG2a class.
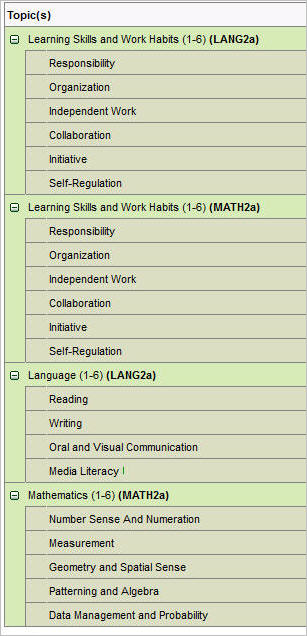
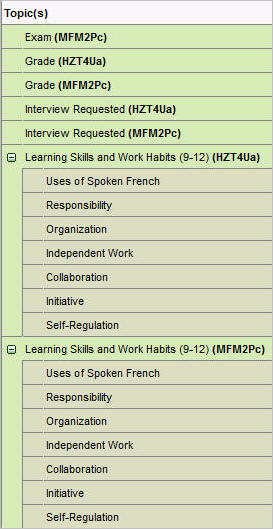
Unchecking it will cause all topics to be listed one after another regardless of class (e.g. it would show the learning skills for LANG2a followed by the learning skills for MATH2a, followed later by the marks for the subjects). Either option can be helpful depending on your method of mark and comment entry/review.
Enter marks into the cells provided for each topic/subtopic. If mark entry is disabled, or a term is locked by the school office, the cells will appear grey (e.g., the cells in the row for “Learning Skills and Work Habits” and the cells in the Report 1 column as shown in the previous image).
Marks are entered by clicking into the desired cell and then entering the student's mark. As you move between marks, use the arrow keys, tab key or <Enter> key to navigate between marking cells. The Tab key normally moves horizontally (e.g. to the next cell on the right), however it can move to the next cell in the same column by checking the "Tab Vertically" checkbox from the Options interface.
If letter grades are allowed, a box will appear with the allowable letters in it where you can click the letter grade from the pop up, or you can just type the letter directly into the cell. The display of the allowable letter grades can be turned off by unchecking the "Display Letter Grade Box" checkbox from the Options interface. We recommend that the letter grade box is enabled when entering letters. Invalid letters will not be allowed even if the letter grade box is not visible.
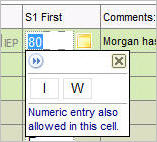
If both numbers and letters are allowed, the letter grade box will look like this, indicating that there are letters available but numeric entry is also allowed:
The school office can colour code letter grades, as shown in below where "N" (for needs improvement) is defined as orange background with black foreground (text). To see the letter grades entered with the colour coding defined by the office, select the "Display Letter Grade Colour Coding" checkbox from the Options interface.
Entering overrides (only applicable if using markbooks or the school has a calculated final mark).
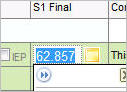
Sometimes, there will be some automatically calculated marks. To override a calculated mark, simply click in the cell with the calculated mark and then enter the desired mark. This will cause the cell to turn yellow. To return to the calculated mark, delete the overridden mark.
Marks are automatically saved when you move off the mark cell
The student's mark is saved as soon as you exit a particular mark cell. You can verify this by watching the Session Timeout in the top right corner of the screen. As soon as you enter a mark and go to another cell, that timer should reset back to the highest value (this value is set by the school). Please note, explicit saving is still required for comments.
Some setups may include a calculated final mark
Some school report card setups require a calculated final mark (e.g. the final mark is based on 70% of the school mark and 30% of the exam mark), and the teachers are expected to enter the exam mark and the school mark into the appropriate columns so that the final mark may be calculated. If the school has enabled this feature, select the "Show Final Mark" checkbox from the Options interface. If this feature is not enabled, the option will not appear.
In the Marks/Comments by Class interface, the final mark will appear just below the student's name (above the topics/subtopics) as shown here:
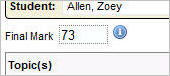
This mark can be written to, based on the settings at the school (whether it allows mark entry at all, and whether it is locked or unlocked).
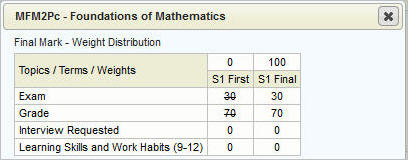
The info icon will display the term and topic weights that determine the final mark. These are also set at the school. In the below example, the term “S1 First” is worth zero, and therefore all topics under it are negated (crossed out). S1 Final is worth 100% of the total final mark. The Grade and Exam are weighted 70/30, and the Interview Requested (yes/no) and Learning Skills topics do not factor in to the final mark at all.
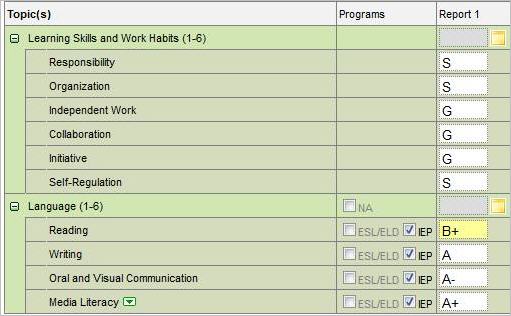
Some report cards include check boxes to flag a student as requiring special programs. The topic program codes are defined by the school office and permission to see these codes must be granted. If the school has enabled this feature, select the "Show Student Programs" checkbox from the Options interface. If this feature is not enabled, the option will not appear.
Once this feature is enabled you should see a column beside the mark with a checkbox for each program that has been assigned to this class. Check and uncheck the program checkboxes as needed. They save as soon as they are checked or unchecked.
Please note, this column will show up if only ONE term is selected, and will not display if ALL terms are selected.
The student's comments can be composed during the entry of the comment, or the comment can be created by drawing from a bank of suggested comments provided by the board/division, or the school, or your own bank of comments (3 different comment banks). Comments support standard copy and paste functionality, and, any comment composed for a student can be automatically added to your bank of comments (aka My Comments) for later use. Spell checking is available and is strongly encouraged.
The banks of suggested comments may contain fields such as {Name} or gender specific words in the format {male word/female word} such as {He/She}. These are called Context Sensitive Words.
Each comment has a corresponding number that may be used in the Quick Comment Entry interfaces (for those teachers who like to enter the comments by simply entering the comment # or #s to be assigned to the student). Comments can also be given filters to help the narrow the suggested comments to only those that apply to the specific course, grade, term, topic, comment type (areas of improvement, strengths, next steps), level (1 to 4, R), or category (Knowledge and Understanding, Thinking and Inquiry, Communication, Application).
Please see My Comments for further information on building your list of suggested comments.
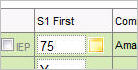
Comments may be entered for those marks that have a comment icon to the right of the mark. Three different comment icons exist, represented by points 4, 5, and 6 in the images and explained below. To apply a comment to a single student, click the comment icon beside the mark. Here's one comment icon shown beside the mark 75:
![]() indicates a topic that requires a comment, and no comment text is present.
indicates a topic that requires a comment, and no comment text is present.
![]() indicates a topic that requires a comment, and some comment text is present.
indicates a topic that requires a comment, and some comment text is present.
![]() indicates that the comment text exceeds report card comment box dimensions (if applicable – some report cards allow an expandable comment box and these will never show a red outline).
indicates that the comment text exceeds report card comment box dimensions (if applicable – some report cards allow an expandable comment box and these will never show a red outline).
If you click any of the 3 comment icons, the comment box will appear as shown below. Enter the comment in the box provided and then click OK to save.
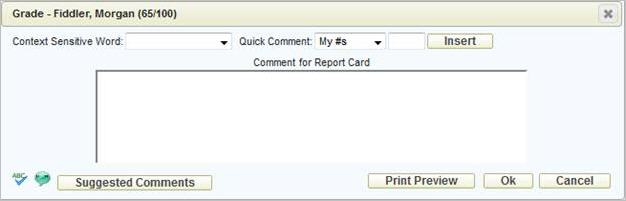
If you have memorized the comment numbers from the various banks (your own, the school’s or the board’s) you can type in the appropriate number beside Quick Comment and click Insert. This will insert the comment number to the box, and when you click OK the text from that comment will be applied to that student.
Please see Additional Comment Information for additional information on entering comments including Context Sensitive Words, Quick Comment Numbers and Suggested Comments.
Once a comment has been entered, it will appear in the right-hand column. If you have more than one term selected, you will be able to choose any term from the Comments drop-down. In this example the S1 Final comment is selected:

If the comment is longer than the provided area, hold the mouse over the comment to see the full text.
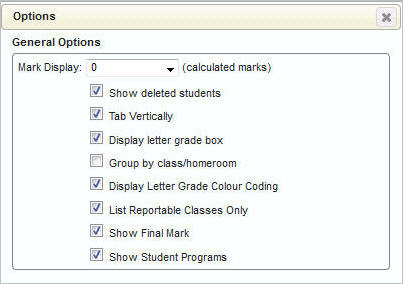
The Marks/Comments screen can be customized using the Options icon at the top of the screen:

Note: additional options will appear if markbooks are enabled. See Markbooks for more information.
Mark Display (calculated marks): If a markbook is in use, or there are subtopics that are weighted to calculate to a master topic, this option will govern how many decimal places the teacher will see for those calculated marks. Options are:
No Formatting: marks will appear exactly as calculated
0 - mark will be rounded to a whole number
0.0 - mark will be rounded to one decimal place regardless of how many digits are actually in the mark (e.g., 75 will appear as 75.0)
0.00- mark will be rounded to two decimal places regardless of how many digits are actually in the mark (e.g., 75.5 will appear as 75.50)
0.000- mark will be rounded to three decimal places regardless of how many digits are actually in the mark (e.g., 75.52 will appear as 75.520)
Please note: you can access the original mark by clicking in the individual mark cell. (The mark is still stored in the database with no formatting). E.g.:
Show Deleted Students: When this option is selected, students who have a deleted enrolment status, and students who have dropped the class, will appear in the list with the word Inactive beside their name. If you have chosen to view all classes for a student, the dropped classes will appear with strikeout text (e.g., HZT4Ua - Philosophy: Questions and Theories).
Tab Vertically: Will cause the cursor to move vertically (up/down one topic) rather than horizontally (to the next/previous term for a topic) when tab/arrow key is used.
Display Letter Grade Box: For any reason the teacher may want to hide the letter grade box that appears when they click in a marking cell. This may make the screen to look neater, but is not generally recommended as it may cause confusion as to which letter grades are allowed.
Group By Class/Homeroom: When you have all classes selected, checking this box will cause all topics from each class to be grouped together. Deselecting it will cause all topics to be listed one after another regardless of class. Either option can be helpful depending on your method of mark and comment entry/review.
Elementary-style layout NOT using Group by Class/Homeroom (image on the left) vs USING Group by Class/Homeroom (image on the right):
 |
 |
Secondary-style layout NOT using Group by Class/Homeroom (image on the left) vs USING Group by Class/Homeroom (image on the right):
 |
 |
Display Letter Grade Colour Coding: If the school has set up colours for each letter grade, this option will cause the mark cells to turn the appropriate colour when a specific letter grade is entered.
List Reportable Classes Only: For any reason the office may have set a class to not be reportable but the teacher still needs to enter marks for it. Unchecking this box will cause all classes to display regardless of reportable status.
Show Final Mark: If your school has enabled this feature, you will have the option to show the final mark. For more information on this, please see Some setups may include a calculated final mark.
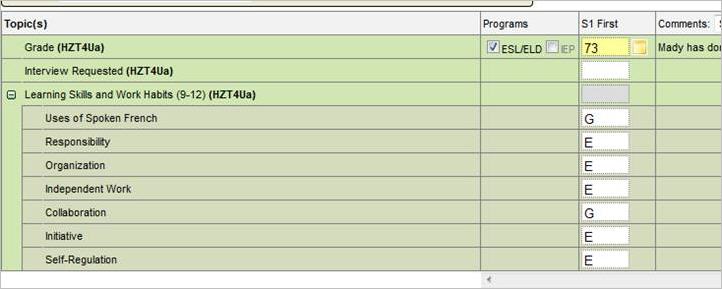
Show Student Programs: To show the programs that have been defined by the school, check this box. This includes IEP, N/A, ESL, EAL, etc. Please note, the Programs column will display when only ONE term is selected as shown here:
Please note, proper permissions are required to see the programs. Please contact the school office if this option is not available.
Click the Print icon to access the following options:
Verification Sheet: This option will print preview the information that you have selected on the screen.
Provincial Report Card (Ontario Only): This option will open up another tab and give you options for which Ontario Provincial report card to print for this student.
Report Card: This option will open up another tab and give you options for which report card to print for this student.
Stay up-to-date with changes by clicking the Online Teacher Resources button. This will bring you to a separate page which contains documents and instructional videos on any new features that we have introduced.