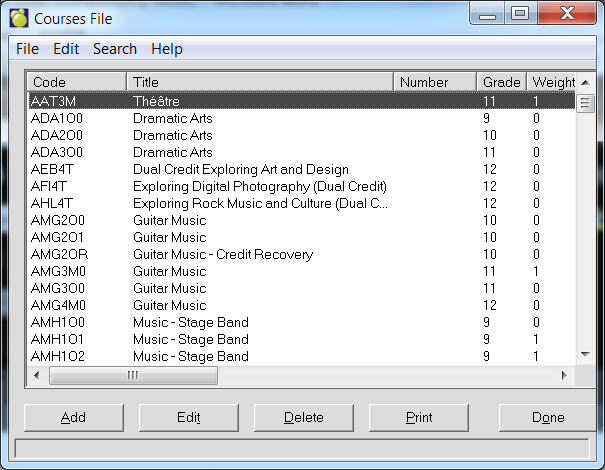
Here you can enter all courses that are available in the school. You can also set up Sequenced Courses and Pre-requisites. To access the Courses File list, choose File, School Setup, Courses (Codes for This Year). A list of courses will appear.
Note: When the user opens a table, the program will select (highlight) the first item on the table. Without using the search menu, the user can enter e.g. "S" and the focus will move to the first item starting with "S".
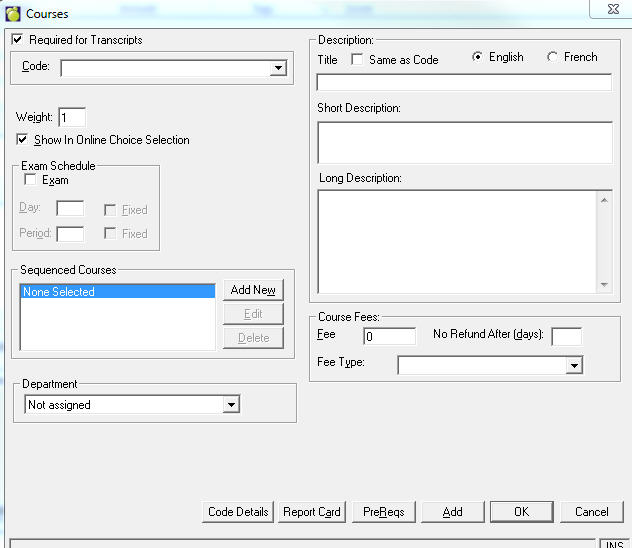
Use the option buttons at the bottom of the screen to add, edit, print or delete courses.
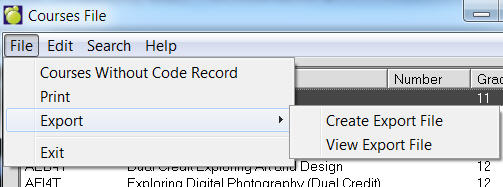
Class Tables can now be exported to a file. To do this, use the menu at the top to select File, Export, Save. Once the file is created, it may be viewed by selecting File, Export, File Export View. The file is in comma delimited format (csv) and includes headers. For hosting customers, if you want to use the file in Excel (as an example), use the View option to find the file and then copy and paste it to a local machine licensed for Excel.
This illustration shows an adding box.
Ontario
Alberta
Manitoba
Saskatchewan
BC
Please note that the course codes must be entered into the Courses File before classes may be entered into the Classes File. Also, if a course code is changed in the Courses File, the corresponding class or classes in the Classes File should be changed as well.
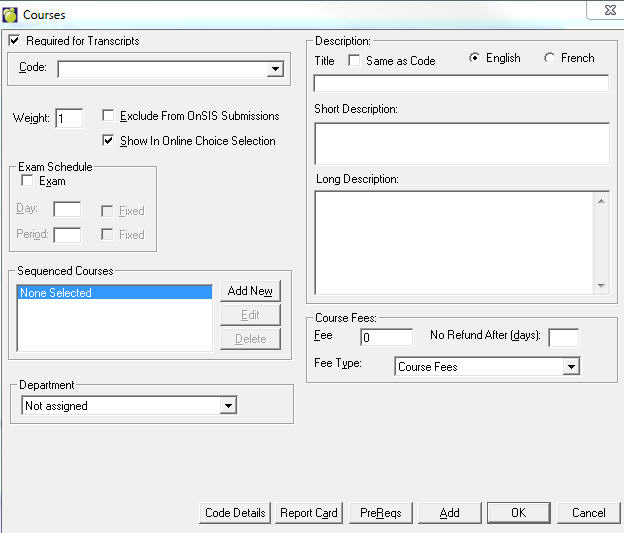
The following items of information may be recorded in the Courses File:
Course Code: The course code may be up to seven characters in length (e.g. MAT1A1F). It is recommended that a number indicating the year level be placed in the same character position for all courses. You can then use Inquiry to search for courses and classes of certain grades. For example, an Inquiry search for ***1 would include only the first year level courses (e.g. grade 9 courses) providing the course codes were entered such that all the year levels were placed in the fourth character position.
Course Number: Every code in the Code file must contain a course code, and optionally a course number. Some schools setup a course code such as CMA25S with a course number such as 3911-25S. This subject code is the first 4 characters and the subject level and course type are the last 3 characters. Other schools just use the course code 391125S with no course number. The course number may be up to ten characters in length.
Grade: Every code in the Code file must contain a grade. Enter a grade level that matches the course.
Weight: The weighting factor represents the workload for the course. By assigning a weighting factor to each course, the workload between semesters may be balanced. The weighting factor may be a number between 1 and 9, but most schools will use only 1 and 2 (1 for junior courses and 2 for senior courses).
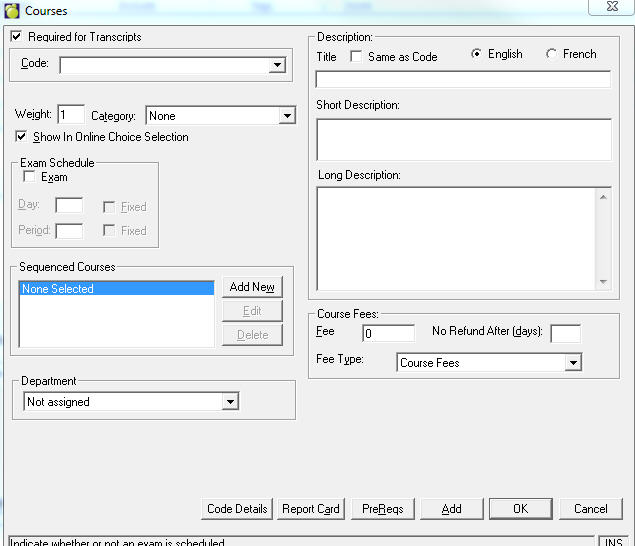
Exam Schedule: Check the box if an exam is associated. Enter the day and period, and check the Fixed box if applicable.
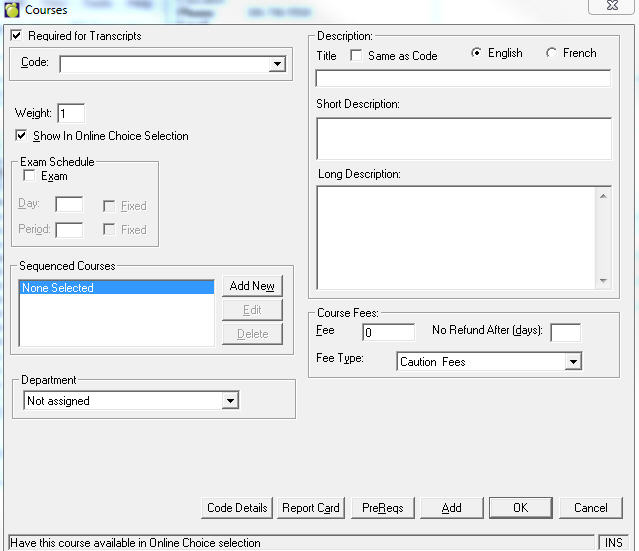
Show In Online Choice Selection: Check this box if you want the course to display when using Maplewood connect Ed.
Title: Enter a course title.
Short Description, Long Description: Enter applicable course descriptions.
Course fees: Enter a Fee number of days after which there is No Refund. Added/Deleted classes, for which a Fee value was entered in the courses file to student's current timetable, will be added/deleted to student's Fee Account if so requested. Select a Fee type from the drop down list. Fee Types are set up under the Accounts menu. Added courses to student's next-year's timetable will not have an immediate impact on student's Fee Account. Refund field: a specific number of days
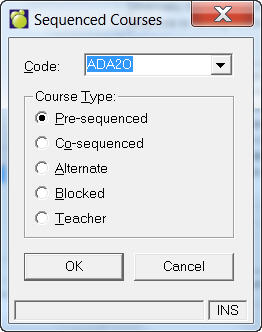
In semestered schools, you can specify class sequencing. The computer uses this information when it automatically creates students’ timetables. The maximum number of sequenced courses is 50.
Click the Edit button on the main Courses screen to sequence courses related to the course that you are adding or editing. On the editing screen you can make changes to a sequenced course. This graphic shows an editing box for specifying sequenced courses. Select a new Course Type if applicable and select a Course from the Code list.
If you click Add on the main Courses screen then you will see a box similar to the Editing box except that there will be no Course initially selected in the Code box.
To delete a Course from the Sequenced Courses box, select the Course and click Delete.
Department: Select a Department with which this course is associated.
-------------------------------------------------------------------------------------------------------------
The following examples explain the different types of sequenced courses:
Alternate: If course A has an alternate course B, courses A and B may not be taken in the same semester.
Blocked: Use mostly for grade 9 to keep students grouped together in classes during the day.
Co-sequenced: If course A has a co-sequent course B, and if both course A and B are among the courses to be scheduled, course B must be taken before or during the same semester as course A.
Pre-sequenced: If course A has a pre-sequent course B, and if both course A and B are the courses to be scheduled, course B must be taken in semester 1 and A must be taken in semester 2.
Teacher: Used to keep students with the same teacher for 2 or more courses (e.g., if A has a teacher-sequenced course B, and if both course A & B are among the courses to be scheduled, the student must be timetabled into course A and B taught by the same teacher.
Description: Select English or French. Then enter a Title for the Course. Enter a more detailed description in the Description box.
Exam Schedule: Click the Exam button if there is an exam for this course. Then select the day and the period. Click the Fixed check box if it is a fixed exam. Fixed means that the automatic exam scheduler is not allowed to move the exam from the period or day that you have specified. Normally, the Automatic Placement feature of Examination Assignment automatically assigns the examination day and period. This information is available through the Courses File primarily for reference.
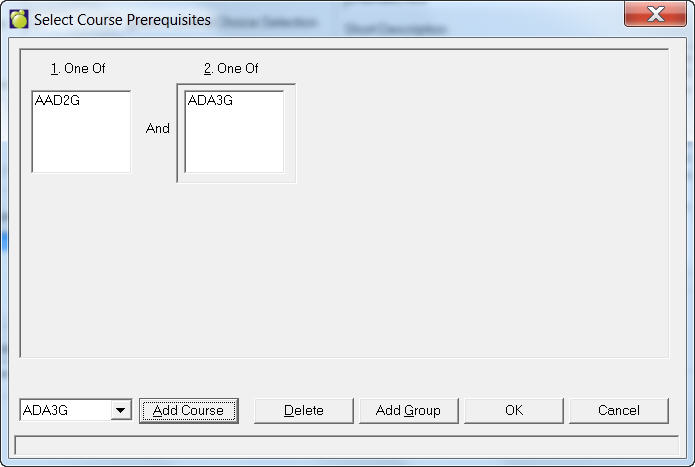
Pre-requisites lets you define what courses must be completed before another course can be taken. You can set up pre-requisites by choosing: