The Ontario Ministry of Education's province-wide OnSIS (Ontario School Information System) captures data at the elemental and aggregate levels from schools and boards. The data collected should provide more accurate enrolment data to support the Ministry’s funding formula. In addition, it will provide a foundation for future initiatives and educational programs, and facilitate in-depth analysis and reporting within the Ministry. OnSIS replaces a number of the legacy reports previously required by schools and boards, such as October/March Reports, Postal Code Report, Course Enrolment Report, Class Size Report and SIS.
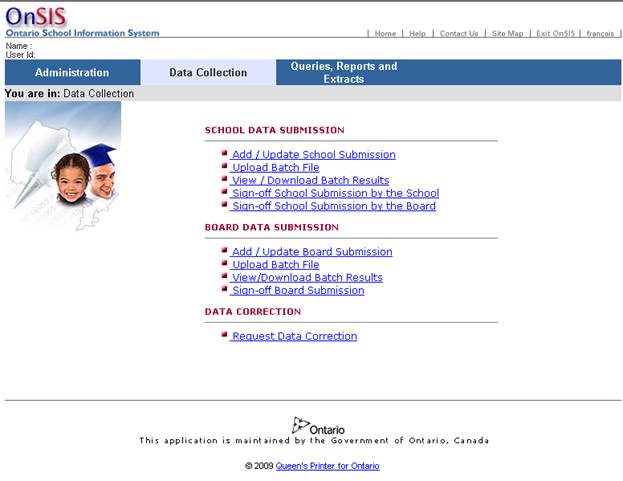
Maplewood has developed the software to generate batch files which can be submitted to OnSIS so that the student data doesn’t need to be manually entered into OnSIS. The application to create the batch files is available through the menu option Reports, OEN/OnSIS, Create OnSIS Batch Files (Elementary) or Create OnSIS Batch Files (Secondary). The batch files may be created in Maplewood either by the individual schools, or for multiple schools using Central Office. Each board must decide whether the schools or the board will create and submit files.
OnSIS collects more than student data, and therefore other software applications may be used to maintain data that is not part of the Maplewood student management system. For example, OnSIS may collect personnel information that may be maintained in a Human Resources (HR) application. Maplewood is able to provide OnSIS information regarding teachers’ homeroom/class/subject assignments, but other information must be updated in OnSIS either manually or through an OnSIS compatible HR application.
Maplewood currently supports the following OnSIS submissions:
The Ministry of Education has an OnSIS library which includes User Guides and Training Manuals. Once you log into the Ministry’s OnSIS application, this documentation is available by clicking the What’s New button. Here you will find detailed information on the Ministry’s application, and it is a good starting point for anyone unfamiliar to OnSIS.
Maplewood’s documentation will focus on the generation of the batch files through the Maplewood system, and Maplewood’s support staff should be contacted if there are any queries regarding the creation of the batch files, the contents of the batch files, any errors generated when the batch files are processed, and we can also provide direction on any errors/warning in the validation reports.
Inquiries from schools and boards regarding the Ontario School Information System, its policies and procedures should be directed to the Ministry’s OnSIS Group, whose most accurate contact information can be found through the Contact Us link in the Ministry’s OnSIS application. The current contact information is:
Ontario School Information System (OnSIS) Group
Education Statistics and Analysis Branch
Ministry of Education
777 Bay Street
4th Floor, Suite 422
Toronto ON M5G 2E5
Telephone: 1-888-275-5934 or 416-212-6366
Monday to Friday (excluding holidays)
8:30 a.m. to 4:30 p.m.
E-mail: onsis_sison@ontario.ca
Fax: 416-212-2763
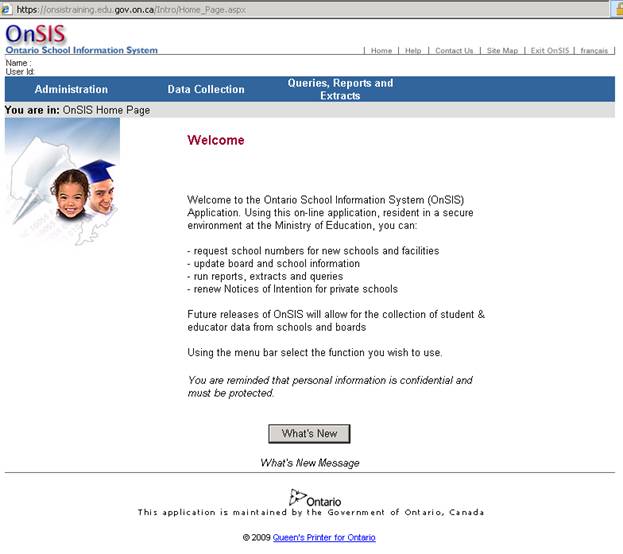
Once you have logged into the Ministry’s OnSIS application, you will see the What’s New button as shown here:
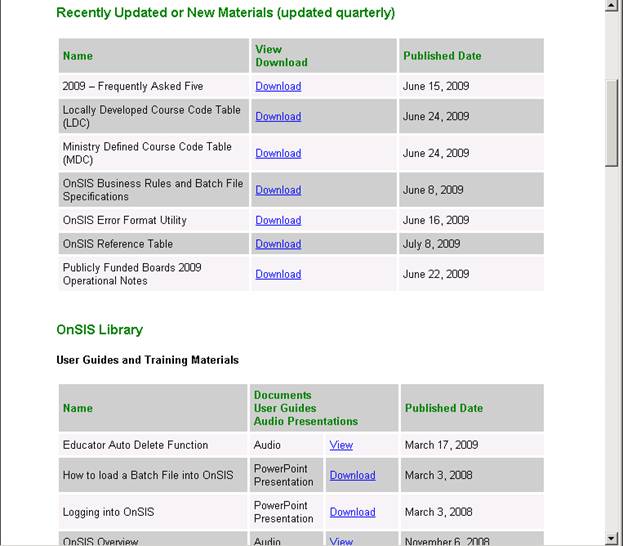
The What’s New button will take you to the Ministry’s library of OnSIS documentation, including tables and user guides and training manuals as shown here:
Once a submission period is newly opened, the OnSIS application will sometimes pre-populate the submission period with data from the previous submission period. For example, when you start a secondary school submission period in October, you will find that it already contains the students who did not leave the school in the June submission period.
As batch files are created by Maplewood, it is important for us to know whether the data is pre-populated. It the data already exists, we send an UPDATE action, and if it doesn’t, we send an ADD action. It you send the wrong action, OnSIS will return an error.
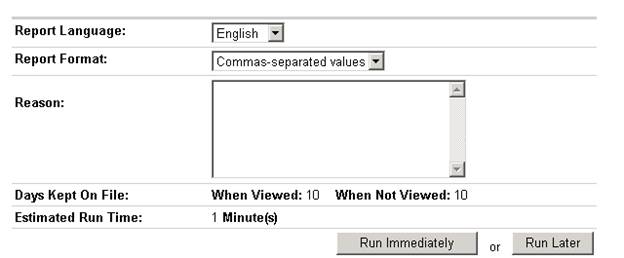
The only way to know whether the data already exists is through the use of extracts. The extracts are comma delimited files (CSV files) that the Ministry’s OnSIS application generates following a specific layout that we then use to determine whether we are adding or updating the data.
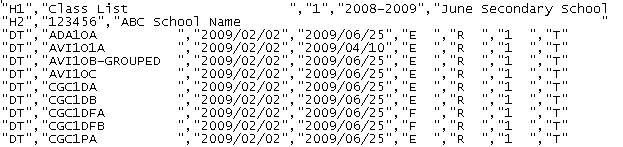
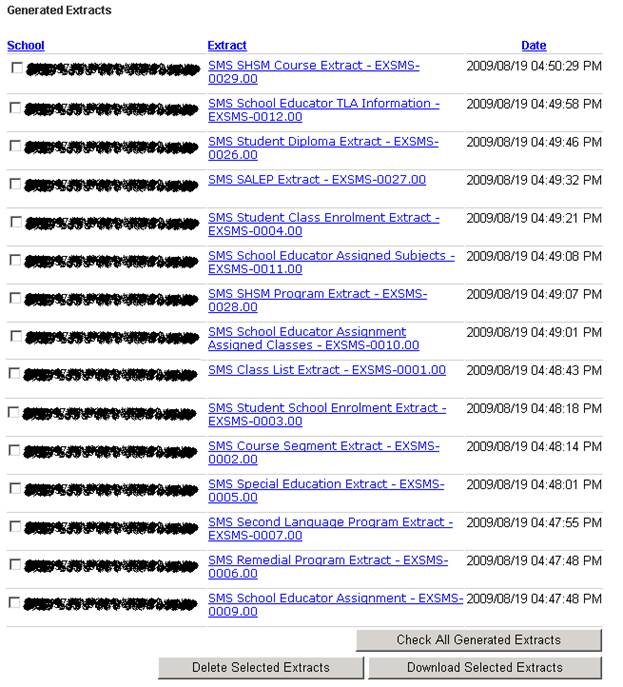
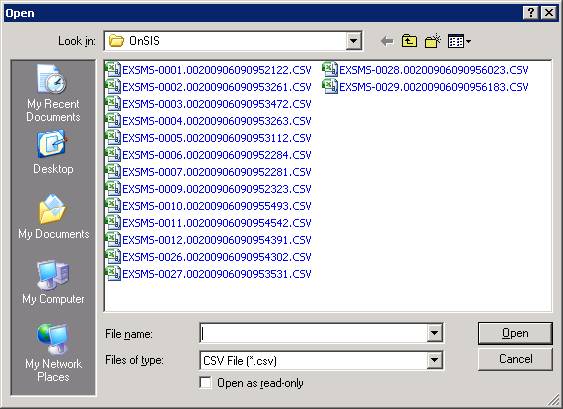
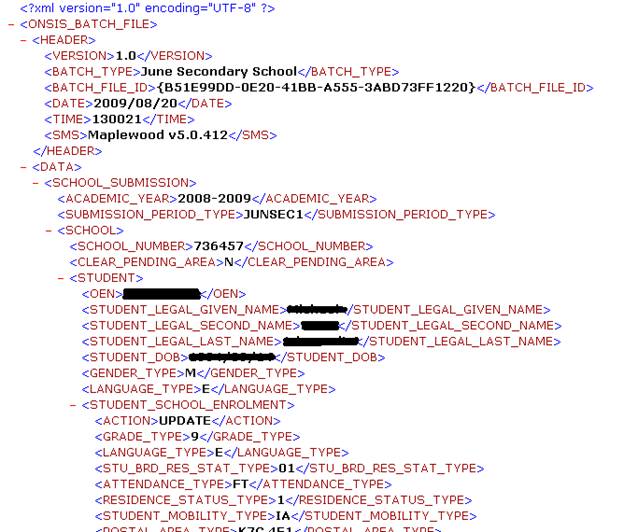
When extracts are generated by the Ministry’s application, by default they are given a name such as EXSMS-0001.00200906090952122.CSV. The first part of the extract contains the number we use to identify this extract (e.g. we would refer to this extract as extract 0001). An extract will look something like this, where the H1 and H2 header record provide information about the submission, and school identification, followed by D2 detail records detailing the data in OnSIS at the time the extract was created. The detail records change depending on the type of extract, and multiple schools can exist in an extract (handy for boards submitting data through Maplewood’s Central Office). This is a sample class list extract:
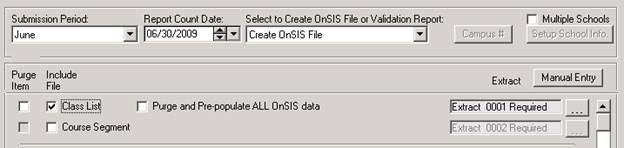
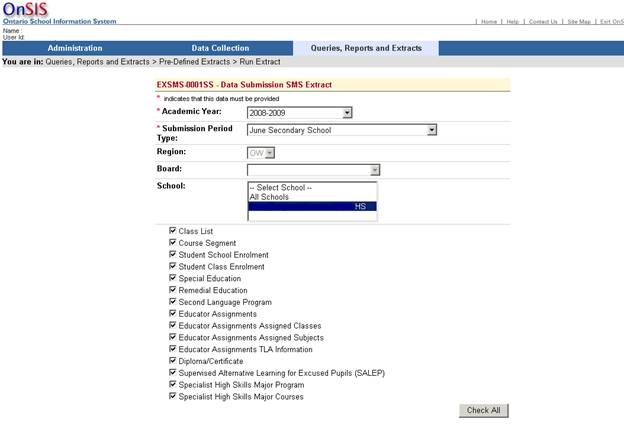
In Maplewood’s application, we will guide you as to when an extract is required as shown here where it is suggesting that Extract 0001 is Required:
If the submission period requires extracts, it is important to follow these steps once the submission period is opened by OnSIS:


- In Explorer, find the file just saved and then unzip it (generally by double-clicking it).
Maplewood has developed the software to generate batch files which can be submitted to OnSIS so that the student data doesn’t need to be manually entered into OnSIS. The application to create the batch files is available through the menu option Reports, OEN/OnSIS, Create OnSIS Batch Files (Elementary) or Create OnSIS Batch Files (Secondary). The batch files may be created in Maplewood either by the individual schools, or for multiple schools using Central Office. Each board must decide whether the schools or the board will create and submit files.
Each school type has a different set of requirements for OnSIS reporting. The Ministry’s OnSIS site has determined your school type, and is setup to expect only batch files that match the submission periods available to your school. When the June submission period is opened by the Ministry, a batch file will be rejected if the submission period is not June. The Ministry’s documentation includes the reference tables. The SUBMISSION_PERIOD_TYPE table will provide the list of codes Maplewood uses in the batch file.
Private Schools (as defined in File, School Setup, School Information, Configuration Tab), will have additional, self-explanatory, options on their screen that must be properly set to ensure the correct submission period code is used in the batch file. See Private School Options for further information.
When you go into the Maplewood option to Create OnSIS Batch Files (Elementary or Secondary), you must then select the Submission Period. The possible Submission Periods are as follows:
* not applicable to private schools
Once the submission period is selected for the school, the list of batch files which may be created will appear. If a batch file option is disabled, it is not required for the submission period.
When the scroll bar appears on the left, you should scroll down to see if any subsequent batch files are required, or, you can maximize the form by clicking the Maximize button (middle button in top right corner). Here is the secondary June submission screen maximized:
The check box for Multiple Schools is only applicable to schools with multiple schools using one set of data in Maplewood.
When the batch files are created through Central Office, there are 2 additional interface changes:
The batch file names are based on Ministry terminology.
We strongly suggest that the batch files are submitted to OnSIS in the order they appear on the screen. When batch files are submitted to OnSIS, unnecessary errors are prevented if the files are submitted in the order they appear on the Maplewood screen. For example, if the class list contains the homerooms (for elementary schools), the list of homerooms must exist in OnSIS before the student school enrolment file (that contains the students and their homerooms) can be successfully processed. Or in secondary schools, the class list and course segment files contain information about the classes offered at the school. These files must be successfully processed before you can submit the Student Class Enrolment file (that contains the students’ timetables).
Prior to submitting any Educator related batch files, be sure to either manually update the Educator Employment Information directly in OnSIS, or use a Human Resources software package to generate batch files for this information. If educator information related to position type changes, be sure to request a new Educator Assignments Extract (EXSMS-0009). Maplewood’s educator batch files must include the position type to identify the educator in our files, and if it doesn’t match the data in OnSIS, an error is returned.
Private Schools, using Create OnSIS Batch Files (Elementary), will see this additional option:
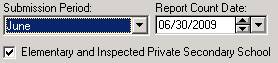
The “Elementary and Inspected Private Secondary School check box must be selected for a private school’s elementary submission if the private school is a combined elementary and secondary school, and the secondary school is inspected. There are unique requirements for this type of school setup, which will be accurately reflected on the Maplewood screen if this box is checked. If the private school does not have secondary students, do not check this box.
Private Schools, using Create OnSIS Batch Files (Secondary), will see these additional options:

The “Inspected Private Secondary School check box must be selected if the private secondary school is an Ontario Ministry of Education inspected school. If the school also contains elementary students, the “School also Includes Elementary Students box must be selected.
Each batch file option has a check box for Purge Item. This box is to be checked if you want the batch file to include a flag that purges and pre-populates the data prior to processing the remaining contents of the batch file. ‘Purge and Pre-populate’ simply means ‘return the data in OnSIS to the way it was when the submission was first opened’. It does not return ALL the data to its original form, but just the data in the section you are working with.
The purge item box is generally selected if you are re-submitting a batch file so that the contents of the previously submitted batch file are cleared, and the data is reset for another attempt.
When the Purge Item box is checked, you may notice the purge box automatically checked for other file options as well. Depending upon the file type, other data may be impacted and automatically purged. Additional warnings will appear when these purge options are selected to clearly identify what data would be impacted.
In order to better understand the purge process, it is important to understand the relationship in the way the data is stored in the Ministry’s OnSIS application. Sometimes you will find references to Parent entries vs Child entries. Each student in OnSIS typically has a parent entry and multiple child entries. Unfortunately, the parent/child terminology is a computing terminology and is not related to the student’s family (OnSIS does not collect parental information). The Parent refers to the student, and the Child refers to different portions of data collected for the student (e.g. class enrolment, special education, second language data, etc are all “child records).
If you select a purge flag that affects a parent entry, it will automatically affect the child entries as well. If a student starts your school during a submission period, the batch file will “add the student into OnSIS. If the student is enrolled in a second language program, a subsequent batch file will add the second language program information into OnSIS. If you purge the student, the second language data will automatically be removed as well.
For elementary and secondary submissions, there is a check box to Purge and Pre-populate ALL OnSIS data which may be checked when creating the Class List batch file. If this box is selected, the entire submission period is purged and pre-populated, enabling you to restart the entire submission period over again. Please note that this will remove any changes made in OnSIS, including educator data that may have been updated manually or submitted by another application (e.g. a HR system).
If one school’s Maplewood database actually contains multiple schools from a Ministry reporting perspective, the check box called Multiple Schools will assist with OnSIS reporting.
Most traditional schools will leave the Multiple Schools box unchecked. Schools with multiple schools in the same database may use this feature by following these steps:
In the students' records, use one of the 4 defined characters to distinguish students between the different schools. For example, if a French and English school are combined, let's say you set the 3rd defined character to F for the French students and E for the English students (on the biographics tab in the student's record).
In the Maplewood Create OnSIS Batch Files screen, check off the new box called Multiple Schools.
Select the button called Setup School Information. Use the Add button to add a school name (e.g. Ecole ABC), the mident# of that school (eg. Mident of the French school), the defined character # used to identify these students (e.g. defined character #3), and the value used for these students (e.g. F). Use the Add button again to add the other school (e.g. the English school) specifying the defined character value for these students (e.g. E). Click Done when all the different schools in the Maplewood database are identified.
When creating any of the OnSIS student files, the list of schools will be presented. Select the school whose batch files are being created (e.g. select Ecole ABC). The mident number setup for that school will be in the batch file, and only the students with the specified defined character value will be considered for inclusion in the batch file.
Please refer to the Ministry’s documentation for the most accurate instructions on their OnSIS application. These instructions are guidelines only.
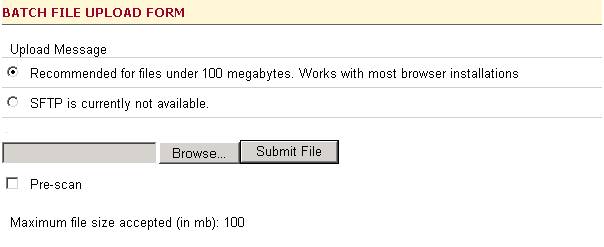
Typically, the Pre-scan option is not selected. If you want to see the errors that may be generated by the batch file, without actually having the contents of the batch file applied to your submission (e.g. it won’t actually update your data), then select this option.
Note the maximum file size. Boards creating batch files with multiple schools may need to zip the file prior to submitting it.
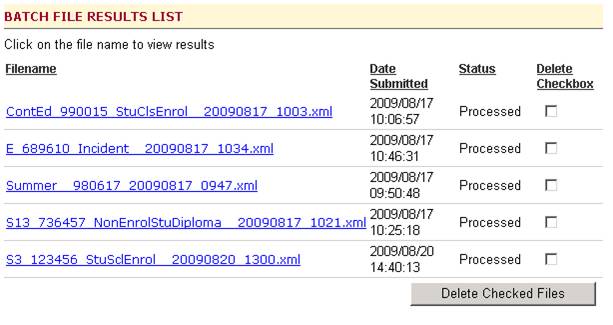
Maplewood suggests using the “Download Results button for batch files with many errors. This button gives you the option to view the contents of the batch file along with the error messages, and the file may be saved and used in Maplewood’s option to Process Result Files to generate a more concise report of the errors (less paper and separates the errors by school for batch files containing multiple schools).
Upon selecting Download Results, a prompt will appear to open or save the report. If the file name does not end with OUT, cancel and make sure you have selected Download Results, not Error Details.
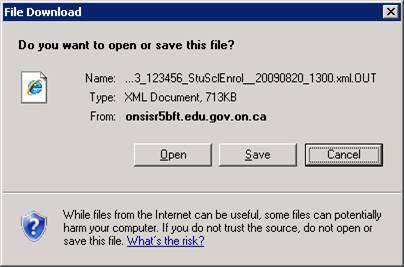
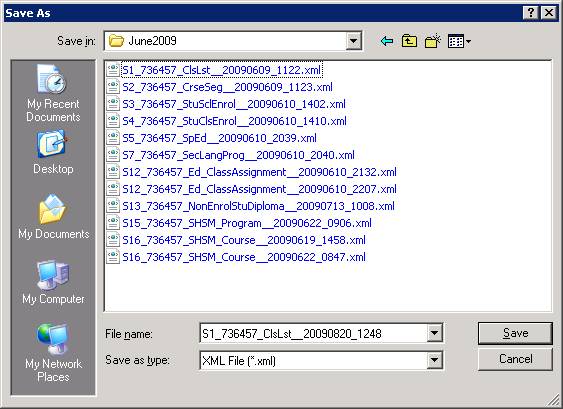
Click the Save button and save the file (we suggest in the data folder IMPORT\OnSIS) and then use Maplewood’s option called Process Result Files to generate a report of the errors.
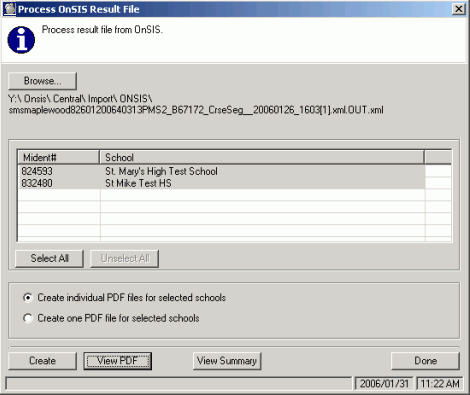
Rather than viewing the errors through the OnSIS application, the batch file results may be saved in an xml file (file name is defaulted ending with .xml.OUT) and then processed by Maplewood and formatted in such a manner that they are less paper intensive and for Central Office users, they can be distributed to the individual schools for correction.
In Maplewood,
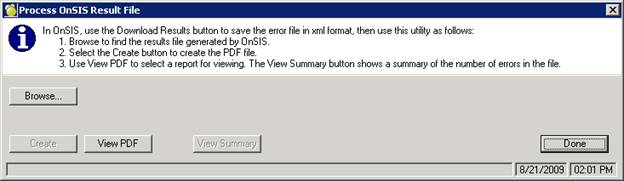
- -Create individual PDF files for selected schools
- -Create one PDF file for selected schools
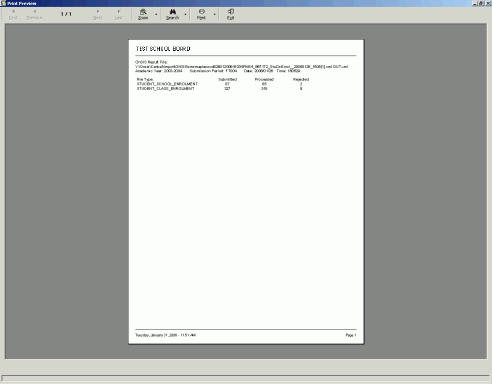
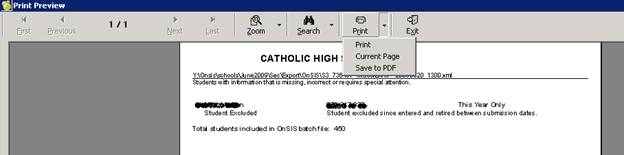
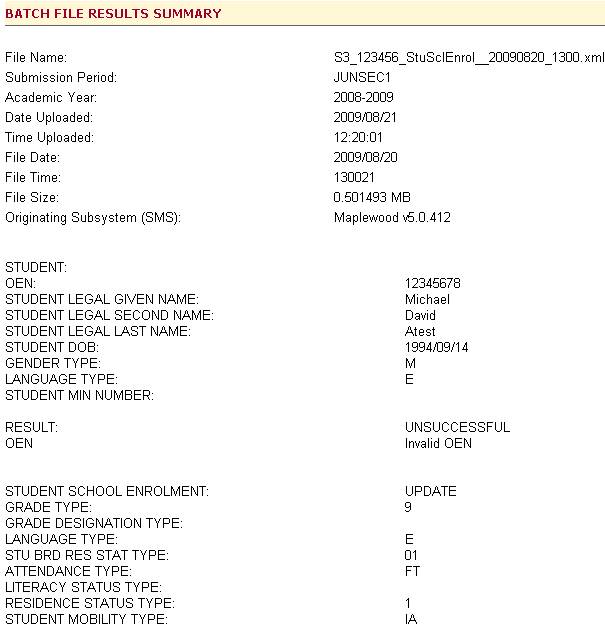
The error report will appear similar to these examples:
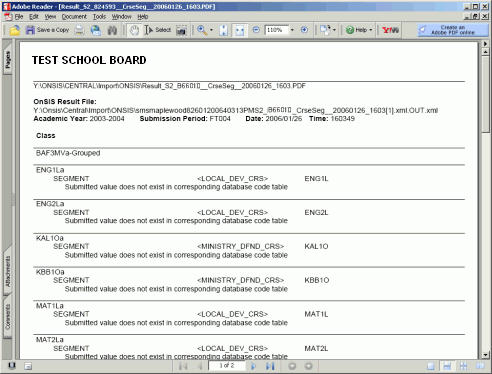
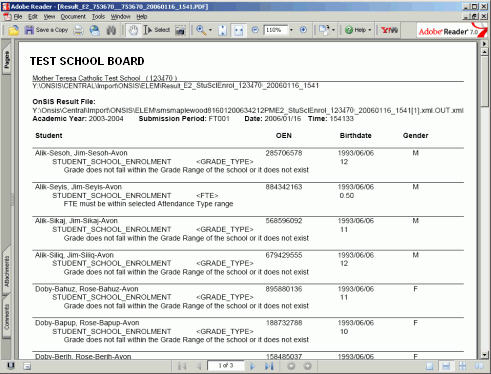
Please note that the error messages are provided by OnSIS, and the PDF files generated in Maplewood are simply formatting the errors returned from OnSIS.
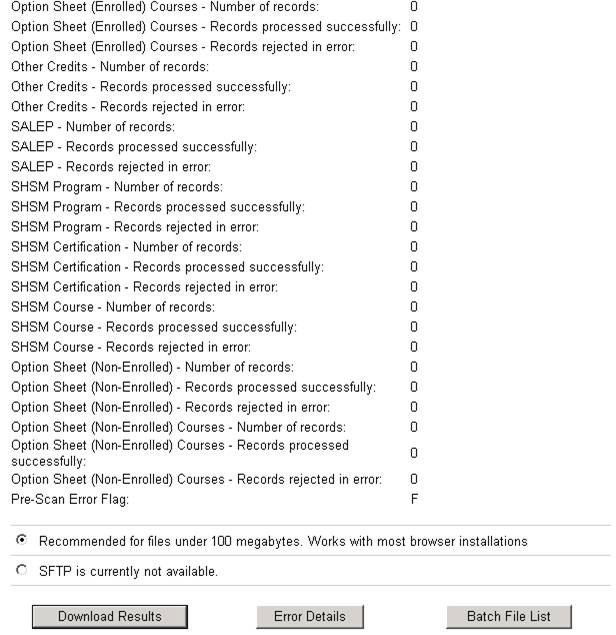
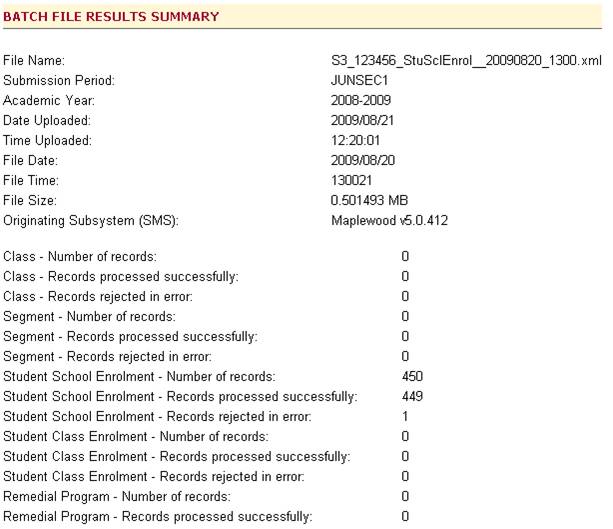
Optionally, you may click the View Summary button on the Maplewood Process Result Files interface. It will provide a summary of the number of records in the file, and the number of errors as shown below: